

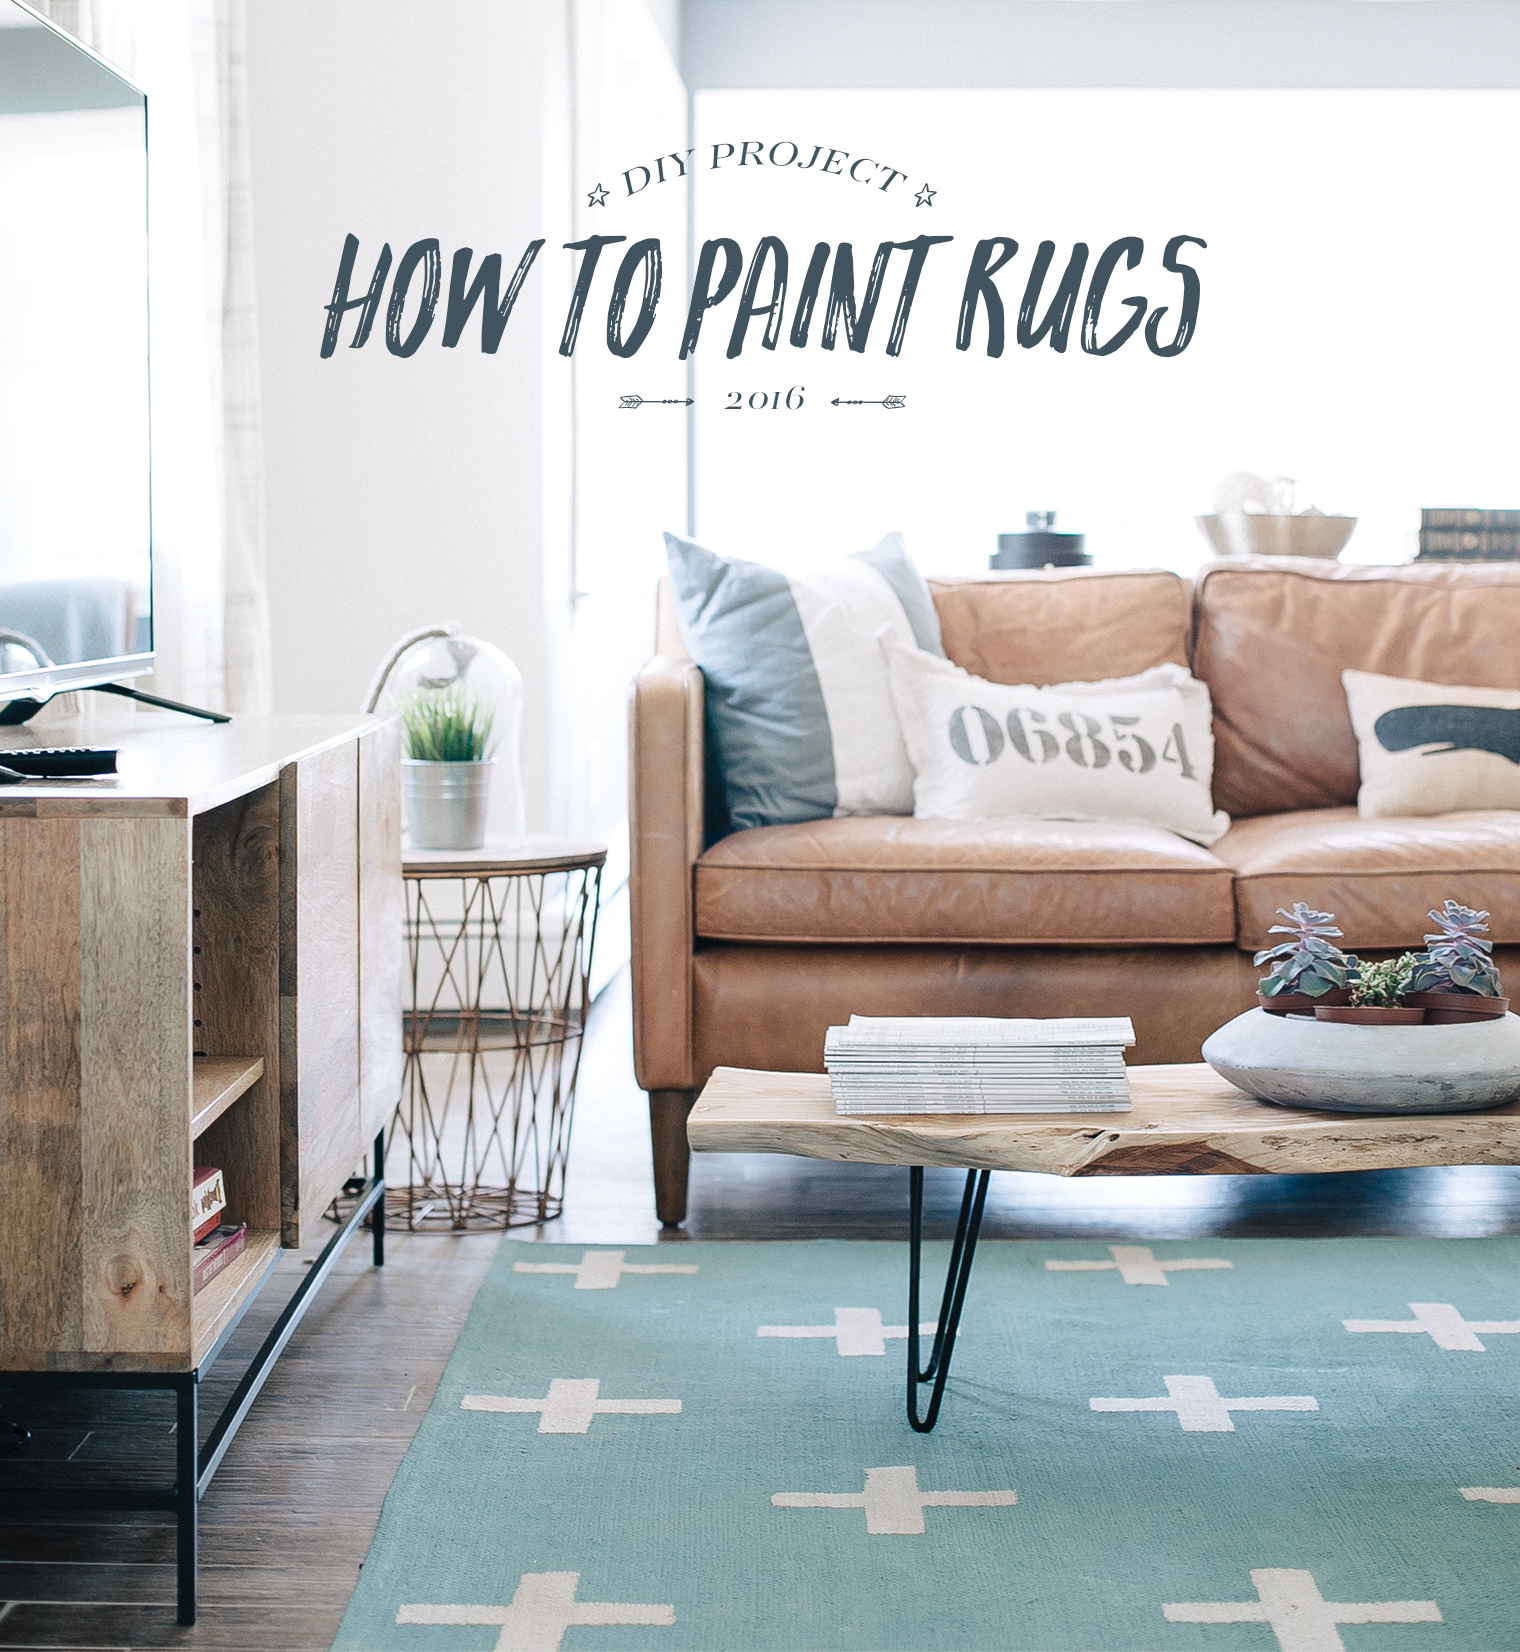
 A few weeks ago I shared the how-to for this American Flag Bench project, and today I’m back with my latest design DIY I’ve made in collaboration with True Value! This time I’m shining my colorful spotlight on rugs, leading you through the all the steps you need to follow in order to transform an everyday plain flatweave rug into a stylish statement piece for any room. Seriously, the transformation of these rugs is kinda incredible: you end up with a bespoke patterned rug for just a fraction of the price you’d need to pay for one from a store! The best part is that you get to completely customize the final look of your rug to match both the color and pattern needs of the room. Click through after the jump to see four different ways you can upgrade your rugs by painting them!
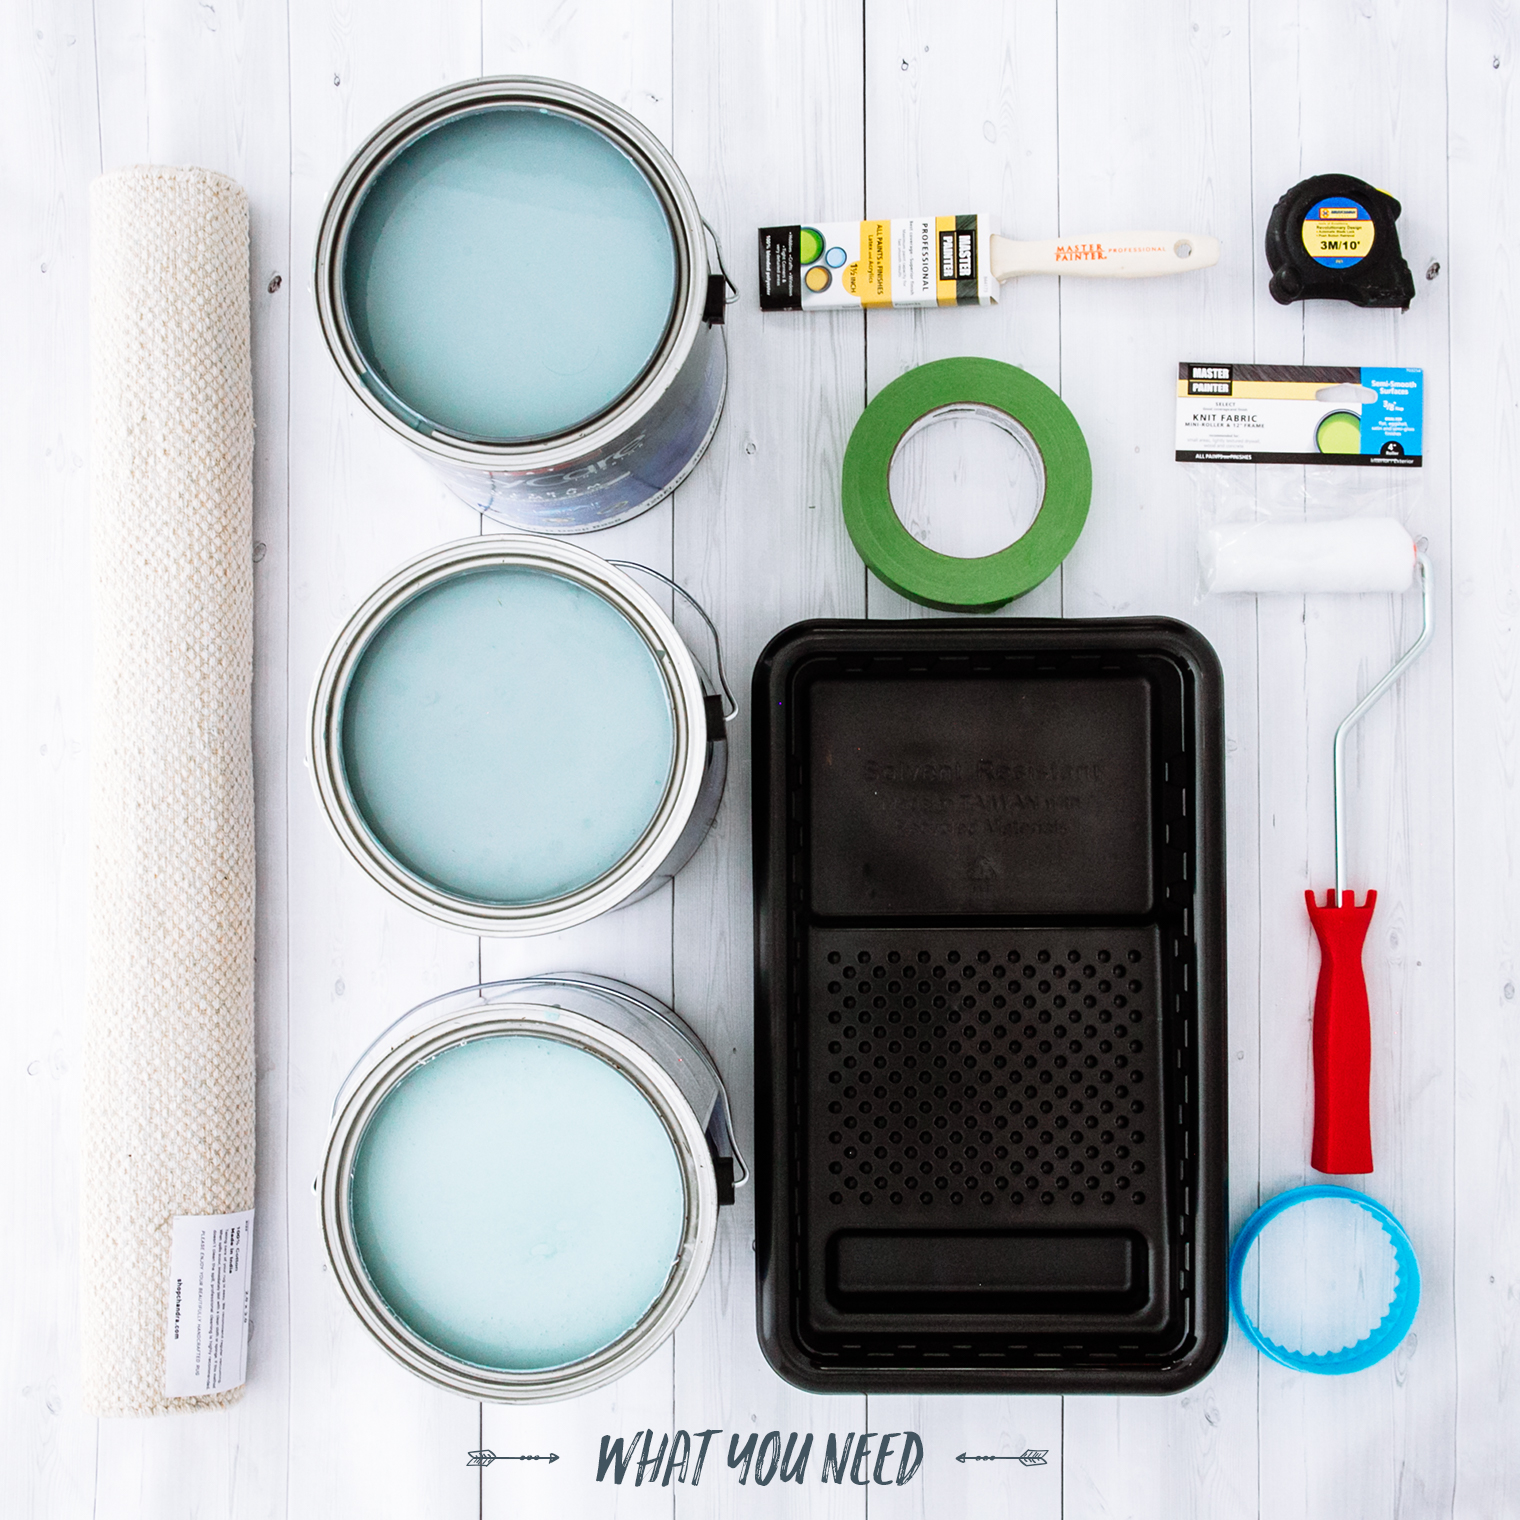 WHAT YOU NEED
– Latex EasyCare paint
– Painters’ tape
– Paint roller
– Paint tray
– Circular cookie cutter
– Tape measure
– Paint brush
– Rug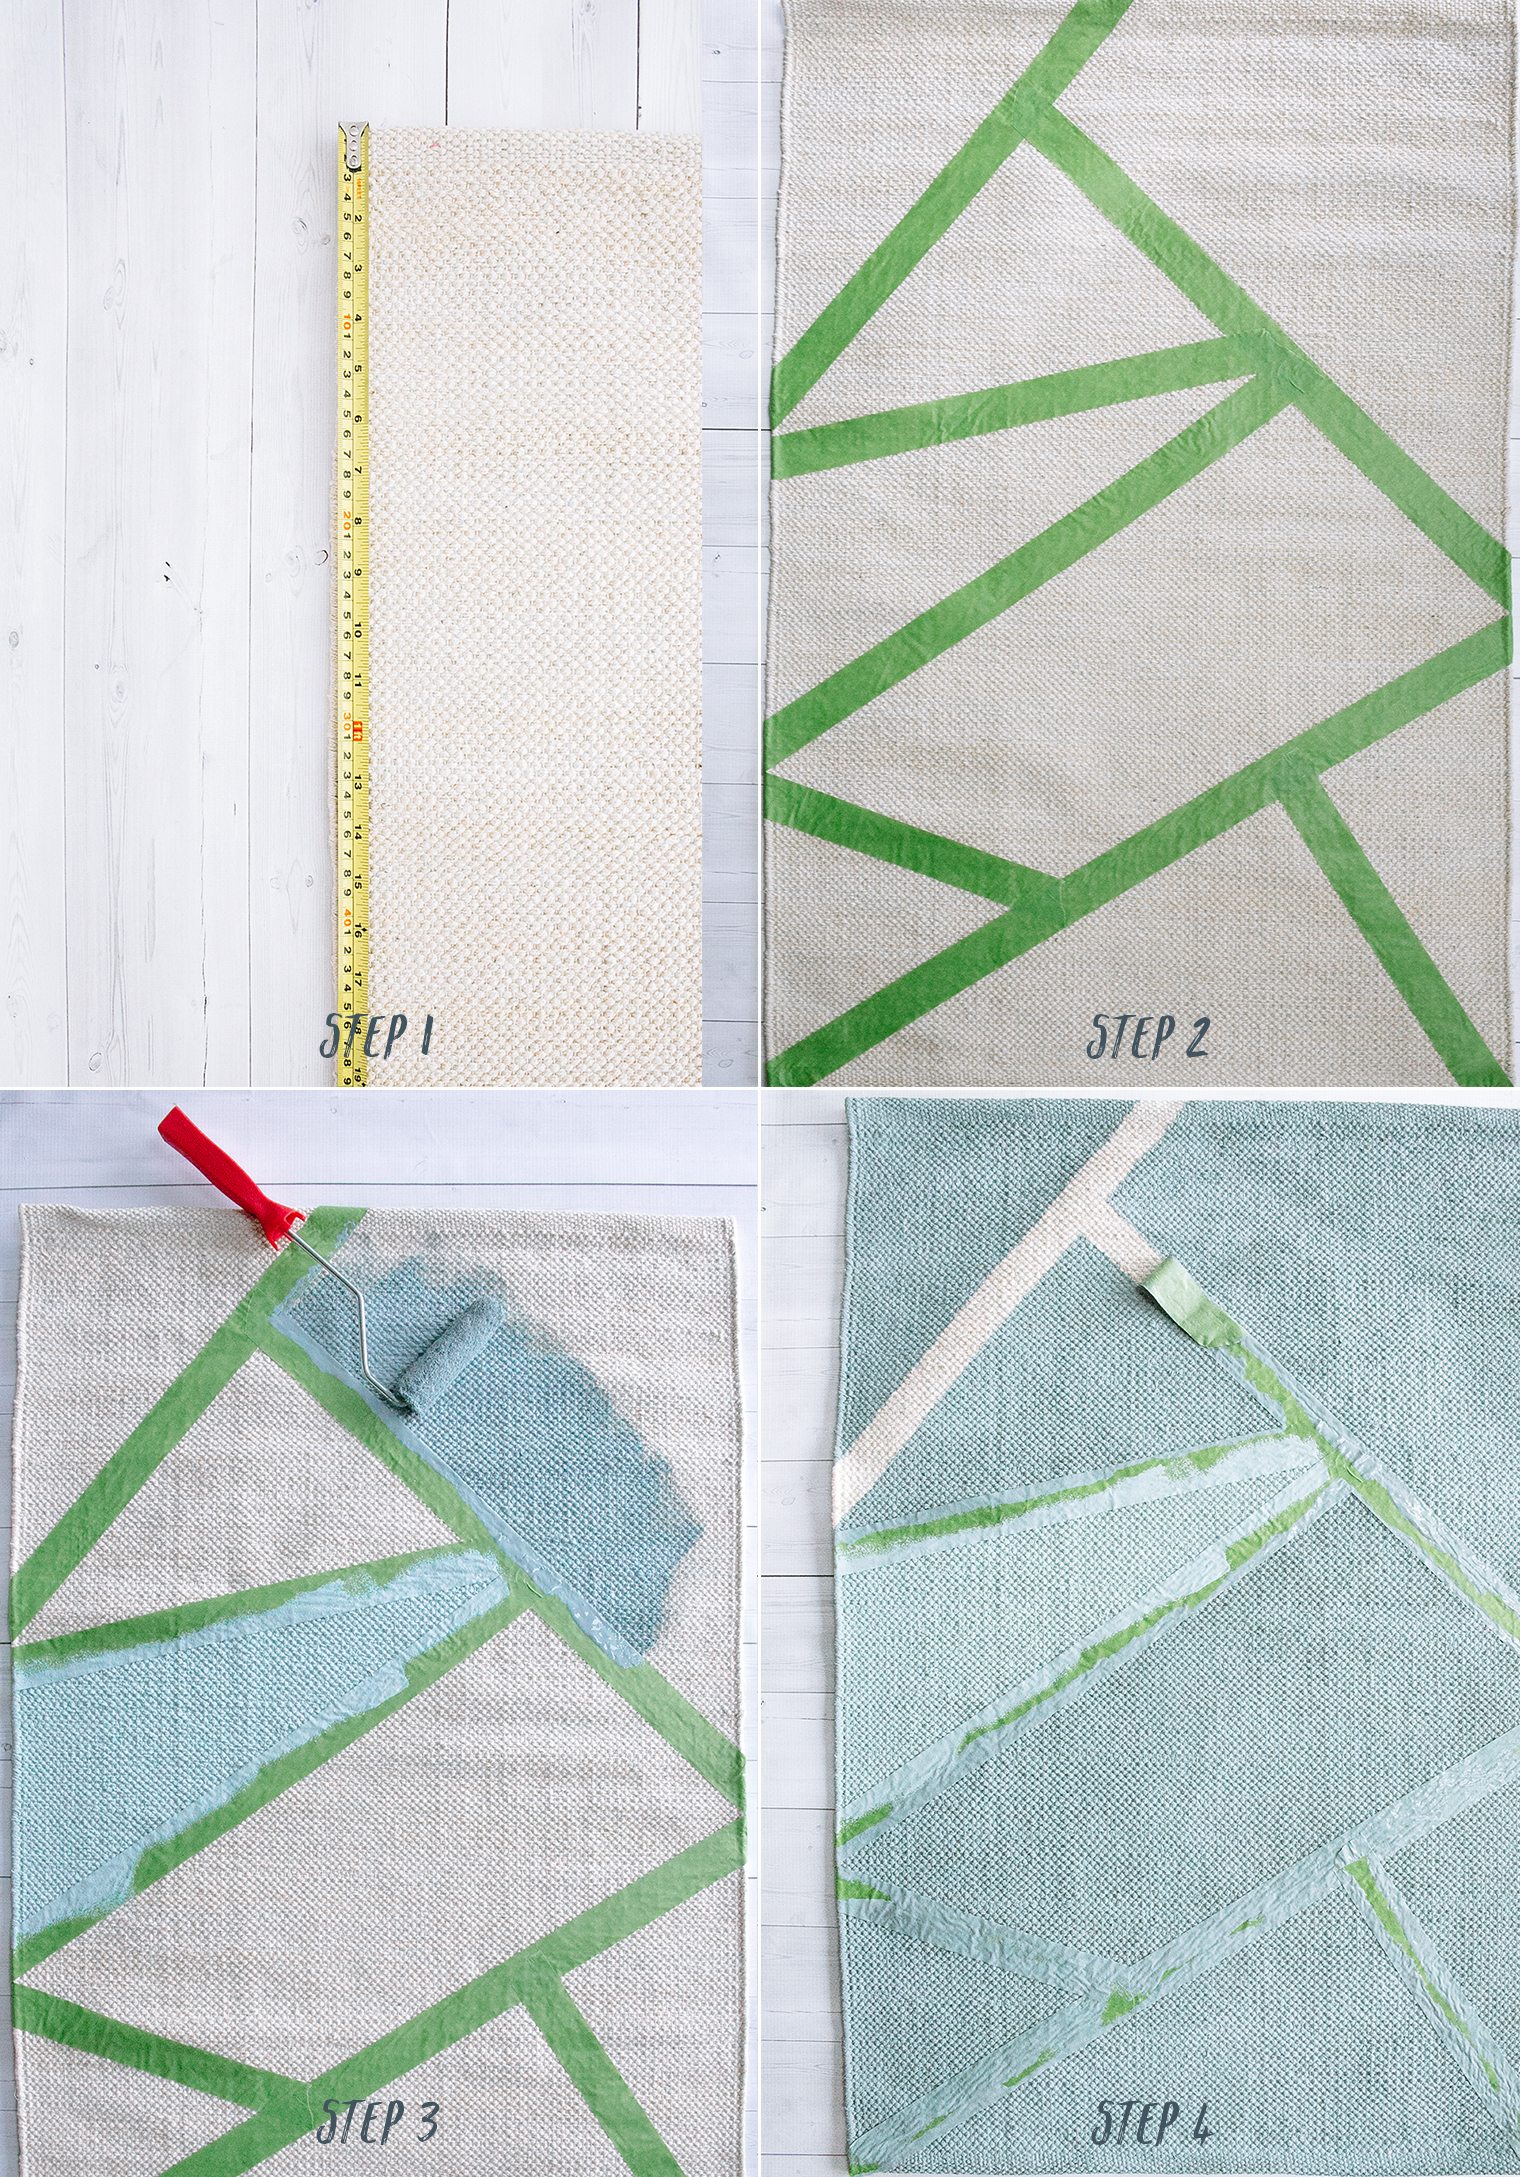 STEP-BY-STEP
Step one: Measure out your pattern to fit the scale of the rug you wish to paint: For a random geometric shape, you can follow the pictures above for inspiration; For the split line design, I used to the width of the painters’ tape to determine the depth of each stripe; For the circular repeat pattern I used the tape measure to equally space the circles before painting; For the crosses repeat pattern design (seen on the large rug) use the tape measure to mark out equally spaced crosses in a 3-by-2-by-3-by-2 (and so on) formation.
Step two: Use painters tape to either mark out the areas you don’t wish to paint on the rugs.
Step three: Get painting! Use a roller for all of the designs apart from the circles, where it works better to use a brush. When using the brush vs. the roller, be sure to dab the paint as this gives a better and cleaner finish. Also, don’t overload the roller as you don’t want to end up with clumps of paint, or encourage any bleeding under the tape.
Step four: As soon as you have finished painting, pull back the painters’ tape before the paint is dry so that you minimize the risk of peeling the paint.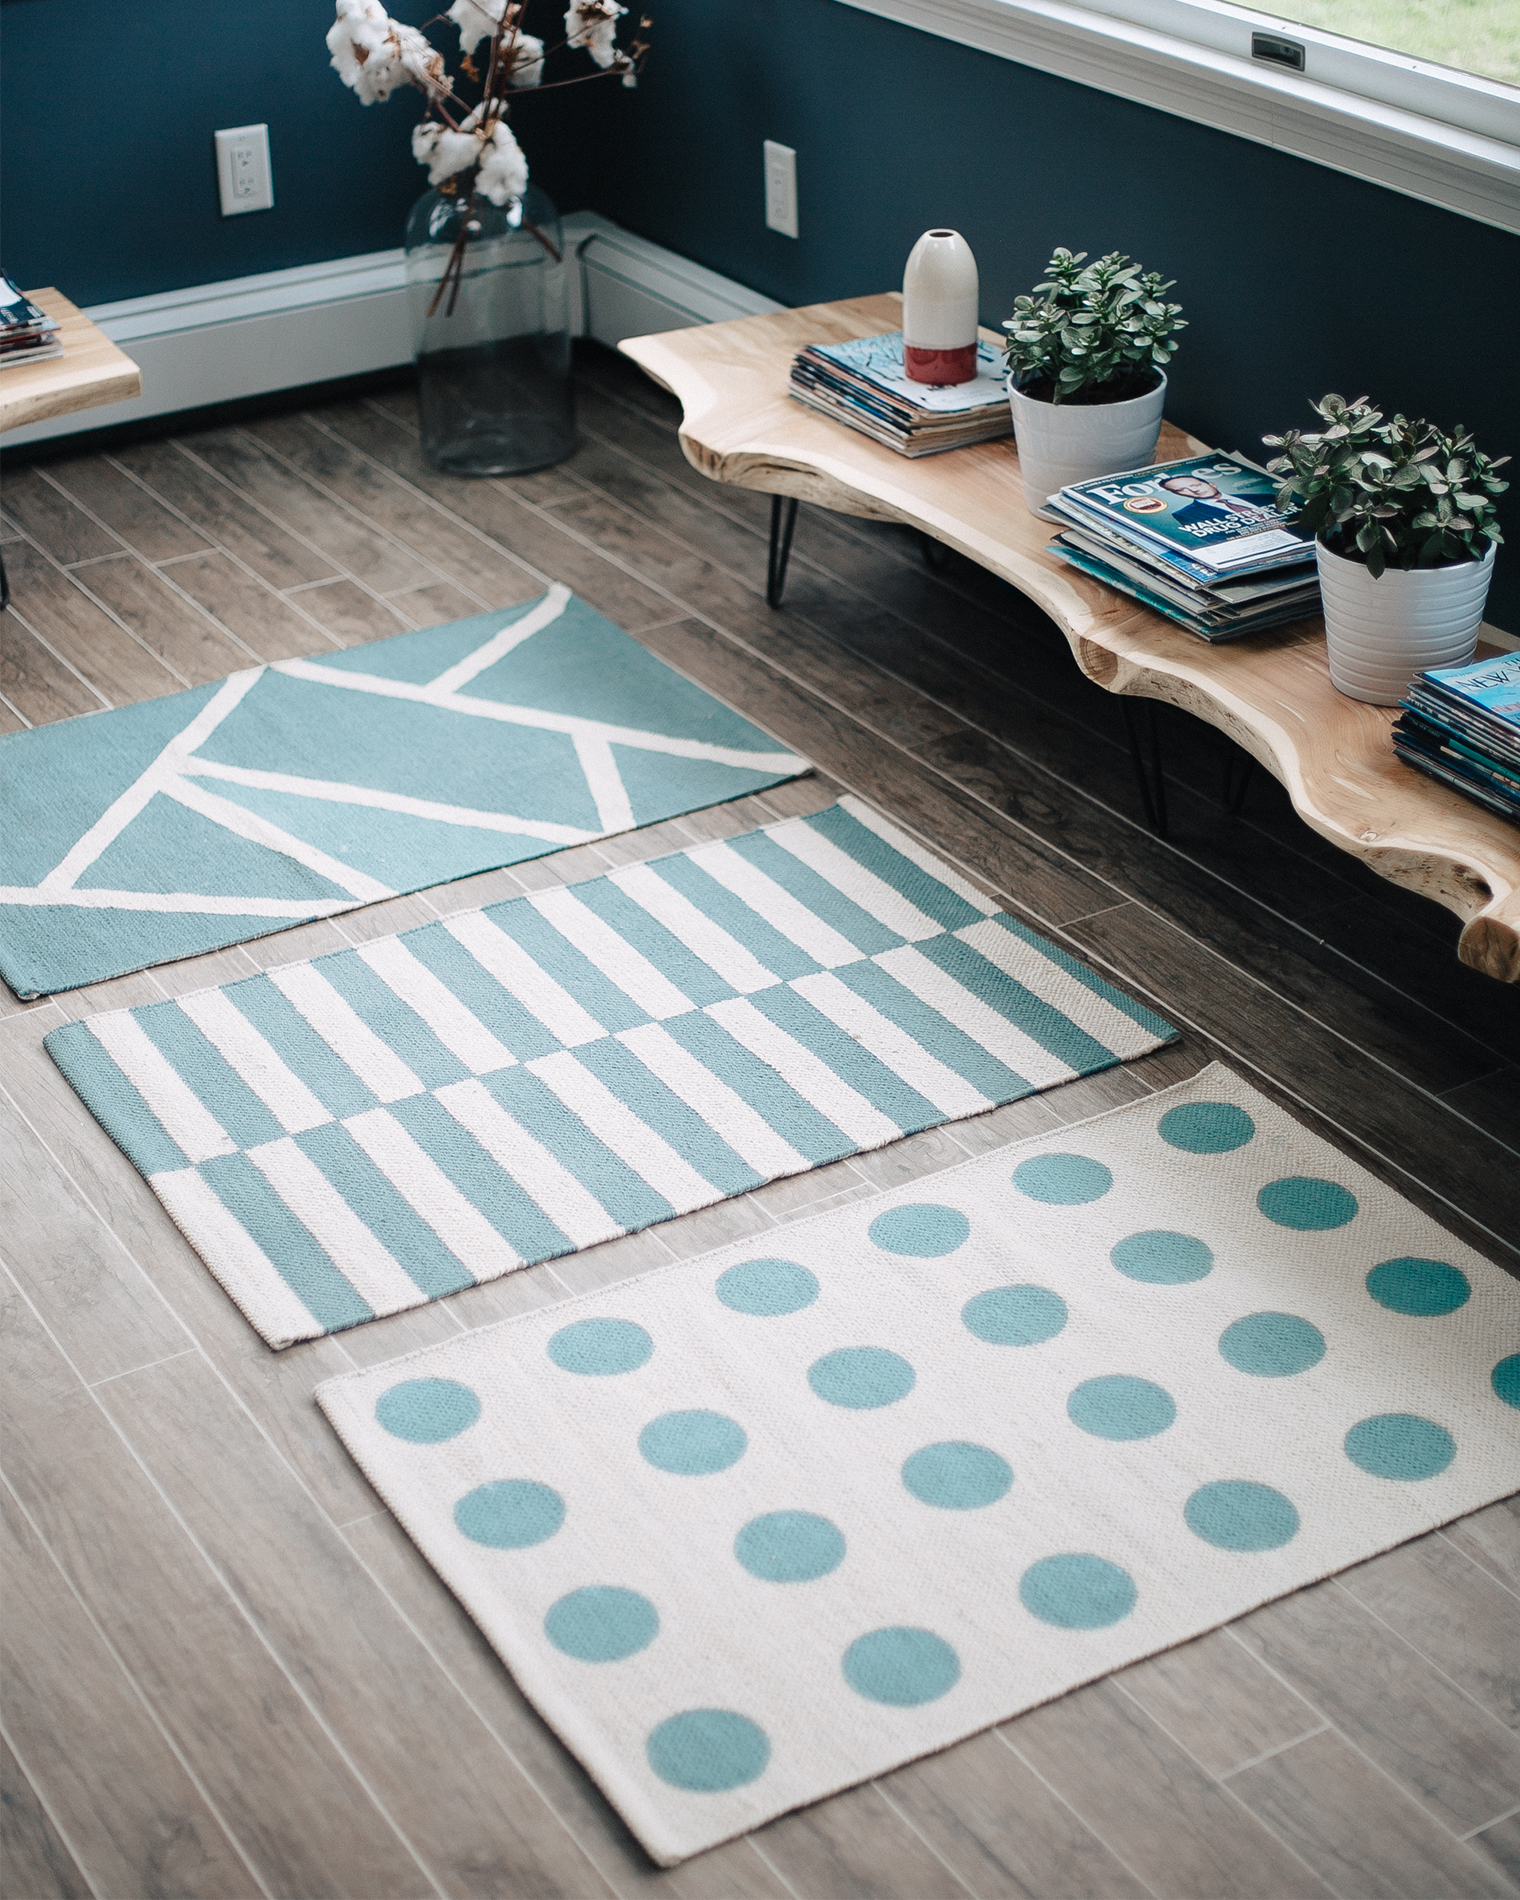 In four quick and easy steps you end up with completely new-look rugs – don’t they look fantastic? I love how they came out! They work great as a trio or as standalone designs – either way, they are the perfect addition of color and pattern for a room.
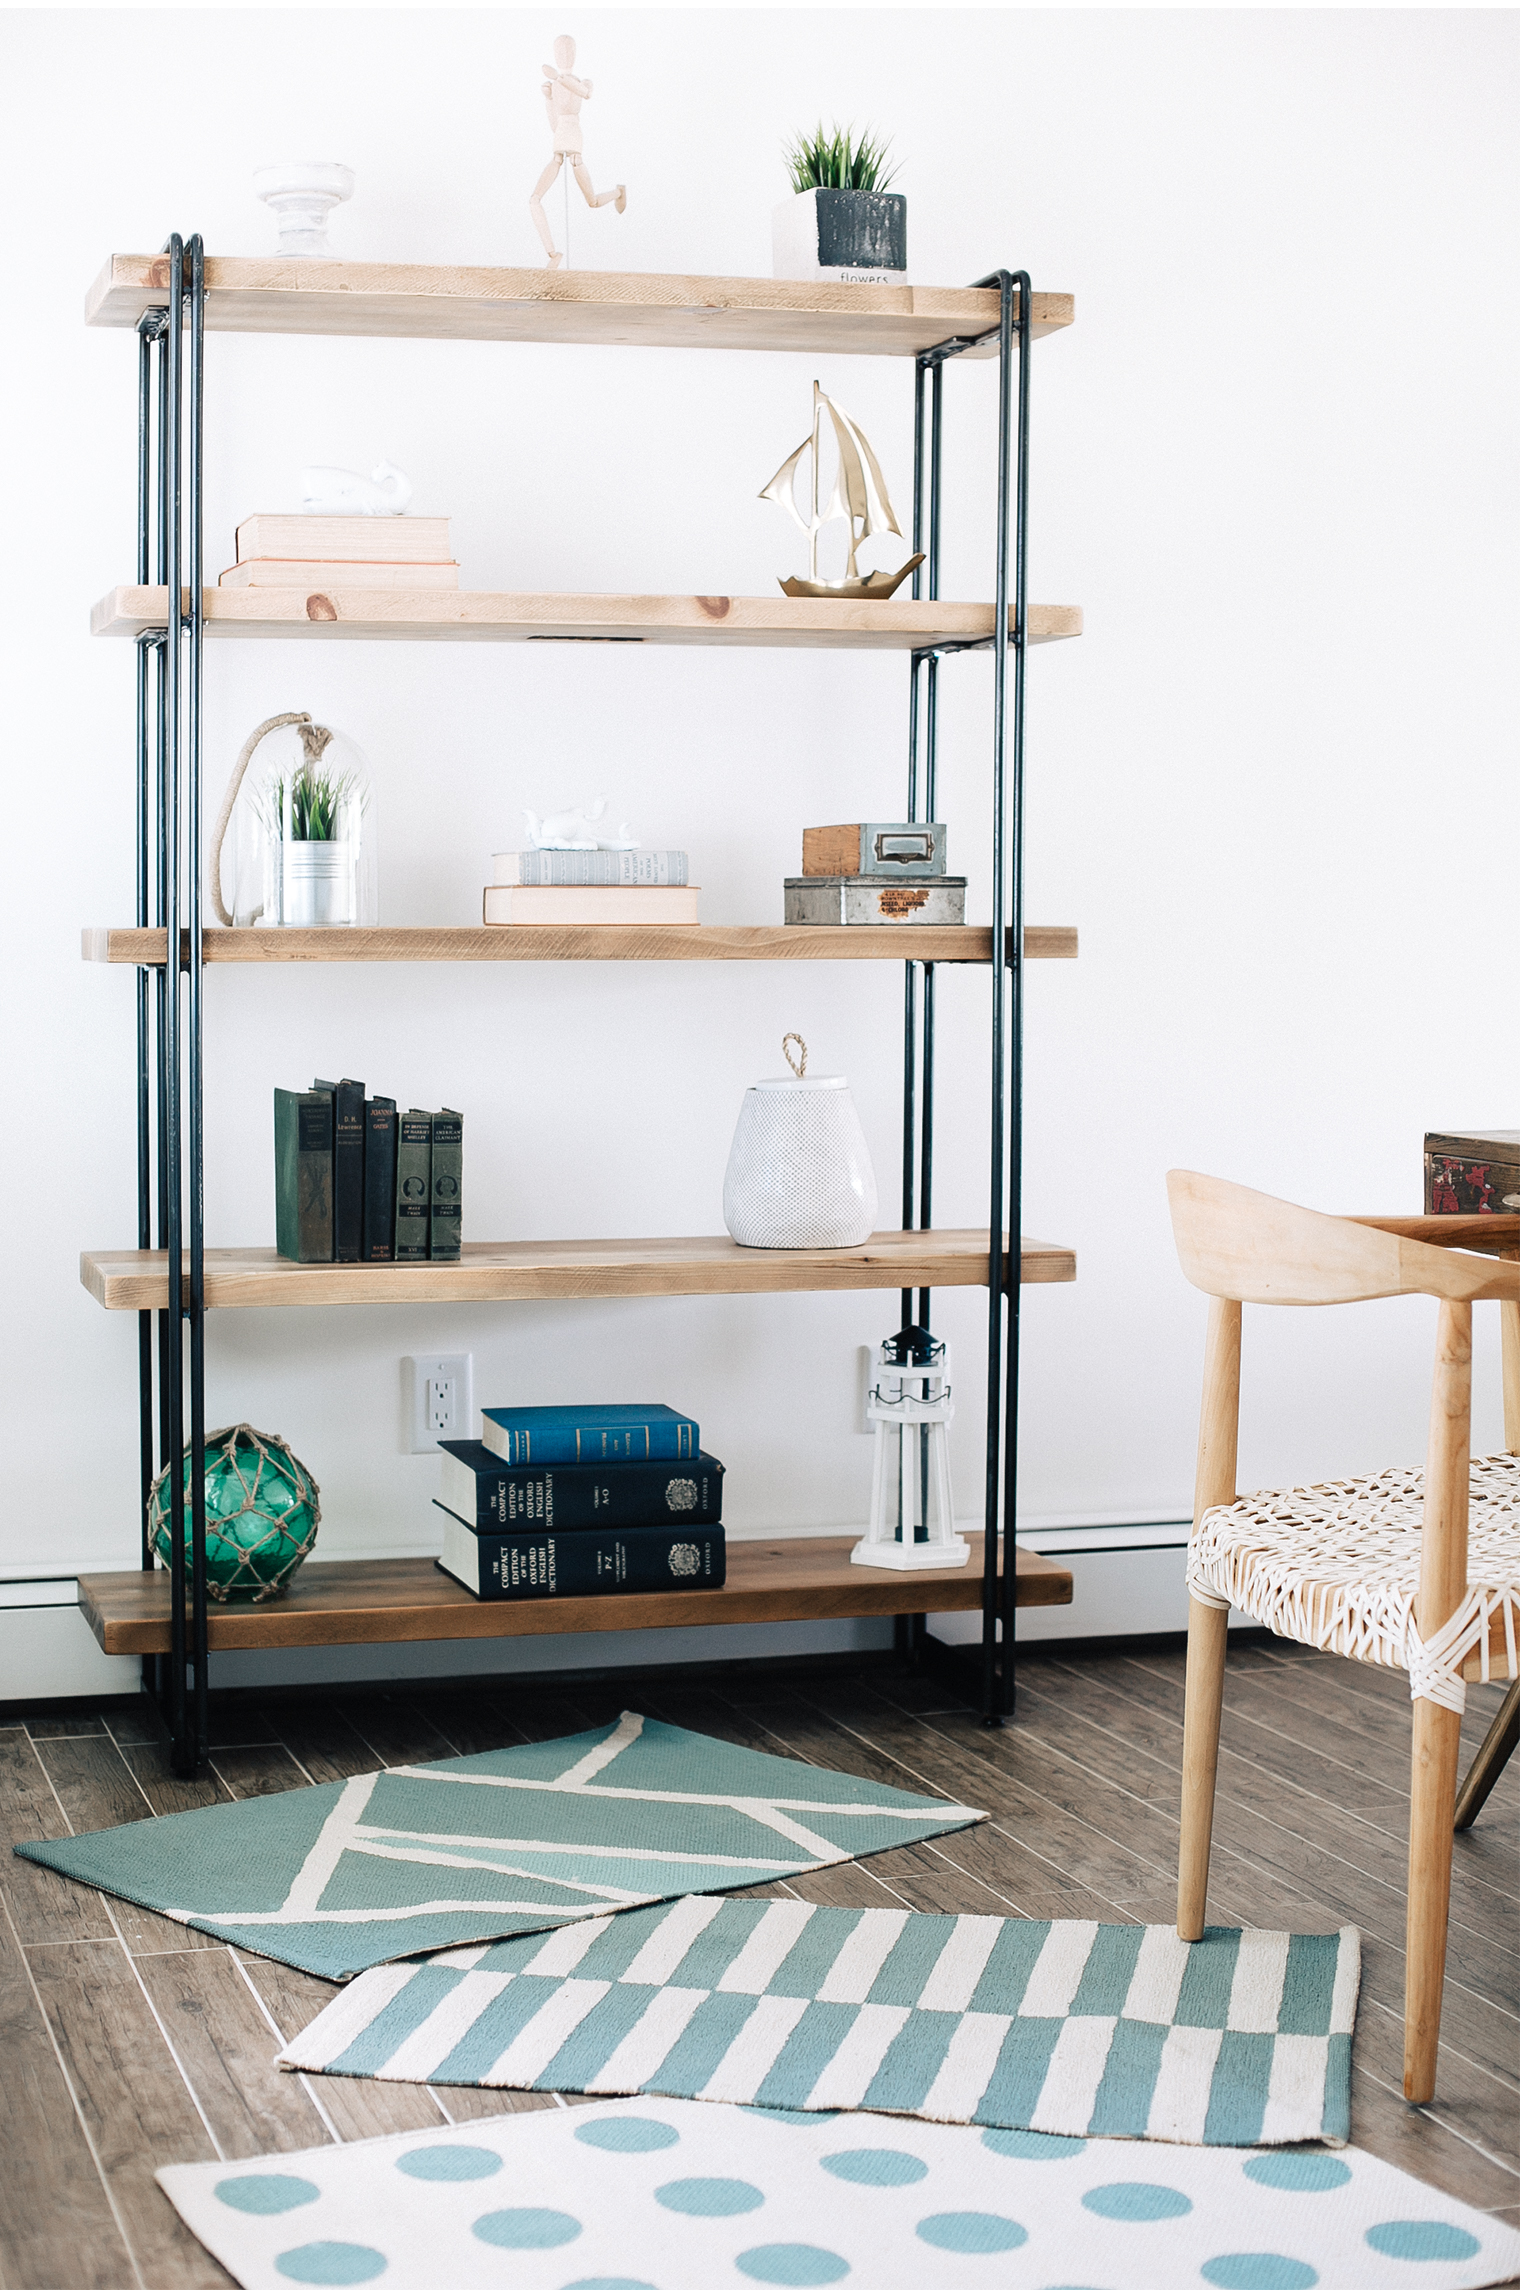 For a casual vibe, try overlaying a series of painted rugs (as seen above). My top tip is that is if you are painting a number of rugs in different patterns, opt for coordinating colors or shades from the same color family in order to achieve a stylish and cohesive final look.
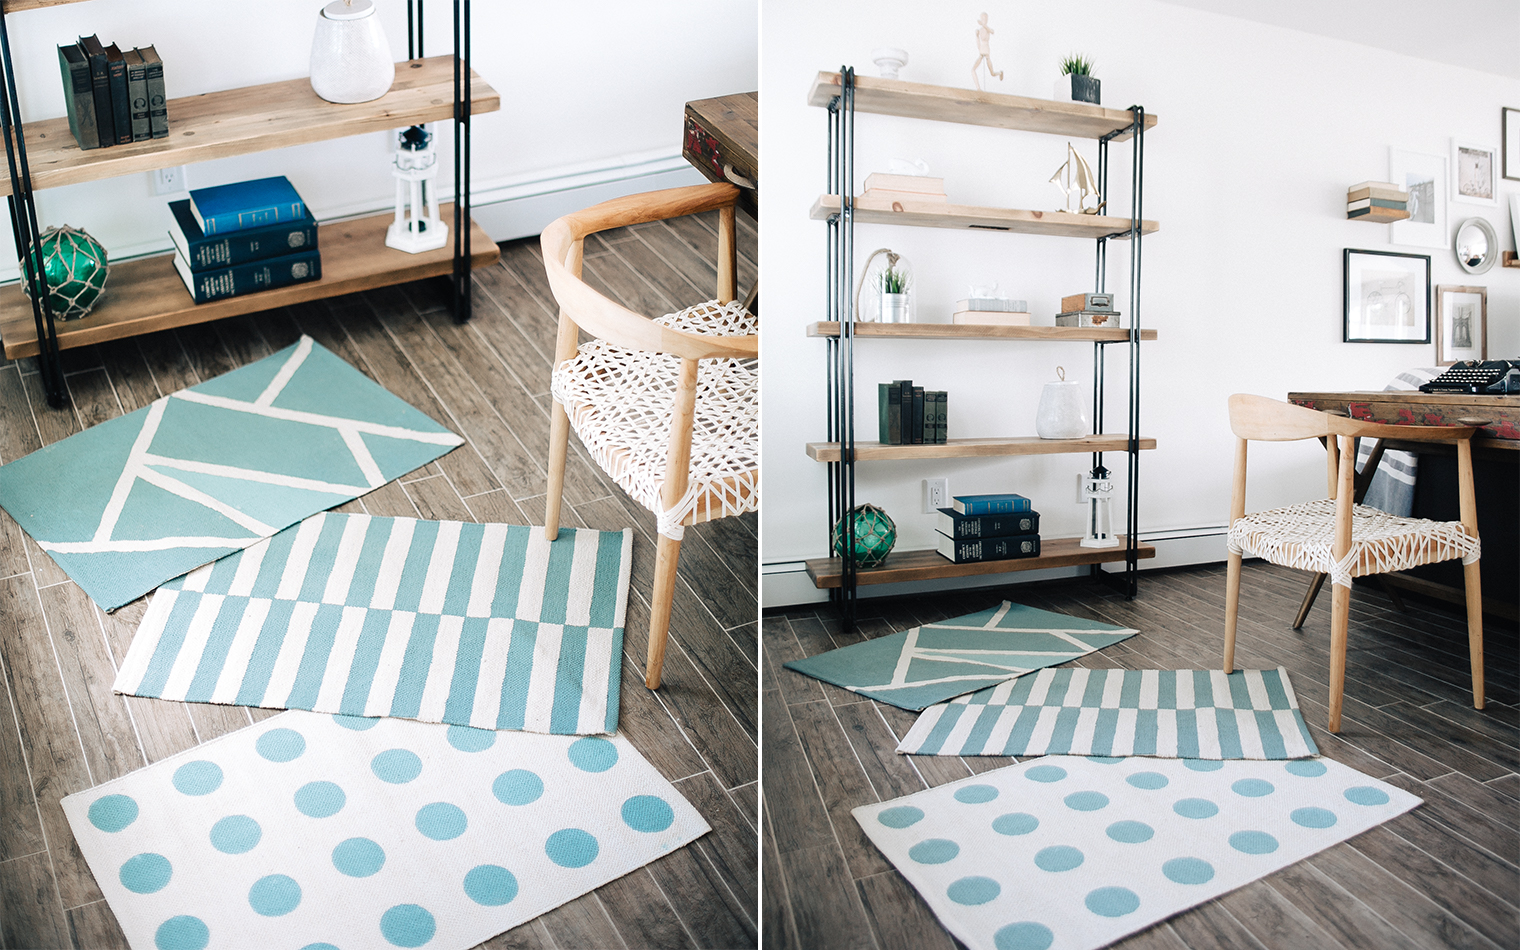 I can’t decide which one is my favorite design? I go back and forth all the time! I always love a stripe design because they are so timeless but the geometric shapes are so striking and graphic that my eye is drawn to that rug, too. Which one do you like best?
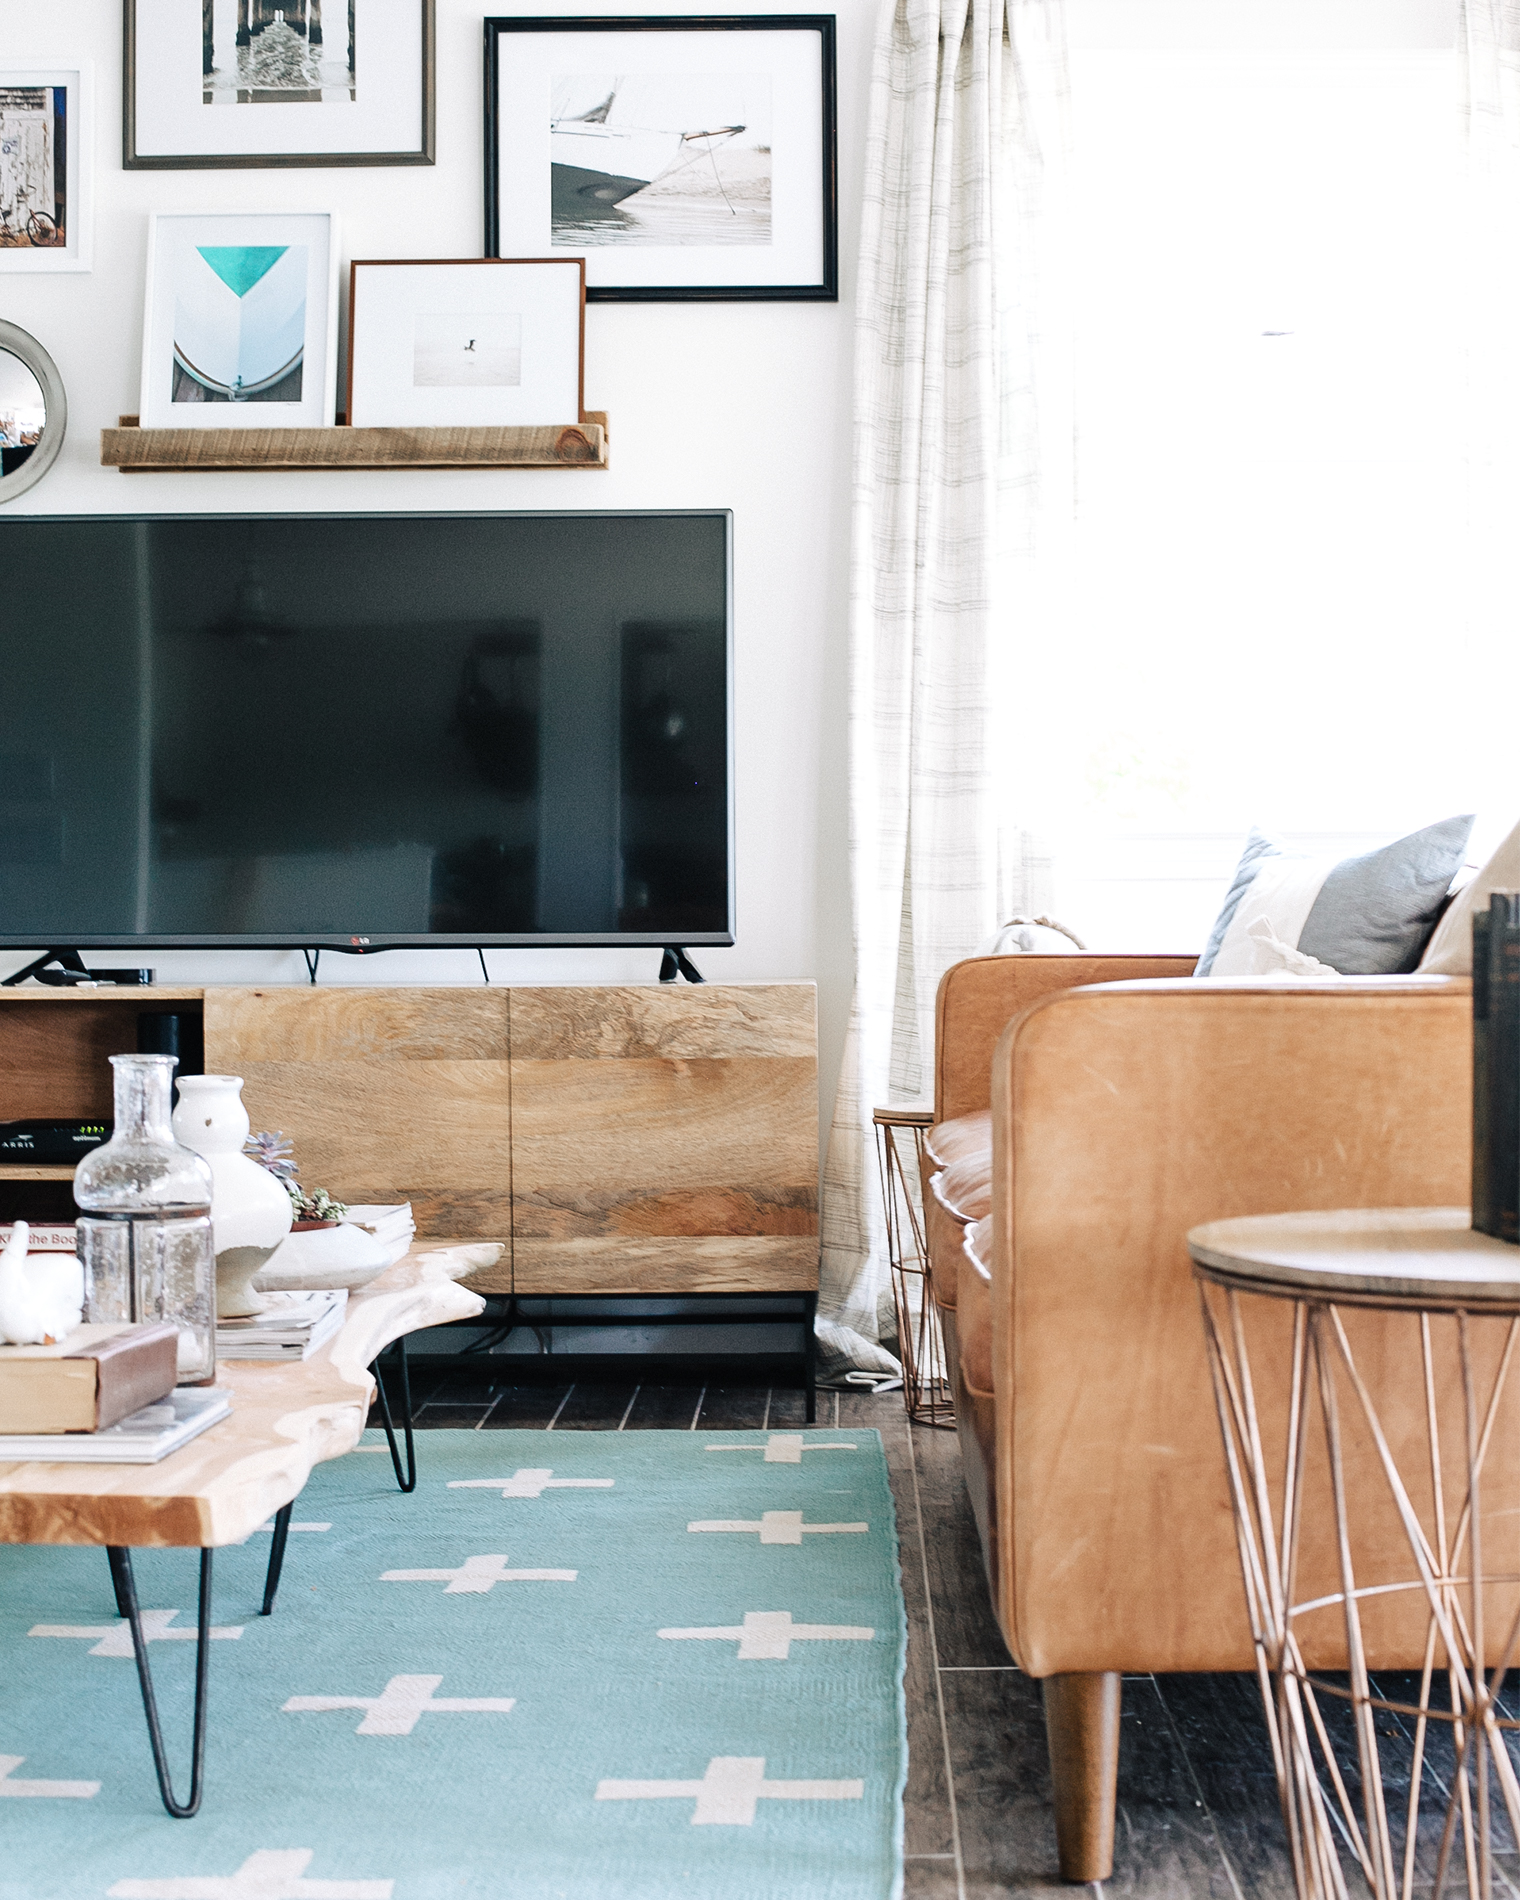 I also painted a larger scale rug, this time in a crossed design to give a cool Scandi feel. I love how painting this large beige rug transformed the rug into a colorful and stylish centerpiece for this living room, anchoring the leather and wood pieces together.
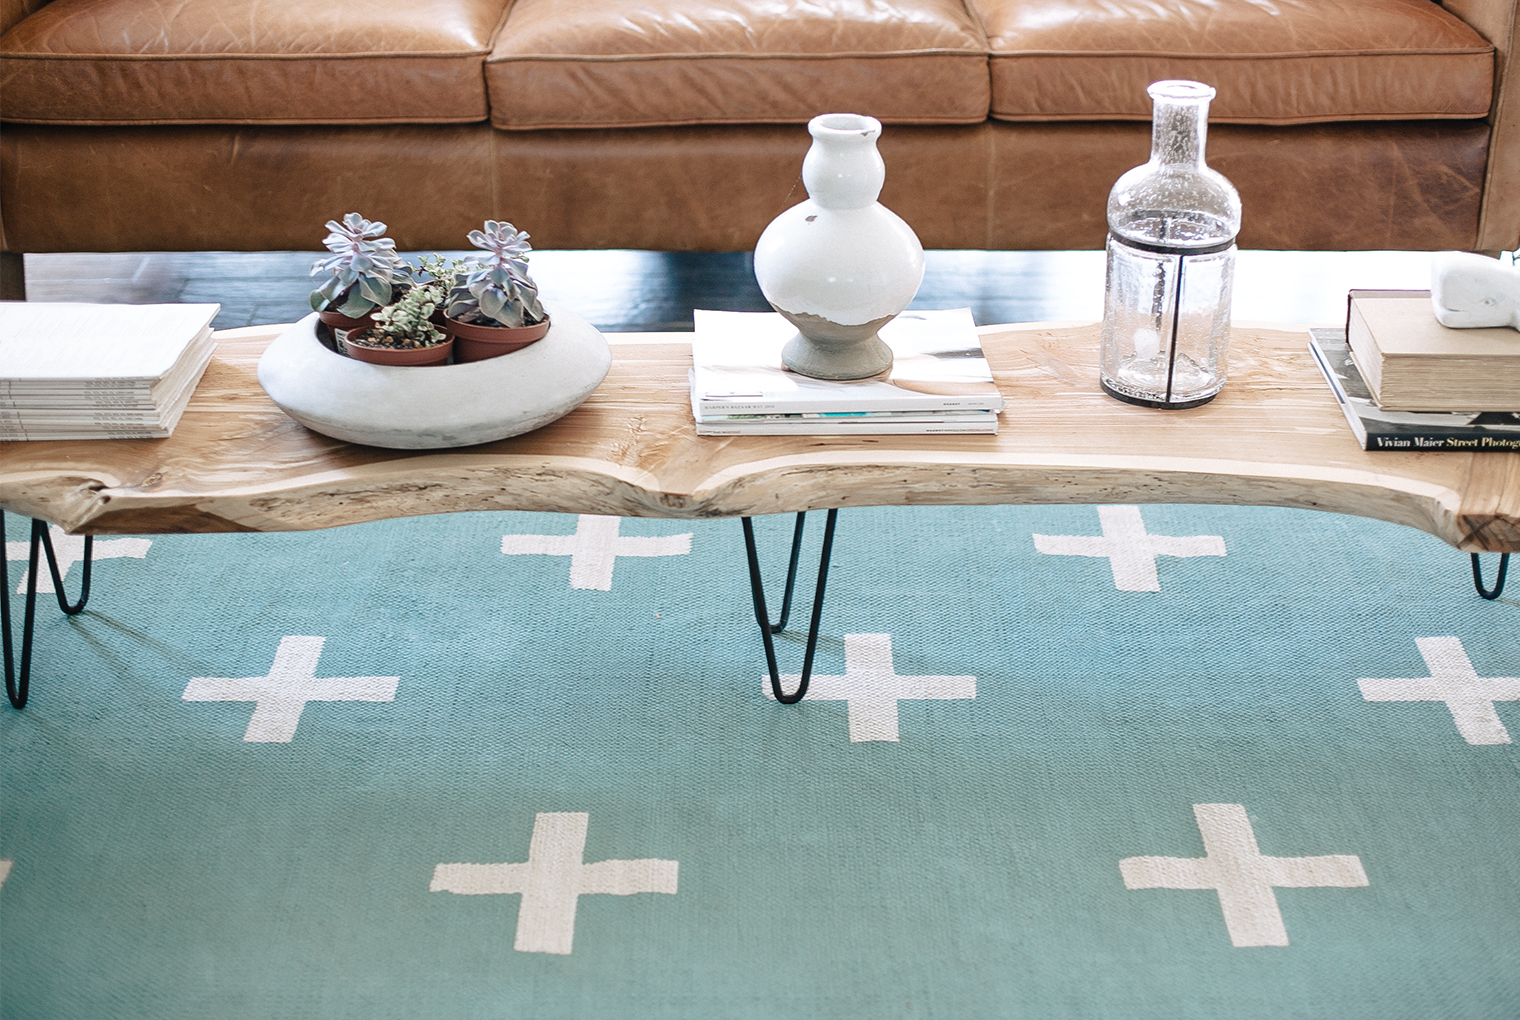 Have you ever painted a rug? Which patterns and colors would you choose for your next DIY painted rug project? I’ll be back with my next design DIY project soon! In the meantime, check out True Value on Facebook, Twitter, Pinterest and Instagram, or visit TrueValueProjects.com for more DIY ideas and projects!
 // Photography by Will Taylor | This is a sponsored conversation written by me on behalf of True Value. The opinions and text are all mine.


21 Comments
Digging the last rug with the + design! Amazing that you painted it.
@Max – Thanks, man!
Another great DIY post will….how do you keep coming up with the ideas?!?! I like the stripes and dots together. I wouldn’t have thought to mix patterned rugs like…it works!!
@Felicity – Thanks so much! Glad you liked the mix and match patterns. 🙂
Never wld have thought you could do this with paint and rugs! V. inspiring as always! xo
@Louisa – Right?! I was thrilled with the final result! 🙂
Can I just move into this living room?
@Brad – Haha! Race ya!
I love how these came out! I think the striped is my favorite. I never would have thought you could paint rugs…such a cool idea.
@Jackie – Great choice, I love the split stripes too! 🙂
Love the rugs!
Did you make the coffee table too?
@Danette – Thank you! No, I didn’t make the coffee table but that would be a super DIY, too! 🙂
Hey Will! Do you know how these hold up? Is there any type of sealant that can be applied to keep them living-friendly?
@Holly – Sure! You could try a spray on sealant to help make them more resistant to spills etc. 🙂
These look great who knew you could paint your own rug?! Great colour too 🙂
@Glyn – Thank you so much! I love the colour too! 🙂
Pingback: Weekend Reading. - The Stripe
What kind of paint did you use Will? Is it a special fabric paint or just regular wall paint? They look fantastic.
@Stacey – Thank you! I used latex paint and then you have the option to use a spray on clear sealant to make them more resistant to spills etc. in higher traffic areas.
Hi Will,
It’s so odd since I stayed at an AirBNB in CT a year ago that looks just the house in your pictures. It even had the exact same rug, coffee tables, and zip code pillow. The rug that you painted looks exactly like the rug that was in the kid’s room upstairs, but in a slightly different shade of blue.
That house was designed by Kim Heljenik of Philadelphia (kjheljenek@gmail.com) and I thought the work was so amazing that I got in touch with her to design and decorate my loft in the city. Did you collaborate with her?
https://www.airbnb.com/rooms/4976279?bev_ref=1483756477_2164Vm5ky0Uedd4q&s=4
Hi Mary!
Thanks for your note. Yes, this is the same Air BnB you stayed in! I paid to rent this Air BnB last summer and then I photographed the DIY rugs I made in the space while staying there. This was fully in-line with the guidelines of Air BnB and I treated the property with great respect; I had very positive feedback from the owner of the property after staying there.
I’m not sure if you are suggesting that I bought the rug (re: your note about the one in the kid’s bedroom? Genuine apologies if I read that the wrong way) but I can assure you that I made it, just as I did the other three rugs of which you can see the pictures of them being painted in this very post. As you can see, this blog post talks solely about how to make the rugs; the post doesn’t talk about the sofa, coffee table etc. that you referenced. I also have pictures and videos I shared on social media of me making the cross rug, which I would be more than happy to email over to you if you would like to see them? I can’t see a way to attach them to my reply otherwise I would have done so for you here.
Take care,
Will