

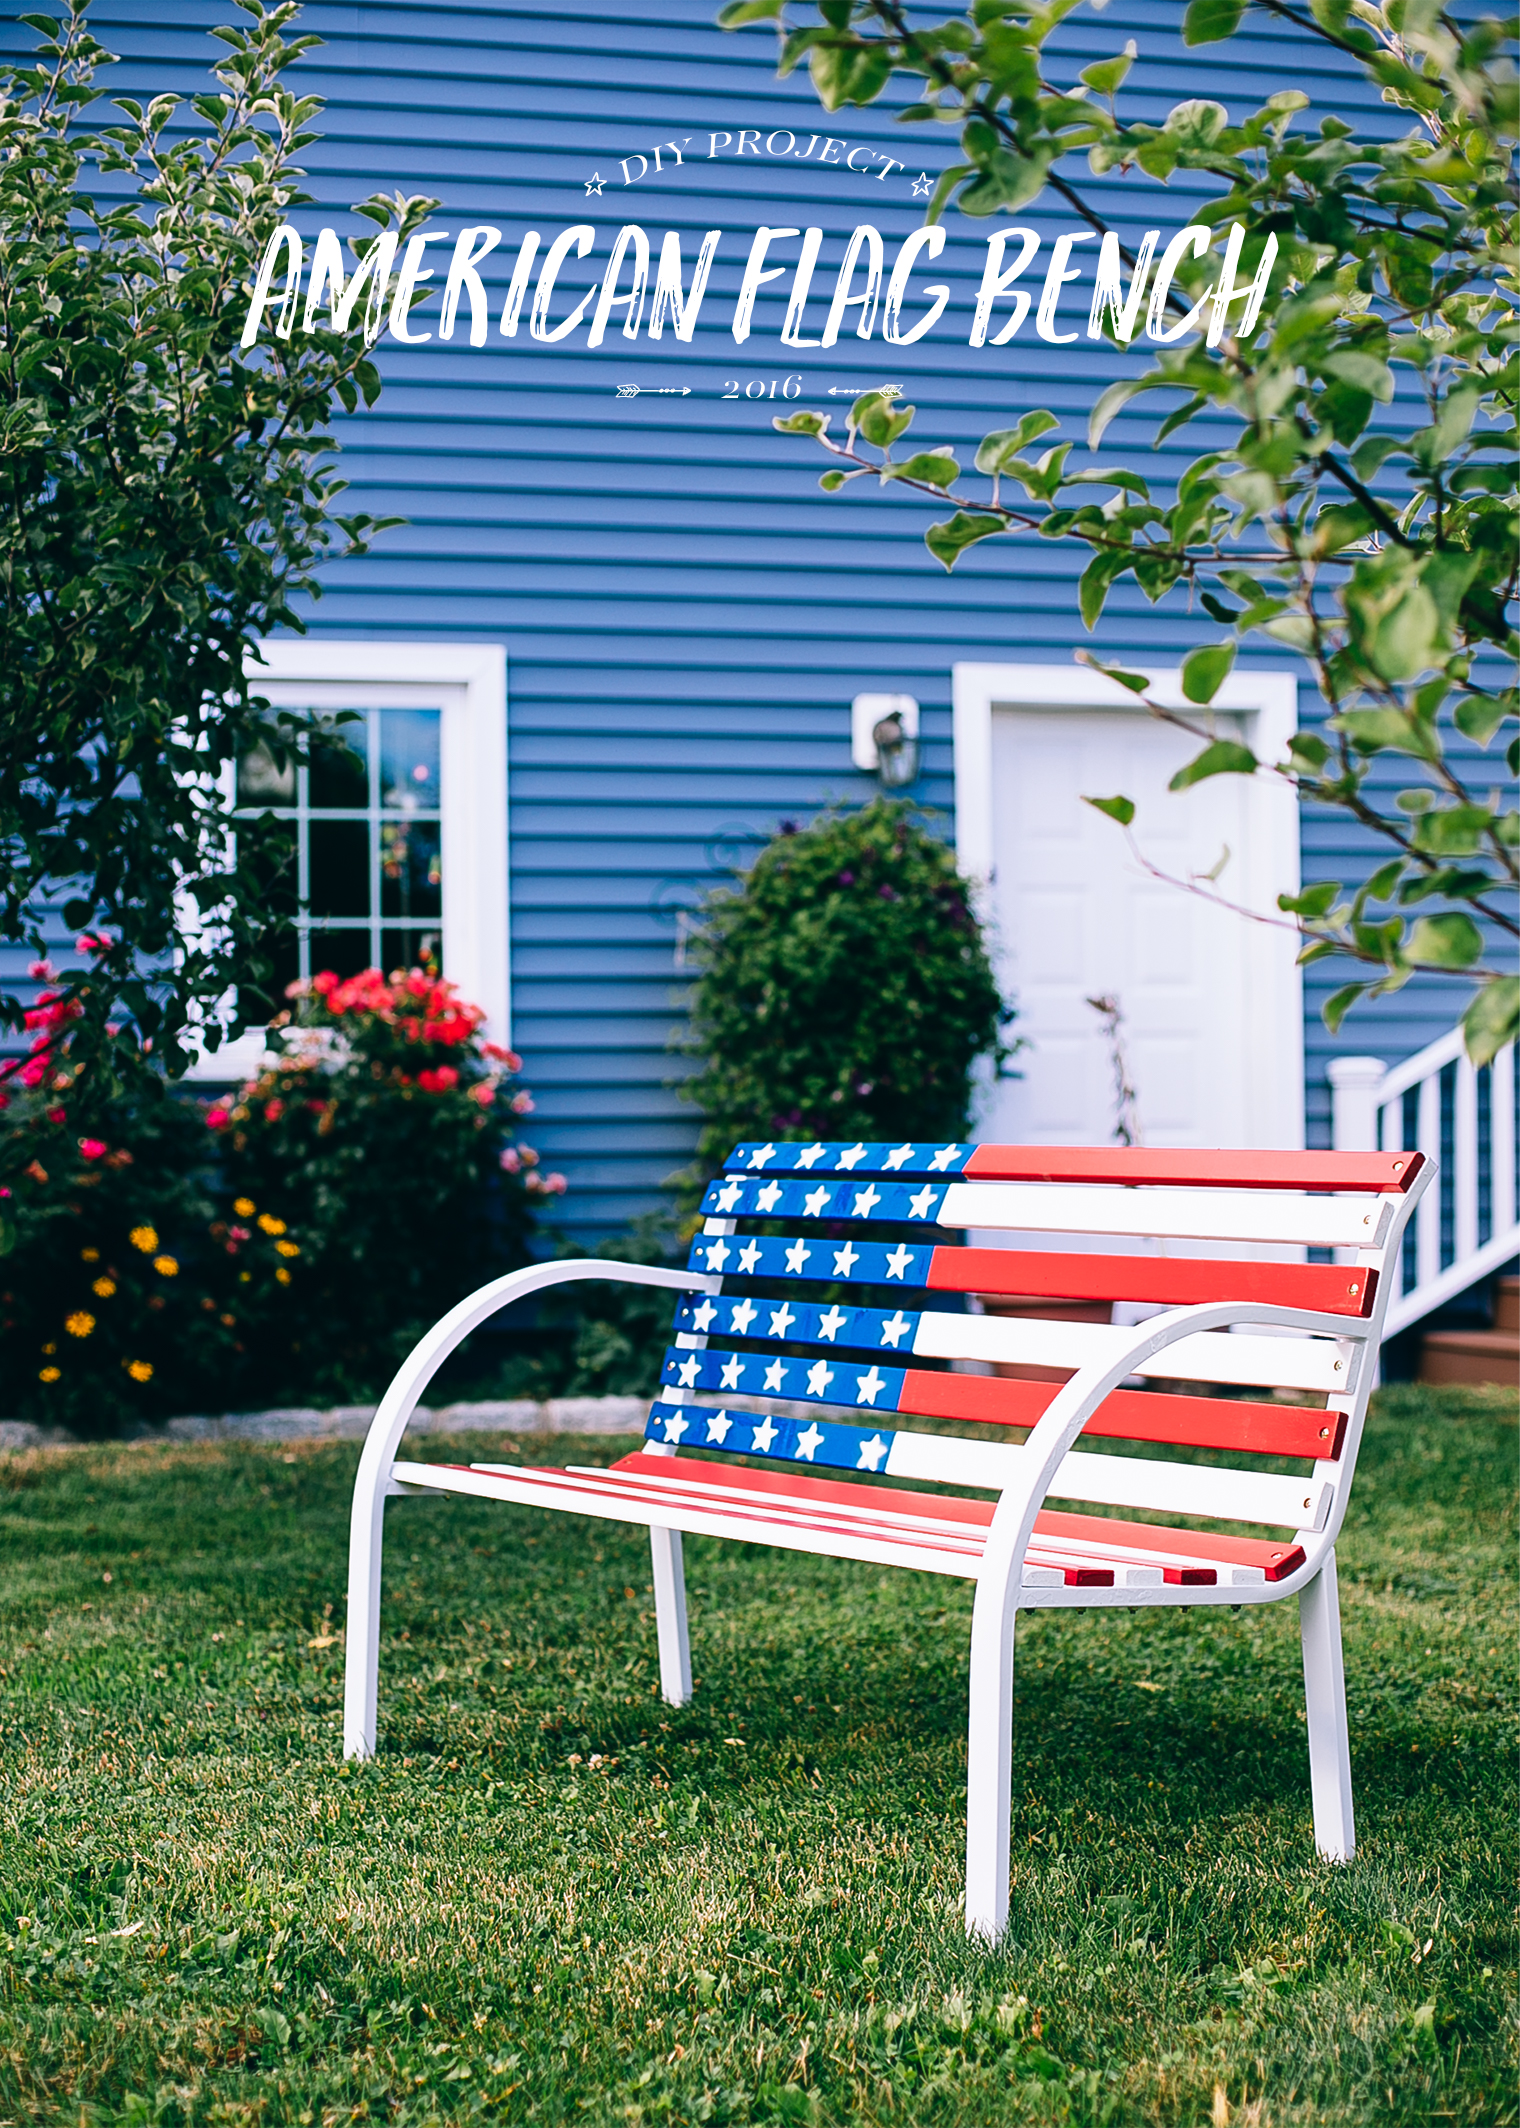
 Graphic use of color and pattern are two of my favorite things when it comes to decor. I guess that’s why I’ve always been drawn to flags – it’s their striking use of bold hues and shapes that makes them memorable and eye-catching. The American flag is iconic the world round and it lends itself perfectly for my first in a series of three DIY projects I’ve concepted, made and styled in collaboration with True Value. This DIY painted American Flag Bench project is perfect for upcoming Labor Day celebrations, BBQs, and parties, or just as a patriotic piece to brighten up your backyard or porch. The best part? There’s only four steps! Click through after the jump for the full how-to.
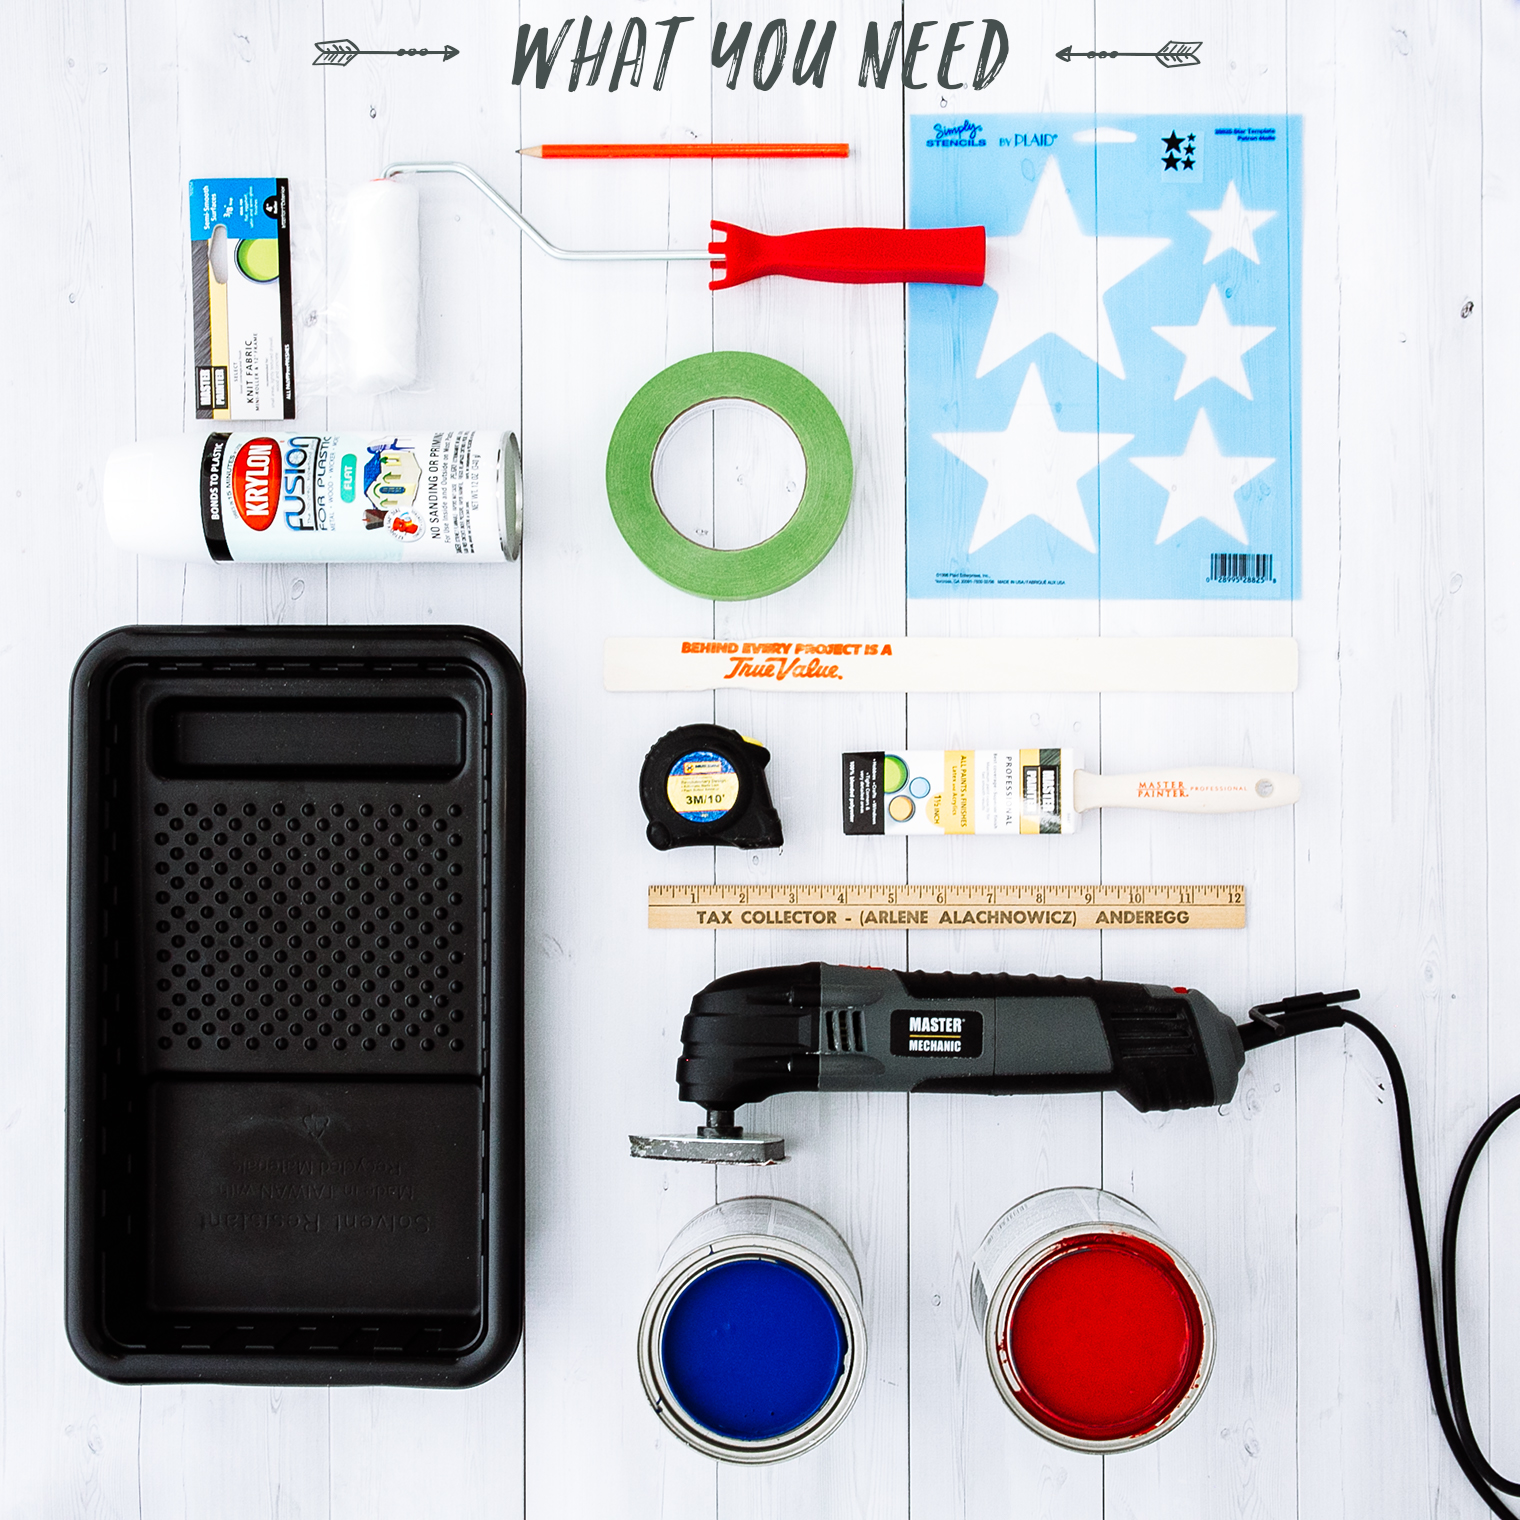 What You Need
– A wooden slatted bench (either a new one assembled per package instructions, or update an existing one)
– Paint brush
– Paint roller
– Paint tray
– Red, white and blue EasyCare Paint
– Master Mechanic Oscillating Tool
– Painters’ tape
– White spray paint
– Tape measure
– Pencil
 Step-by-step
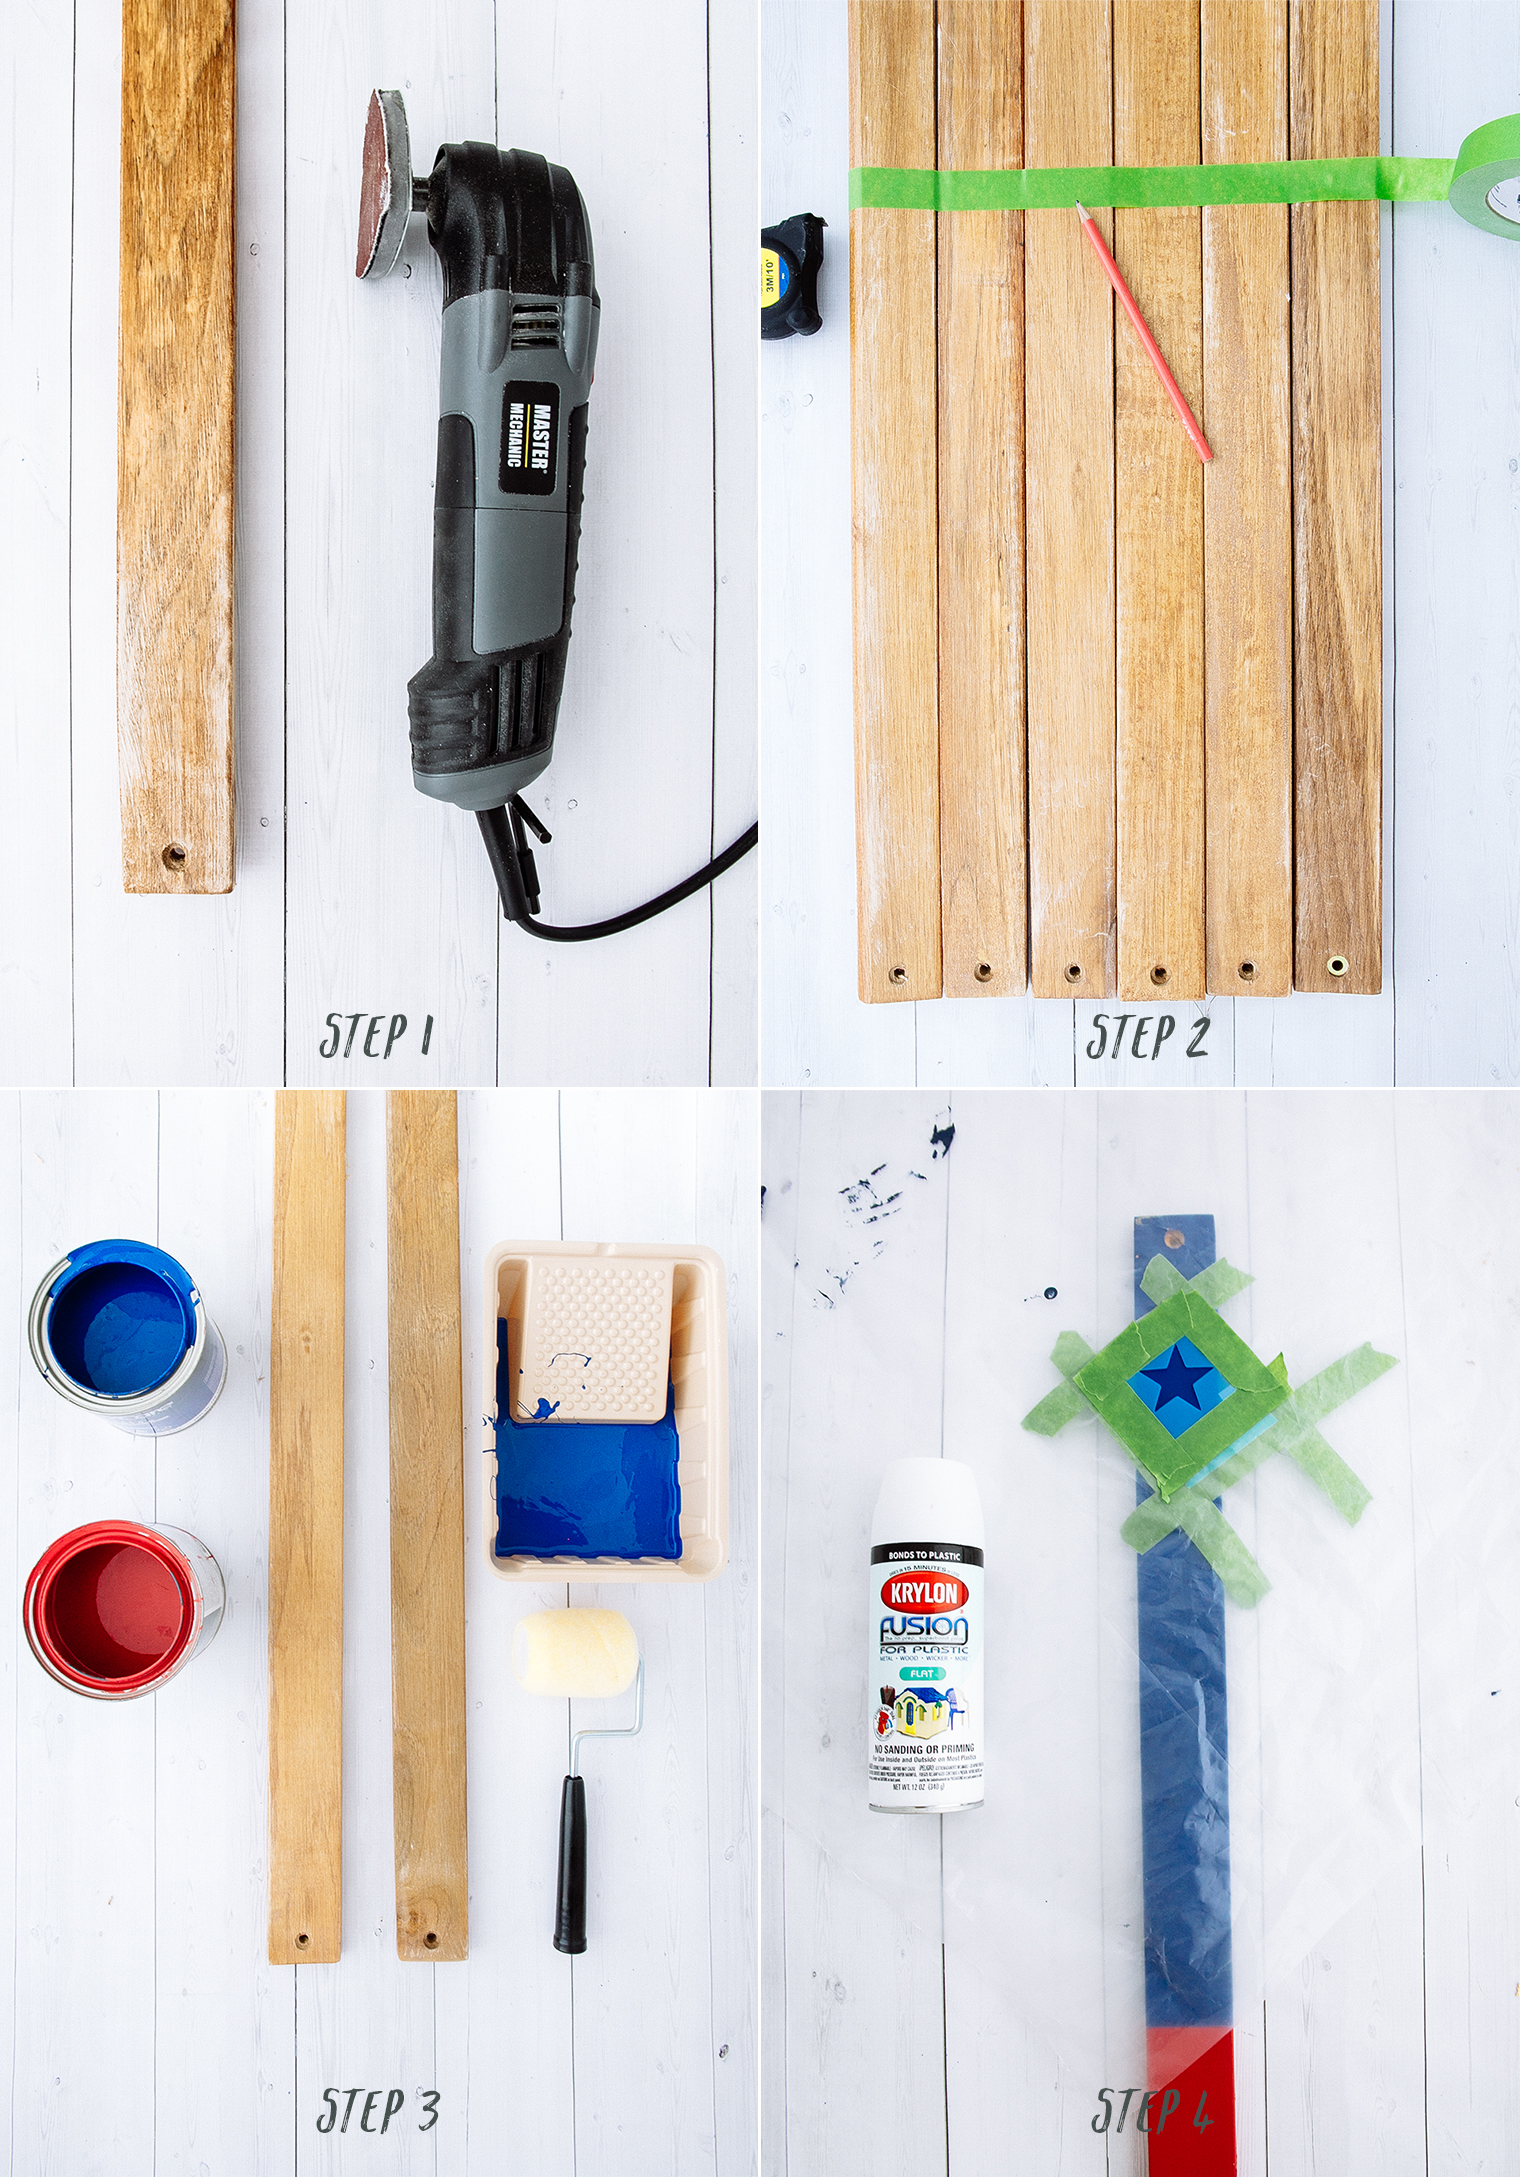
Step one: Use an oscillating tool to remove varnish and sand down the wooden planks. Once sanded, wipe away any excess so they are clean, dry and ready to be painted.
Step two: Using a tape measure, pencil and painters tape, measure and mark out the blue corner section of the flag. This is a little over a third of the total width of the slats for your bench. This bench had 12 slats total, so I made the blue section cover six of the slats in order to reach the bottom of the ‘back’ part of the bench. This helps keep the ‘flag’ looking graphic vs. the blue/star corner going down onto the seated part of the bench.
Step three: Paint the alternate slats red and white. For the top six slats (where the blue corner will be) remove the painters’ tape while the paint is still wet to prevent any peeling. Once dry, tape down the line over the red and white you have already painted, and paint the final section blue. Remember to get a clean line, be sure to peel the painters’ tape as soon as you finish painting in the blue sections.
Step four: Once fully dry, you can spray paint the white stars onto the blue section. You don’t have to be exact with the number of stars, just keep the same number of stars on each slat in order to maintain a uniform and graphic final look. To prevent the spray paint from covering unwanted parts of the slat, cut a hole in a plastic sheet and use painters tape to place the star stencil over the hole. Once you have spray painted one star, don’t drag the stencil as this will smudge the paint. Instead, lift it and only place it back on so that it doesn’t sit on any ‘wet’ stars. Don’t worry if you any stars come out a little wonky, they help give the bench a charming, homemade feel. Once everything is dry, build your bench per the instructions of your model and you have the option to varnish seal the slats, too.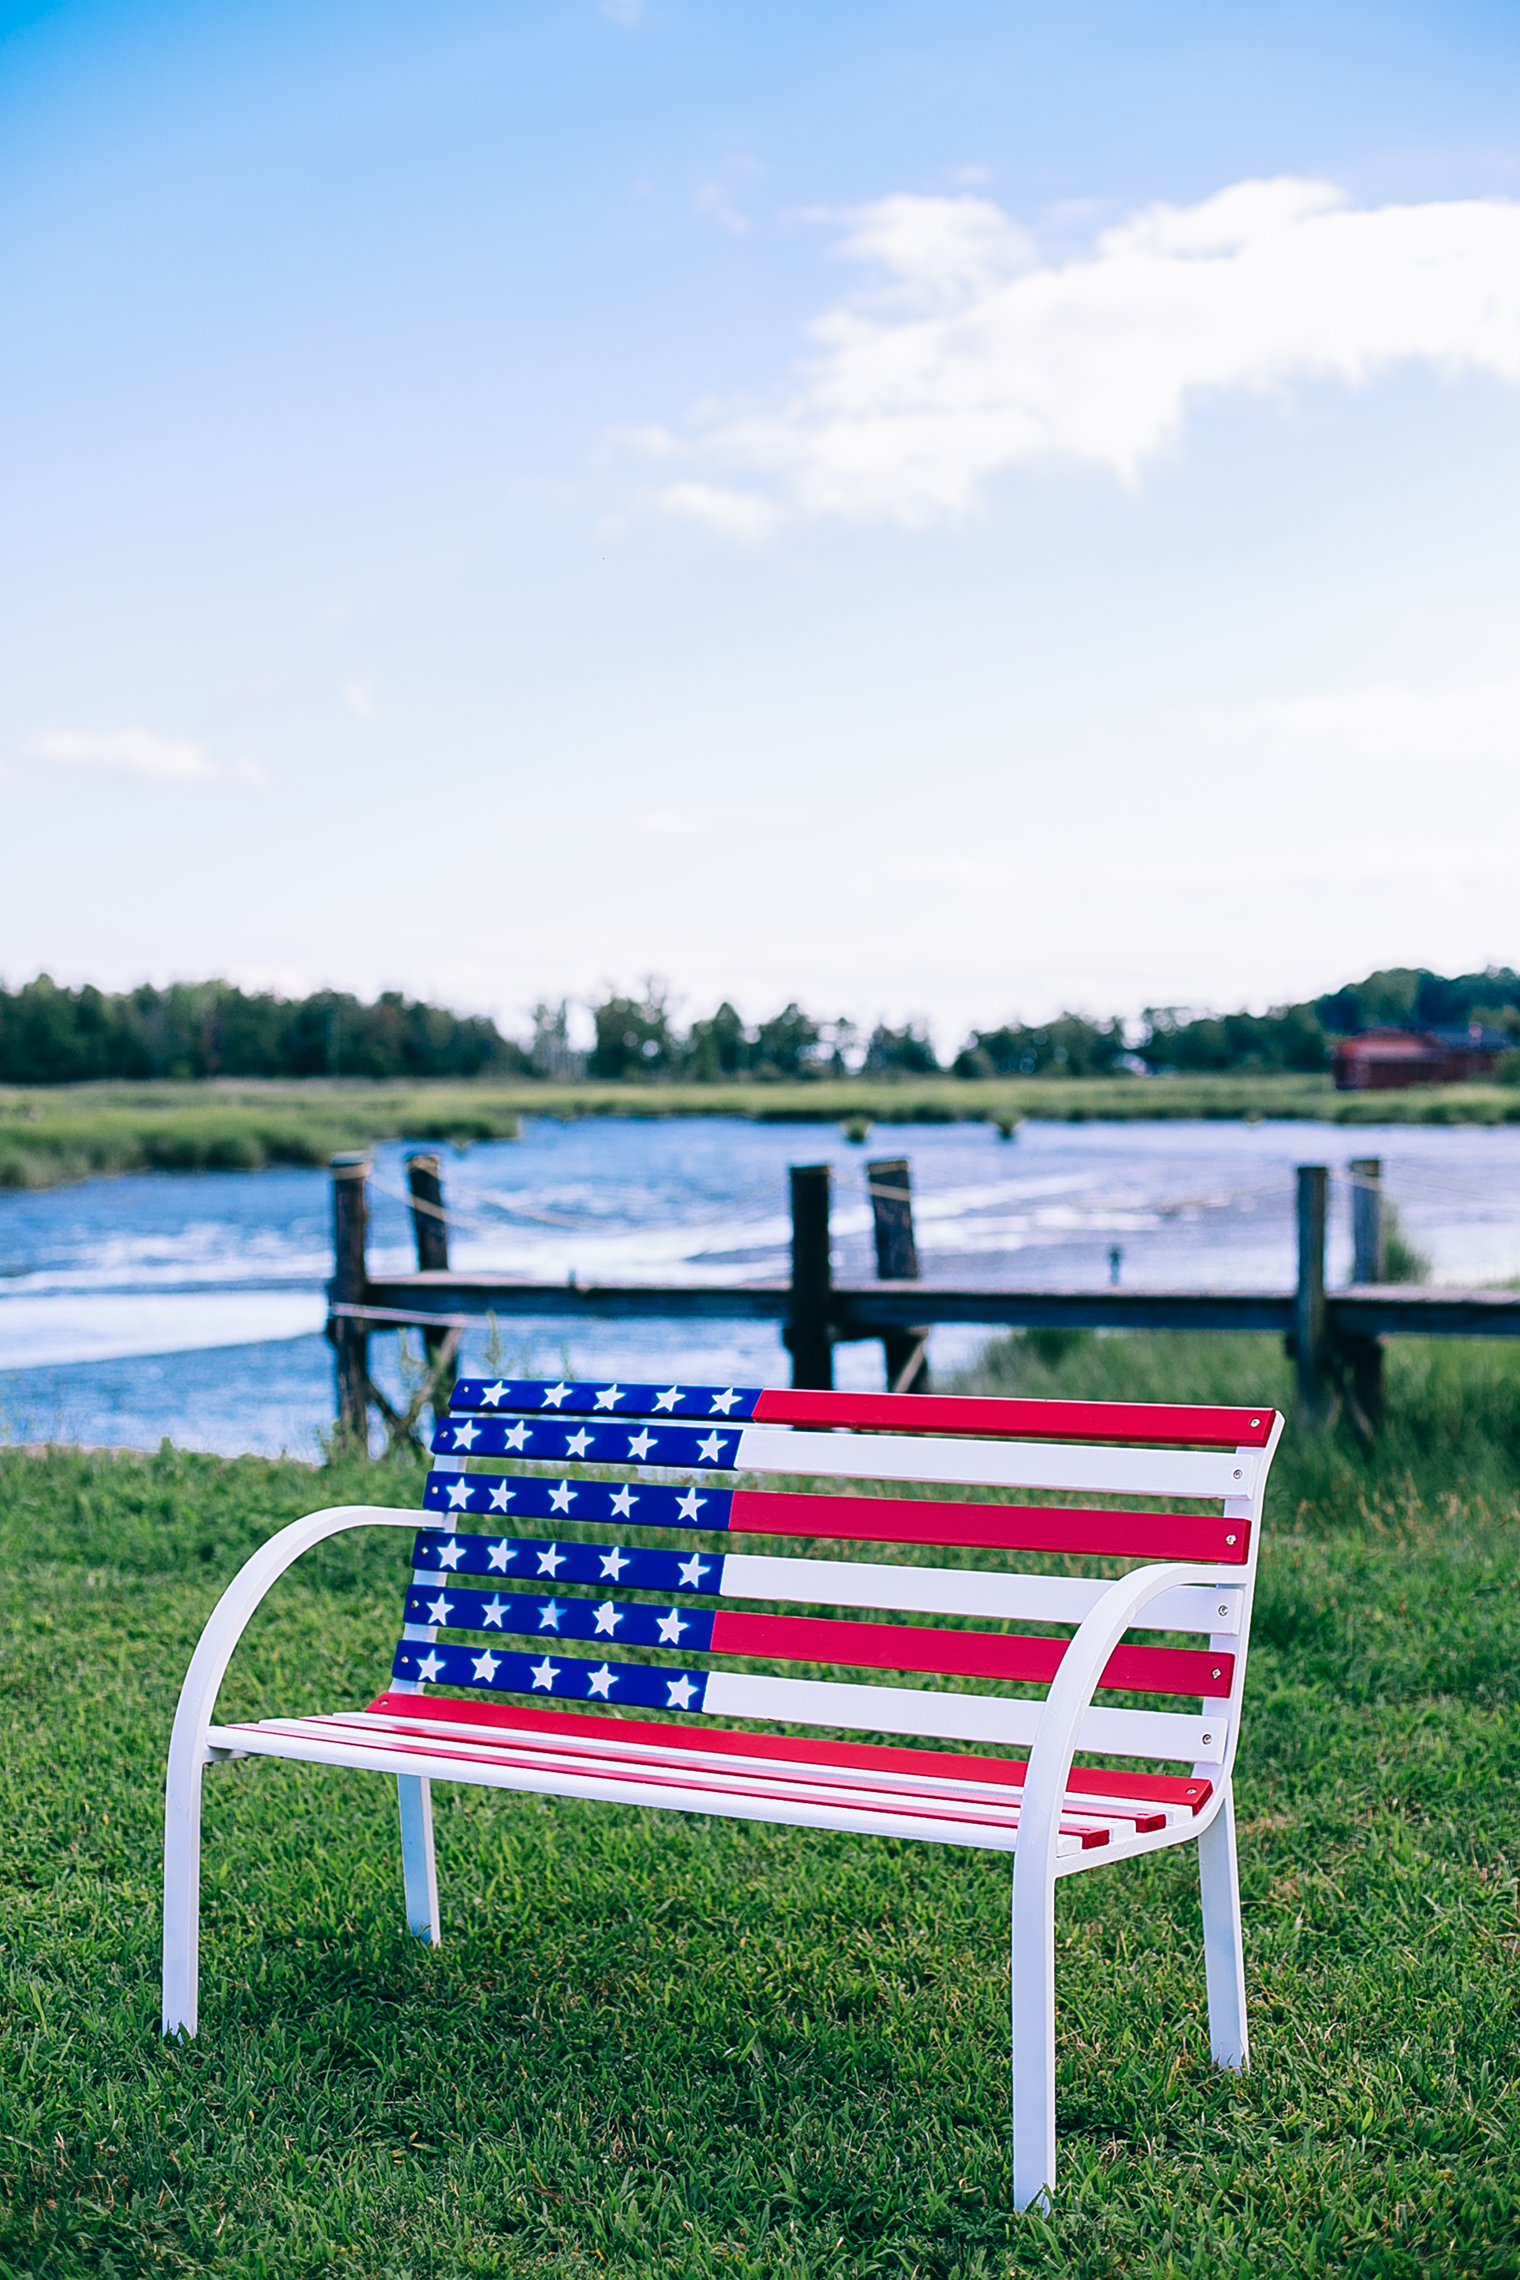 Ta-da! Isn’t it so much fun? I love how colorful and eye-catching the final look is. Don’t you think this would make for a fun conversation starter at a party? You could try this DIY painted bench approach for other celebrations too. For example, a rainbow painted bench would be a super fun Pride celebration piece!
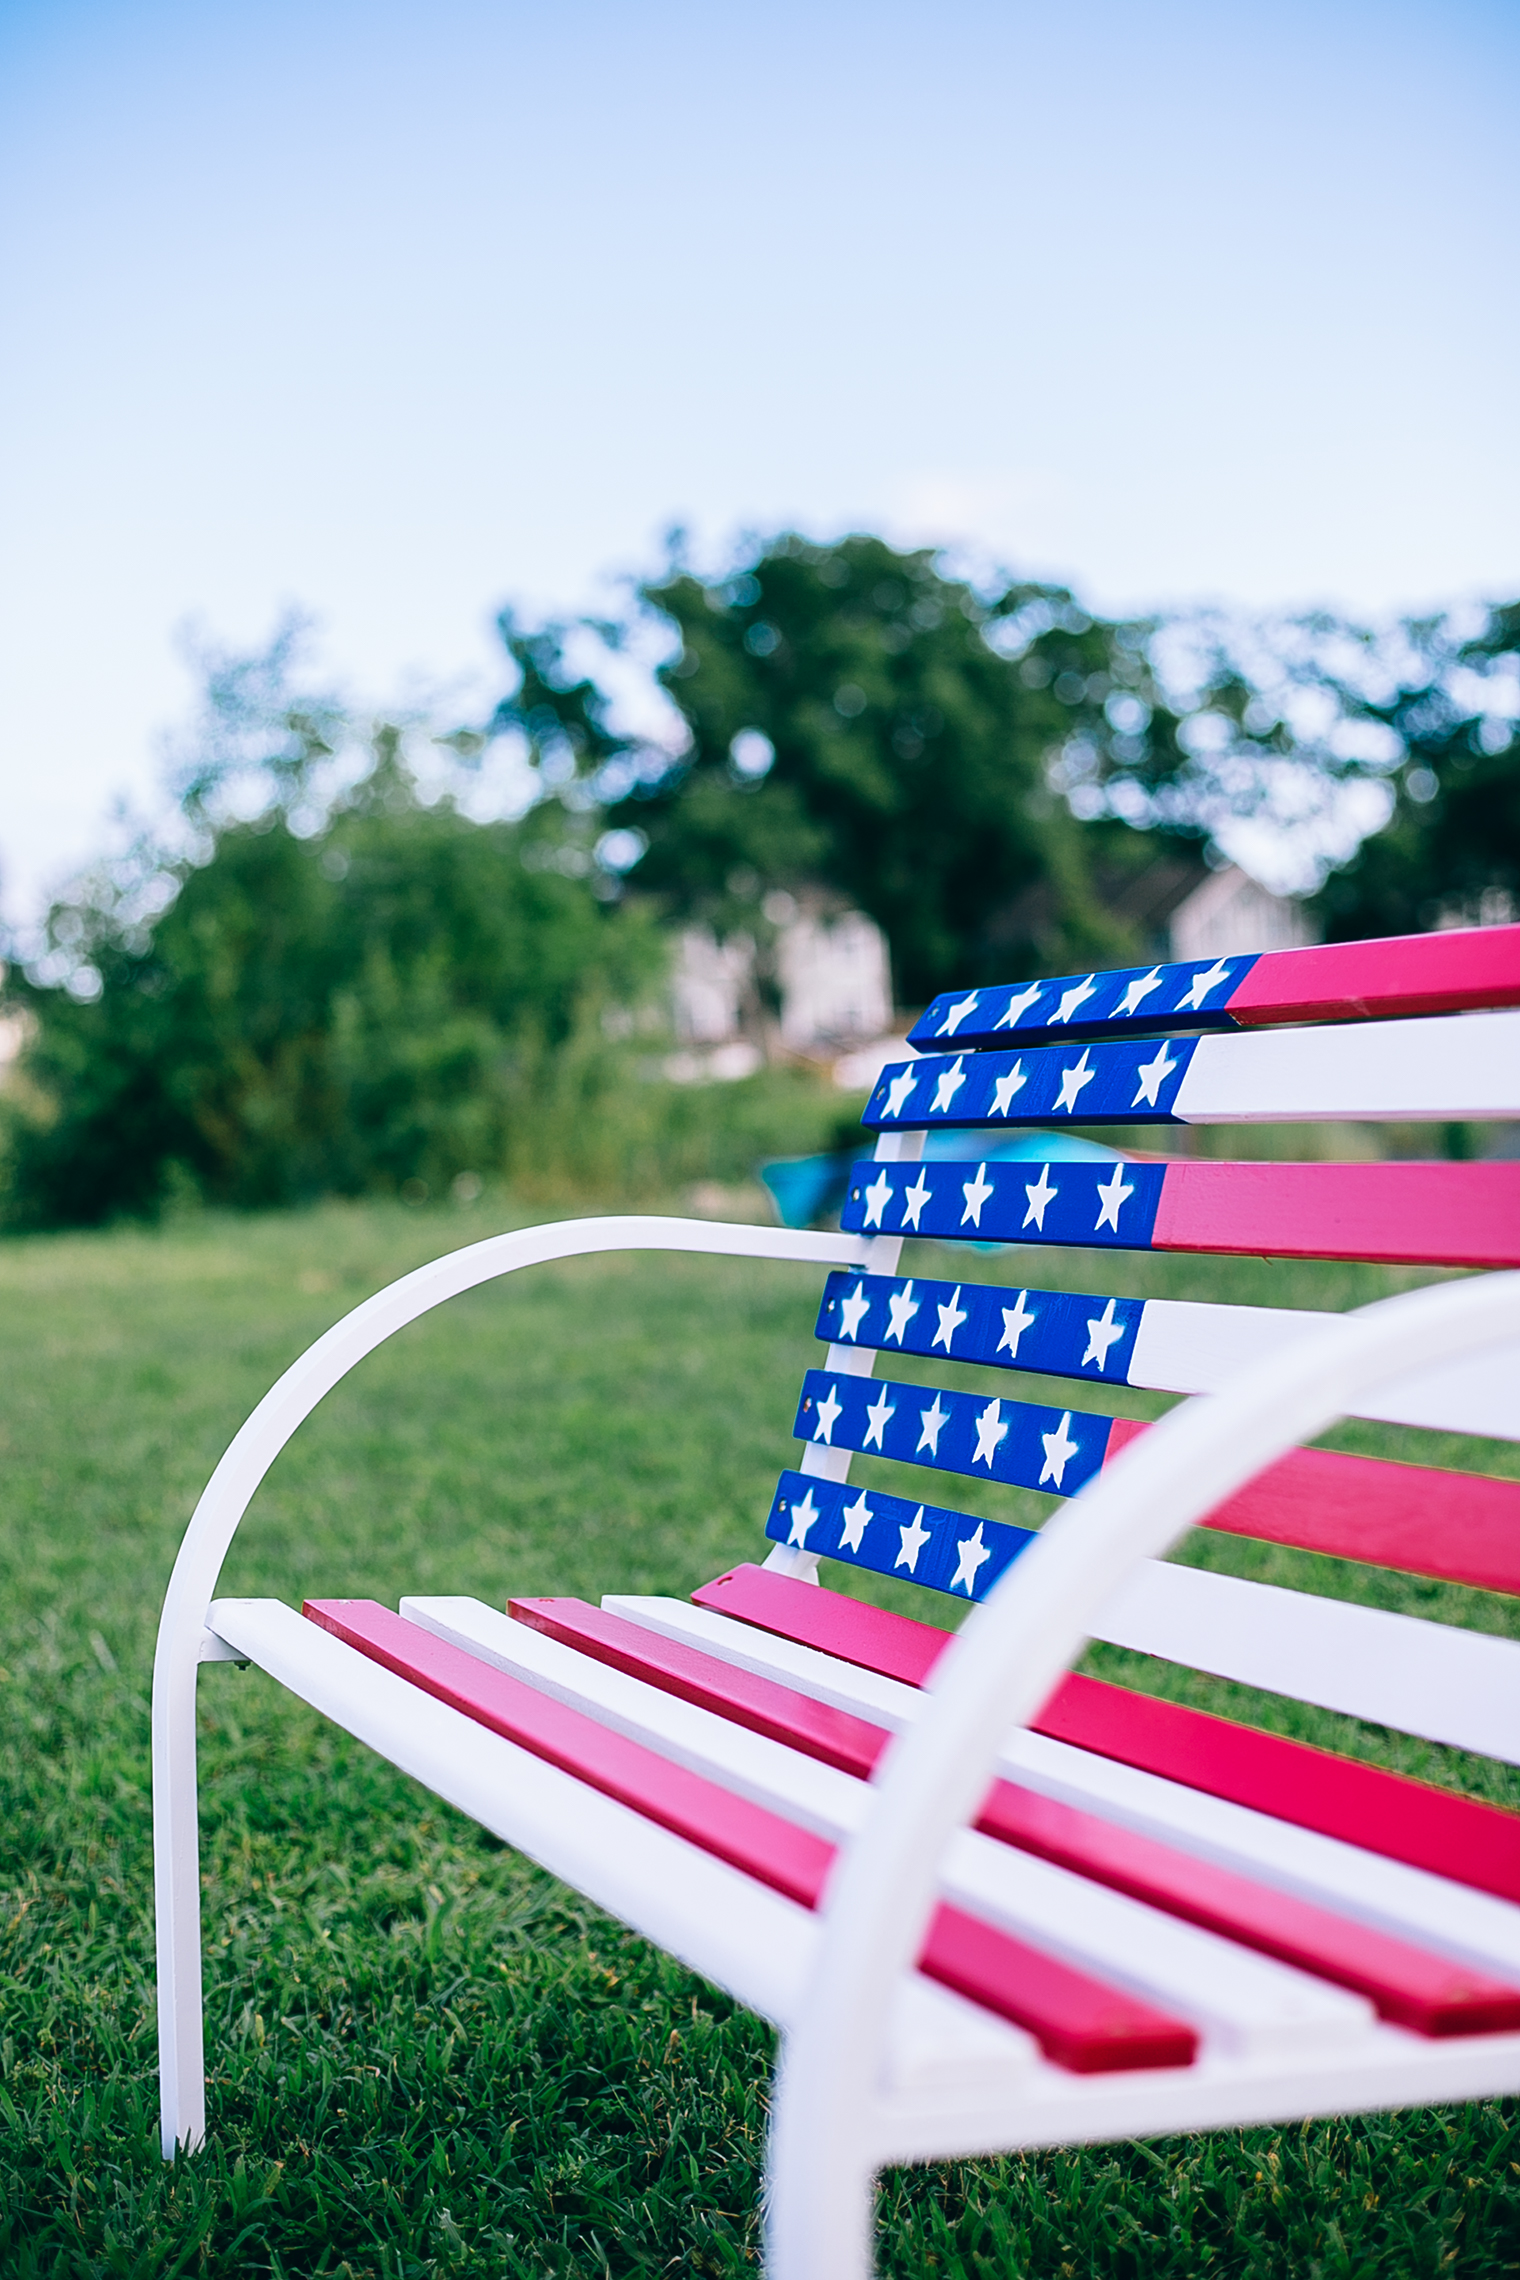 And if you happen to be throwing a party with your DIY American Flag Bench, be sure to dress so that your outfit co-ordinates with it! I’m off to get to work on my next DIY makeover project that I’ll be sharing here soon. In the meantime, check out True Value on Facebook, Twitter, Pinterest and Instagram, or visit TrueValueProjects.com for more DIY ideas and projects!
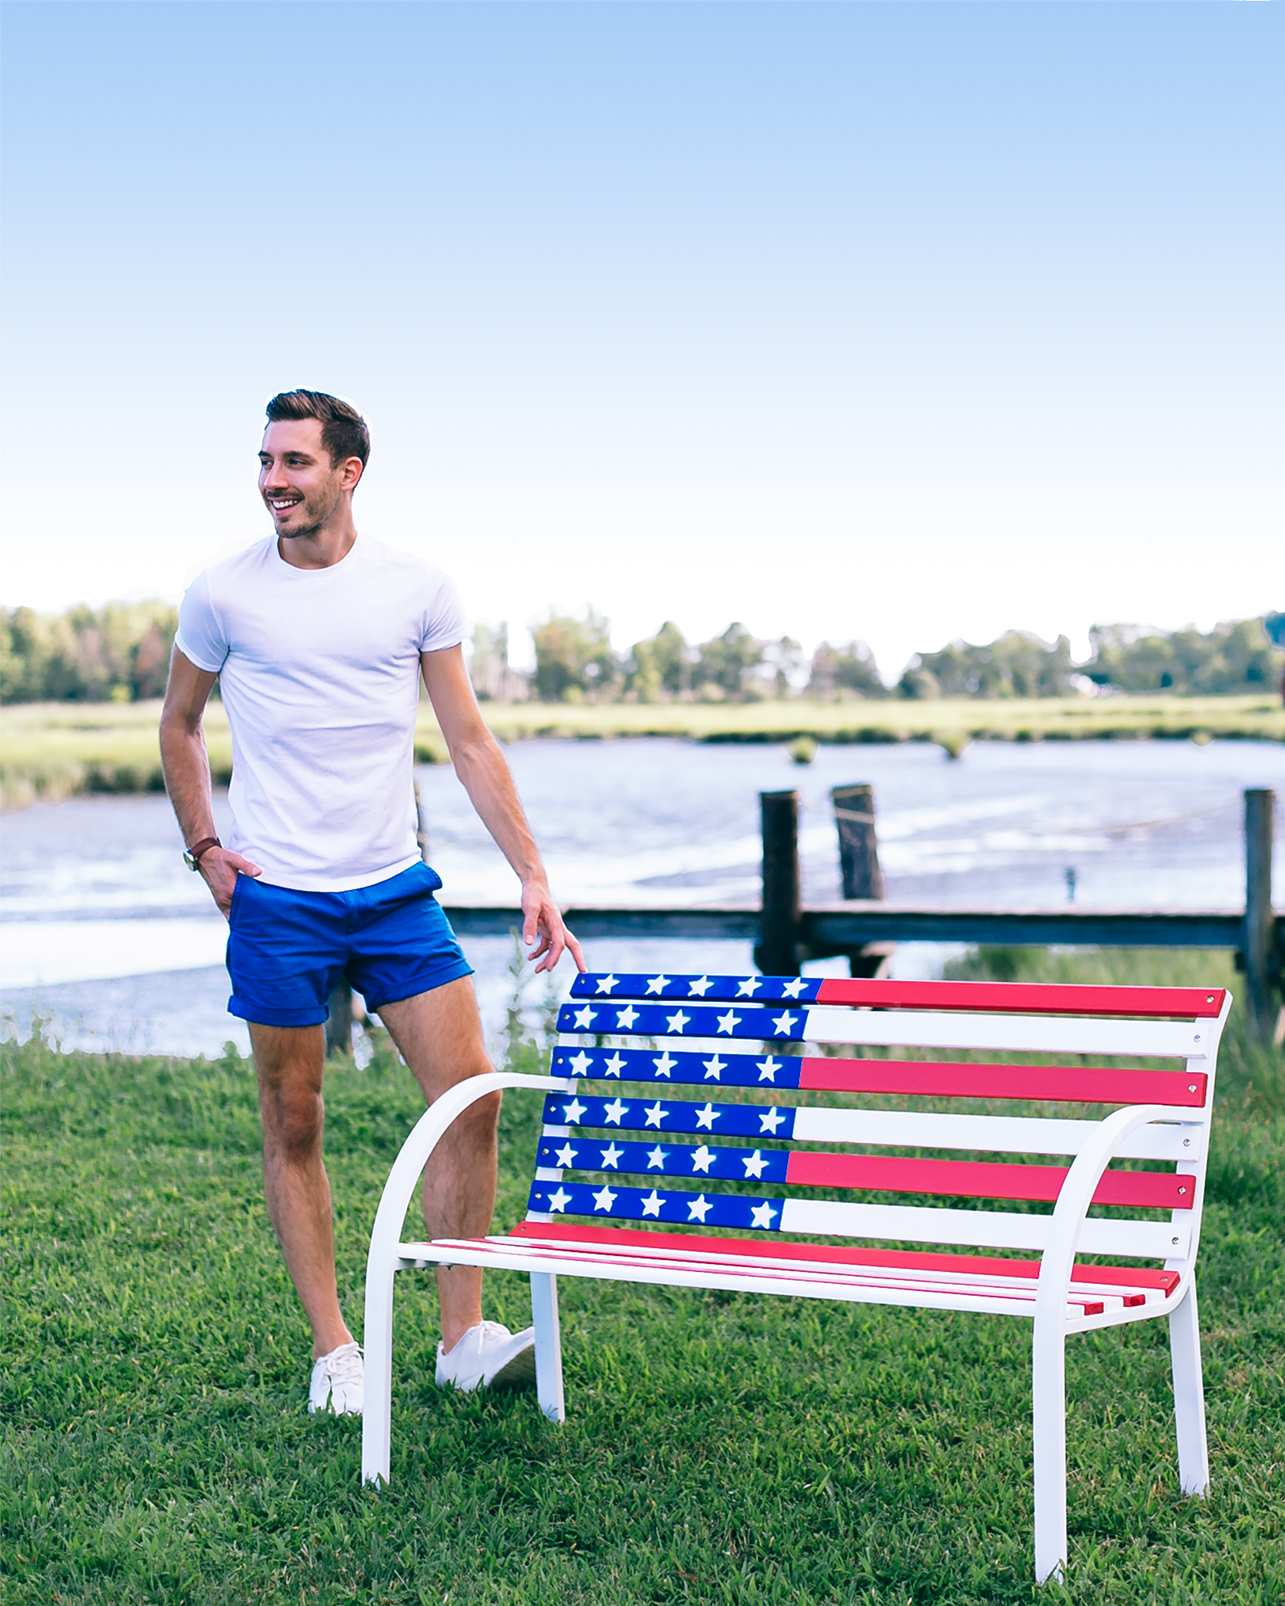 // Photography by Will Taylor | This is a sponsored conversation written by me on behalf of True Value. The opinions and text are all mine.


16 Comments
This is perfect for Labor Day! What a clever project you put together. Well done!
@Jaz – Thanks so much! It was really fun to work on! 🙂
Does it matter what size stars you do? I have a star stencil already so wondering if I need another?? Thks
@Emily – Not at all! As long as the star is smaller than the width of each wooden slat you’re good to go. Have fun!
Ohhhh so adorable! The perfect holiday DIY!!
@Tricia – Right? Would be SO fun at a party!
Cute project Will. Nice work on the photography too.
@Beth – Kind of you to say, thanks! 🙂
How clever, Will!
Carrie
http://www.wearwherewell.com
@Carrie – Thanks!
Such a fun project! You should totally create a Union Jack bench to match!!! ????
@Jenn – I LOVE that idea! I’ve always thought the UK and USA flags are the most graphic and eye-catching which is what helps make this kind of DIY look so striking!
Oh Will this cheerful bench and bright idea made me smile today! Thanks! 🙂
@Rochelle – Thanks so much! Glad it made you smile 🙂
Can I purchase a finished bench shown
@Joseph – Not that I’m aware, sorry. I made this one at home per the steps outlined above.