

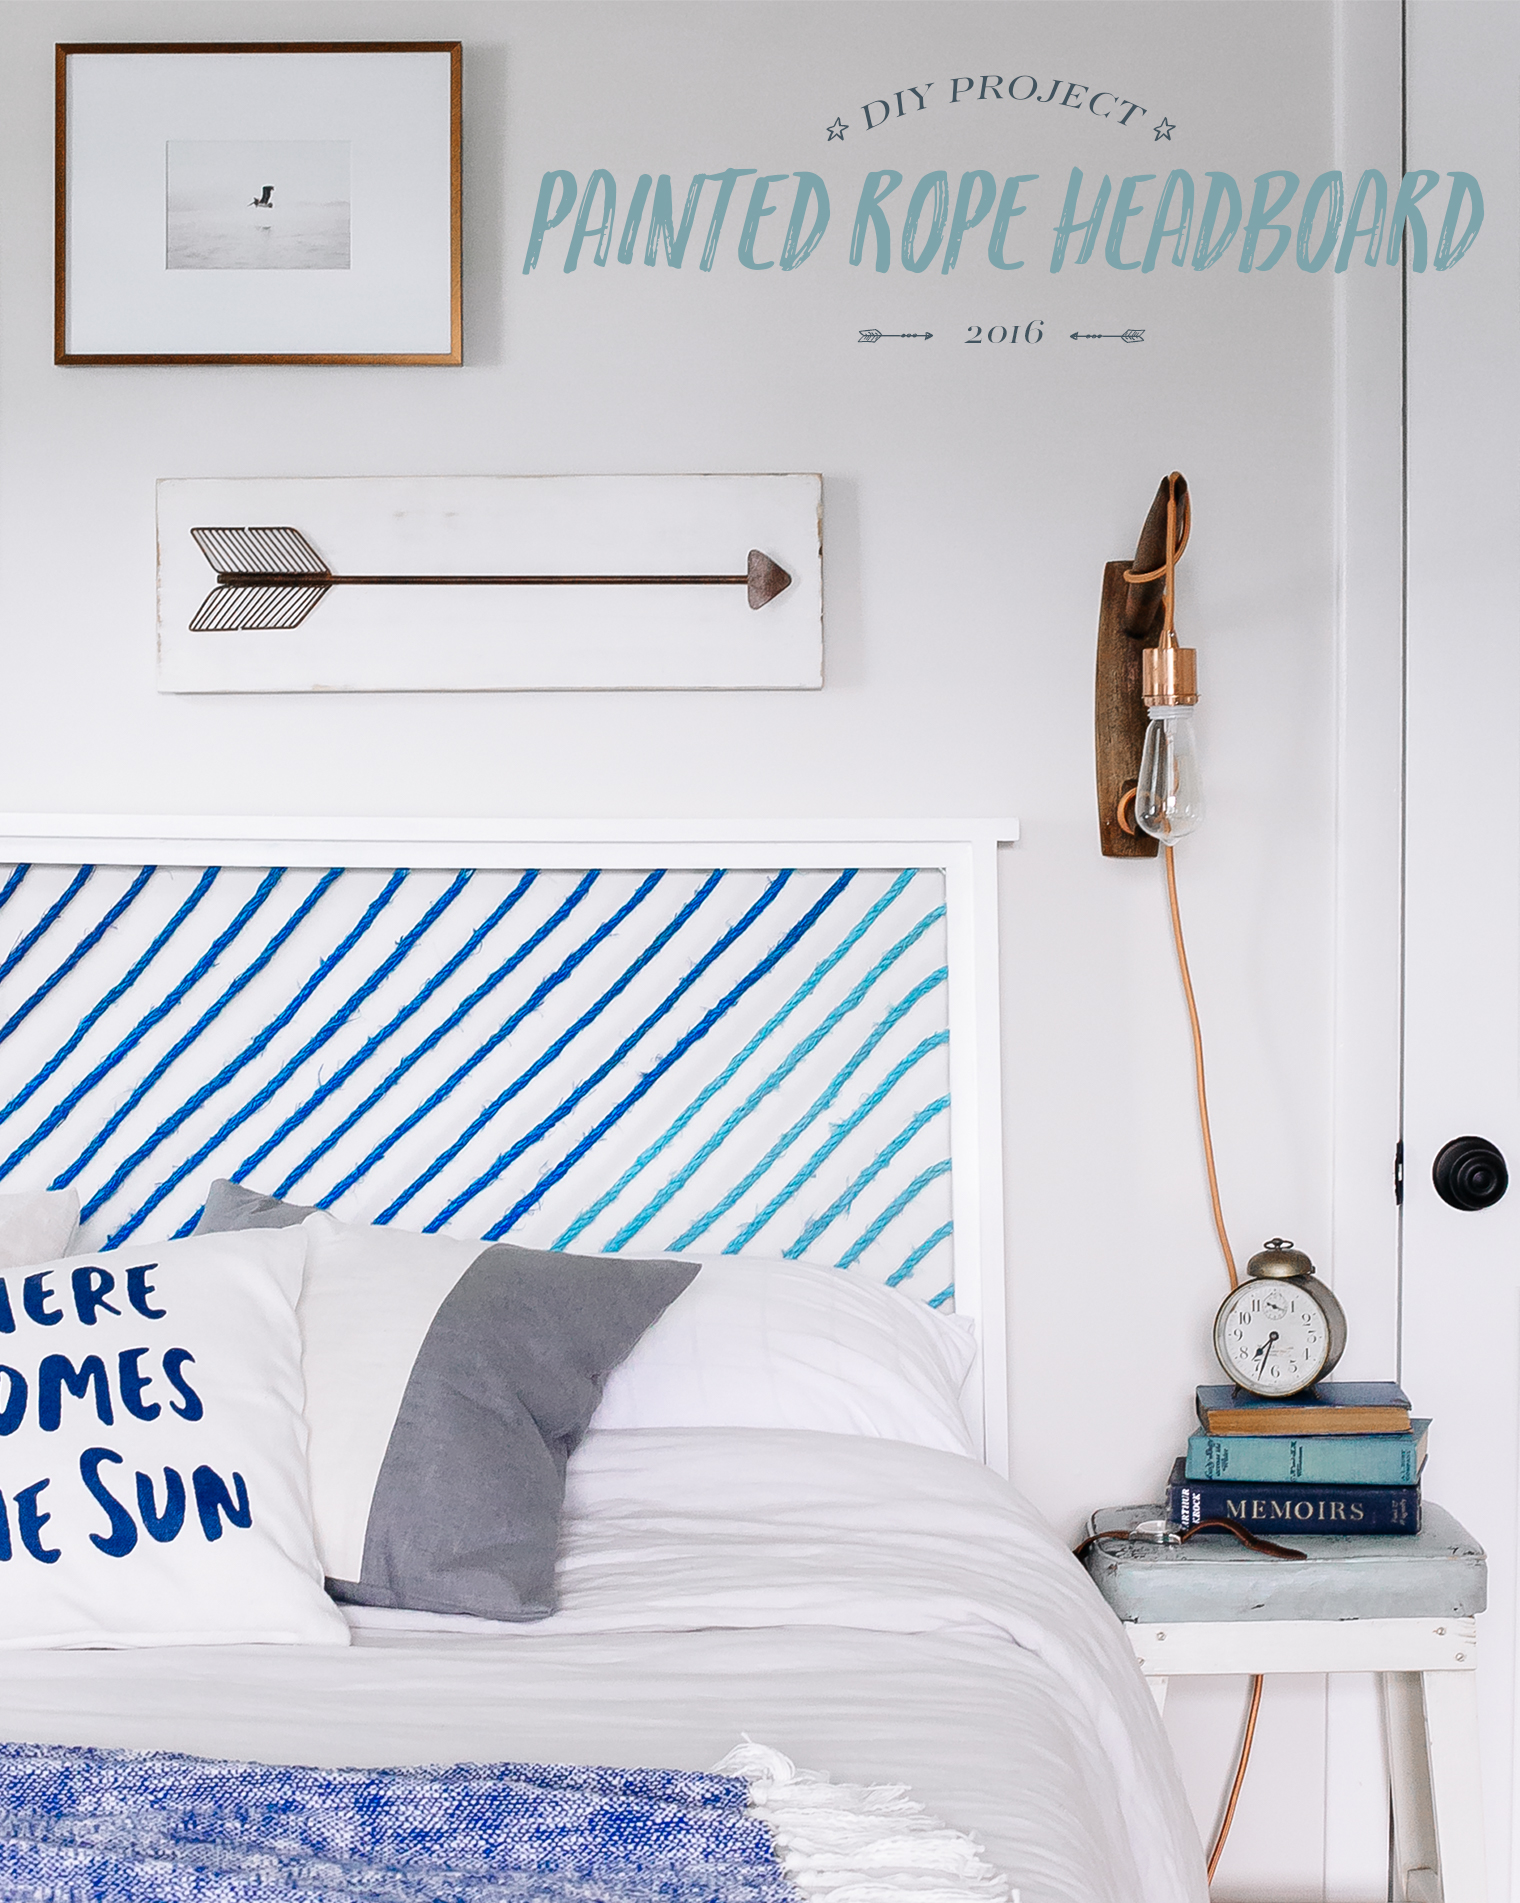
 I’m rounding out September with my favorite DIY project I think I’ve ever posted here on Bright.Bazaar – a DIY painted rope headboard! After sharing my American Flag Bench and DIY Painted Rugs projects earlier this month, I’m excited to post my third #MakeYouSmileStyle DIY I’ve made in collaboration with True Value – this unique and colorful DIY painted rope headboard! You may remember many, many apartments ago when I was still living in London how I upholstered a headboard in an ombre fabric? Well, today’s DIY headboard project shows how you can not only build your own headboard frame, but also create a colorful and graphic ombre effect by painting rope to fill the frame. You guys know the drill: click through after the jump to read the how-to and see the finished DIY painted rope headboard!
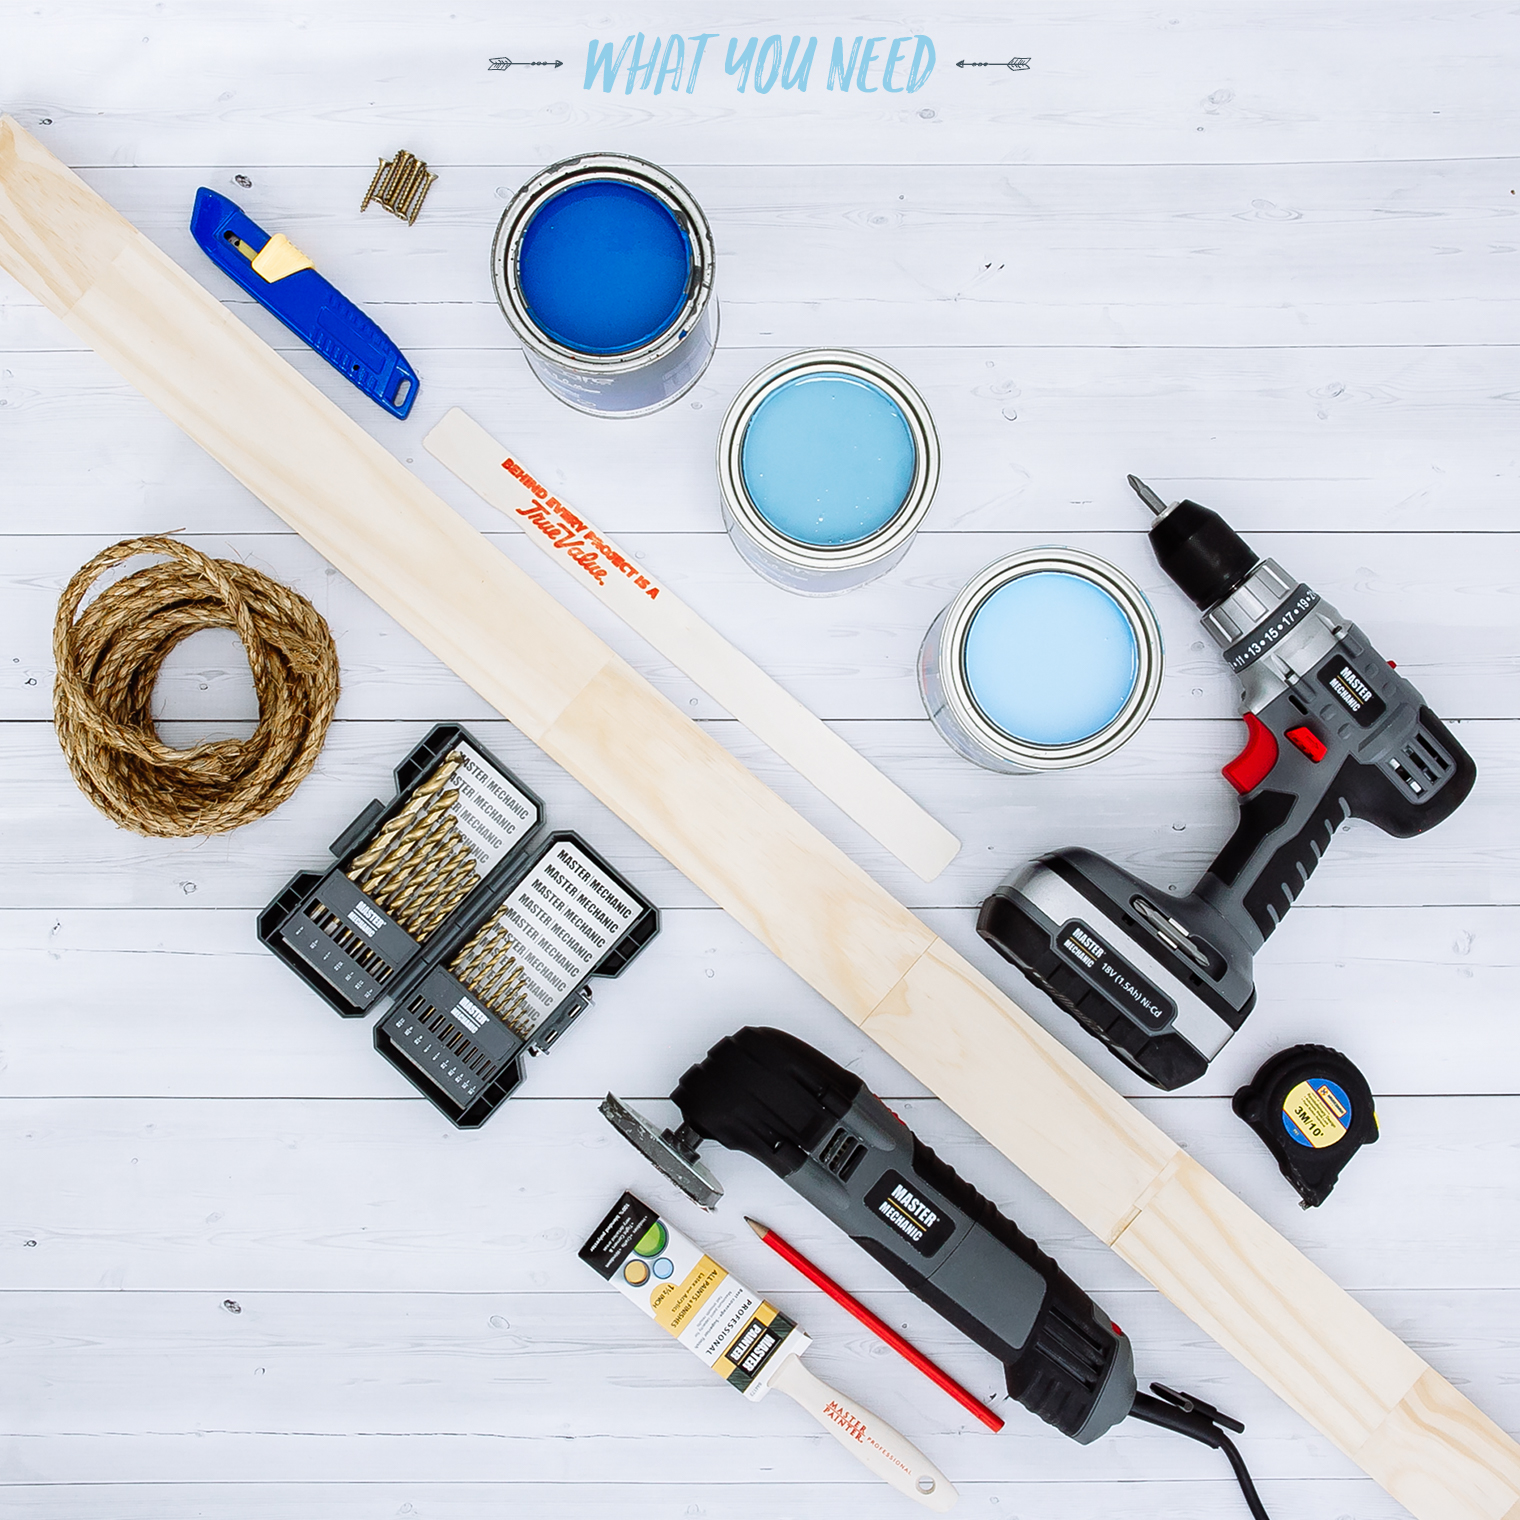 WHAT YOU NEED
– EasyCare latex paint
– Utility knife
– Wood (Poplar works great and is an affordable option)
– Rope
– Master Mechanic oscillating tool
– Master Mechanic cordless drill
– Paint brush
– Tape measure
– Wood screws
– Drill bit
– Super glue
 STEP-BY-STEP
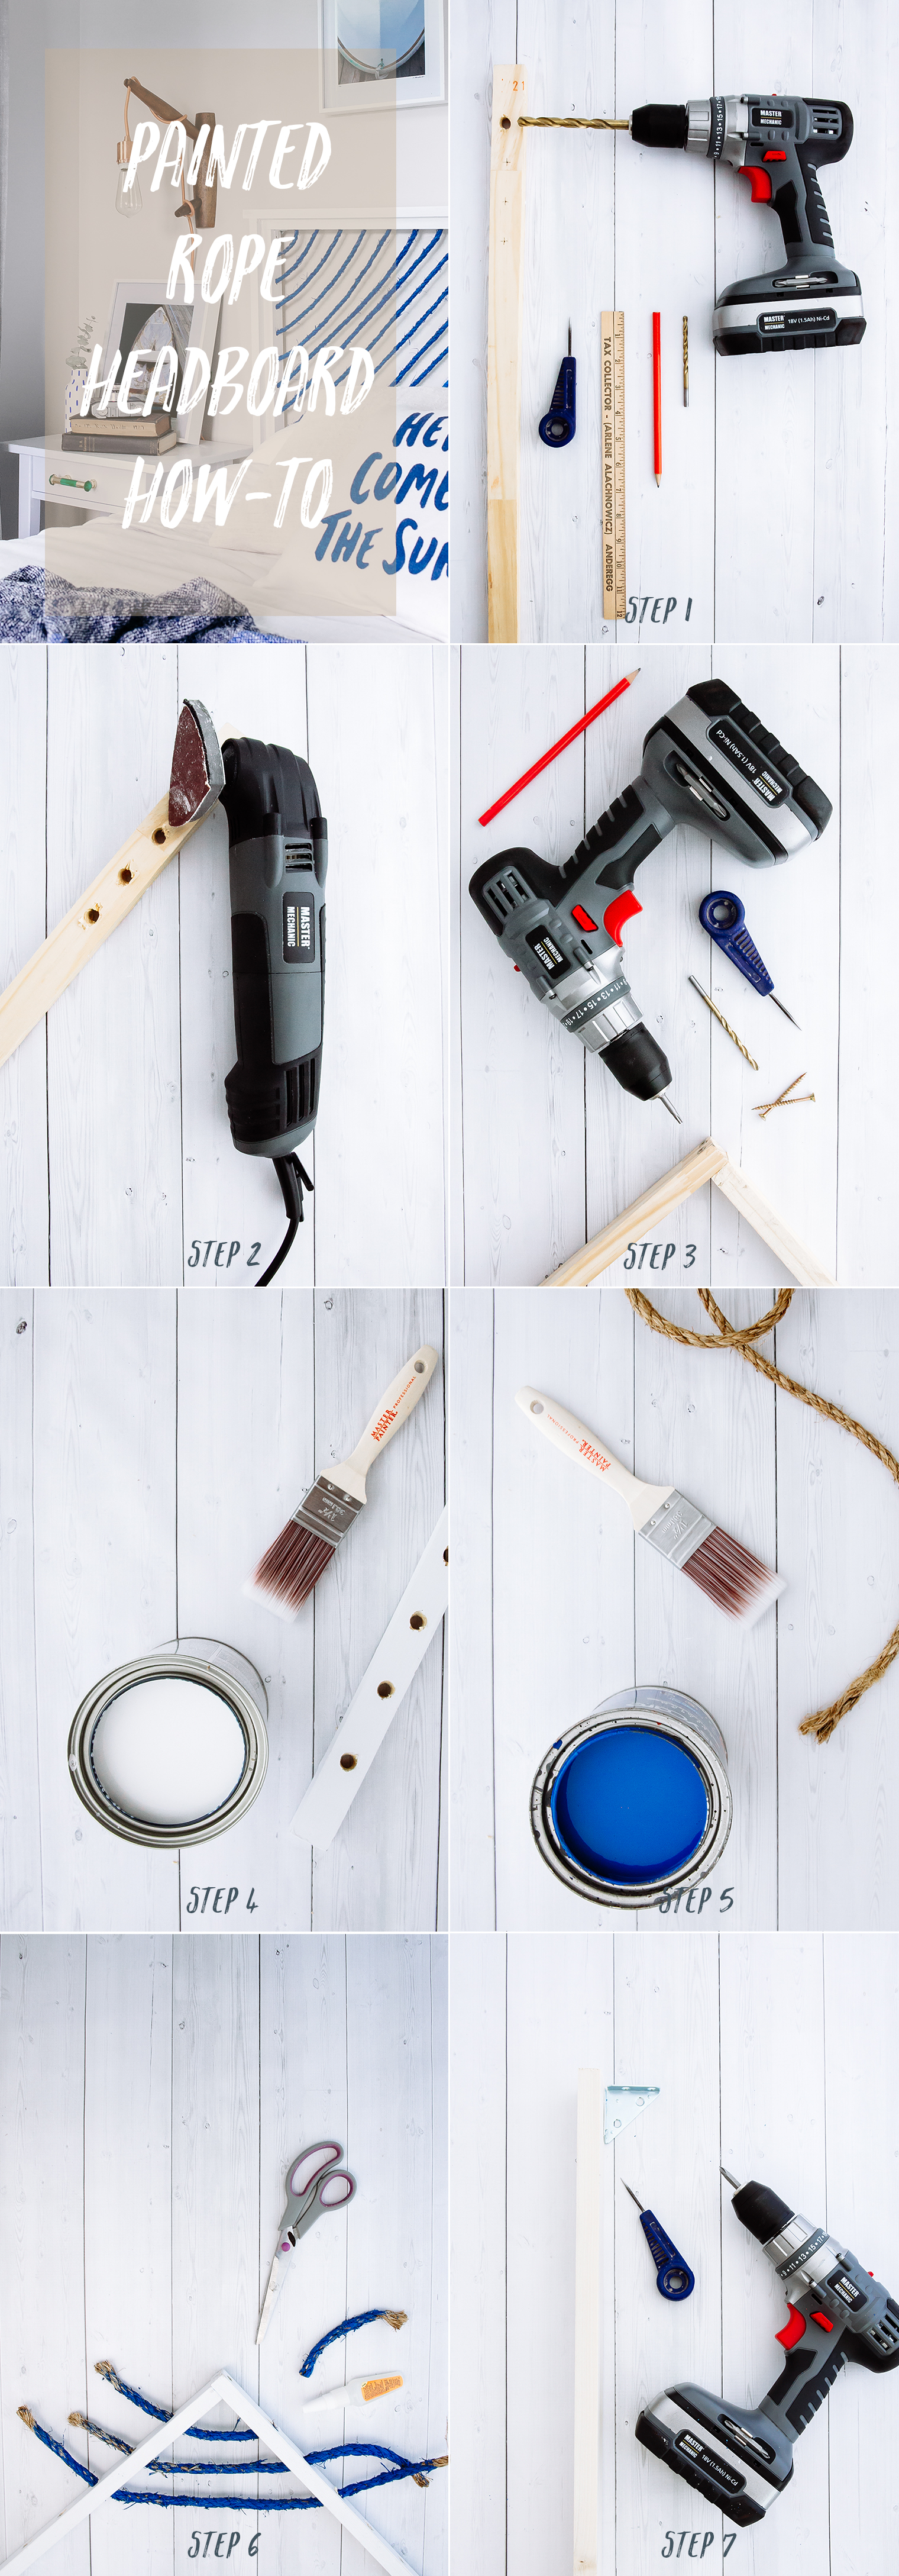
Step 1: Start by building your inner frame for the headboard. I sourced four lengths of wood at a True Value store where I also had it pre cut to size. You will want to have your wood cut to the size of your individual bed. For this post, I made a headboard to fit a standard Full sized bed, which is a headboard 54 inches wide and 47 inches. With the fours piece of wood for your frame ready (two sides, a top and a supporting middle bar), mark and drill holes for the rope to be threaded through along all four pieces. Again, this will vary depending on the pattern you wish to make with the rope, from straight lines to angular or random. For my Full sized headboard, I wanted to go for angular parallel lines to emphasize the ombre fade of the painted rope from dark to light. To do this, I drilled holes two inches apart starting in the top left corner and working out from there across the top and left-hand side, then along the bottom and down the right-hand side, until you reach the bottom right corner. For my rope pattern, I drilled the holes at 45 degree angles to help make the rope ‘sit’ at the correct angle once it was threaded.
Step 2: Clean up the drilled holes by sanding the wood for the frame.
Step 3: Use wood screws to join the inner frame together. For extra support, you can also use corner braces.
Step 4: Paint the frame with white paint.
Step 5: Roughly lay your rope over the frame as though you were feeding it through the holes, and then cut each one ensuring you leave some excess on each length of rope. Leave the lengths in piles per the colors you plan to paint them. For example, in my headboard you will see that I had three colors, making the rope go from dark blue to light blue creating an ombre effect. With the rope cut to size, paint each length the desired color and leave to dry.
Step 6: Feed the rope through the holes in your frame by feeding the rope through the holes from the inside of the frame to the outside, as this will prevent any damage to the painted rope. Next, cut the excess away and seal the rope in place with super glue.
Step 7: Finally, to give a professional finish and add additional support to the inner frame, you can build a larger outside frame. To do this, buy three lengths of wood that are three times the width of your inner frame but the same thickness. Have them cut to length per your individual headboard size. Per the directions for the inner frame, build and paint the outside frame and then use wood screws to attach the inner and outer frames together. As per a store bought stand-alone headboard, you can then attach the headboard to your bed frame by screwing the legs of the DIY headboard to the metal base that supports your mattress.
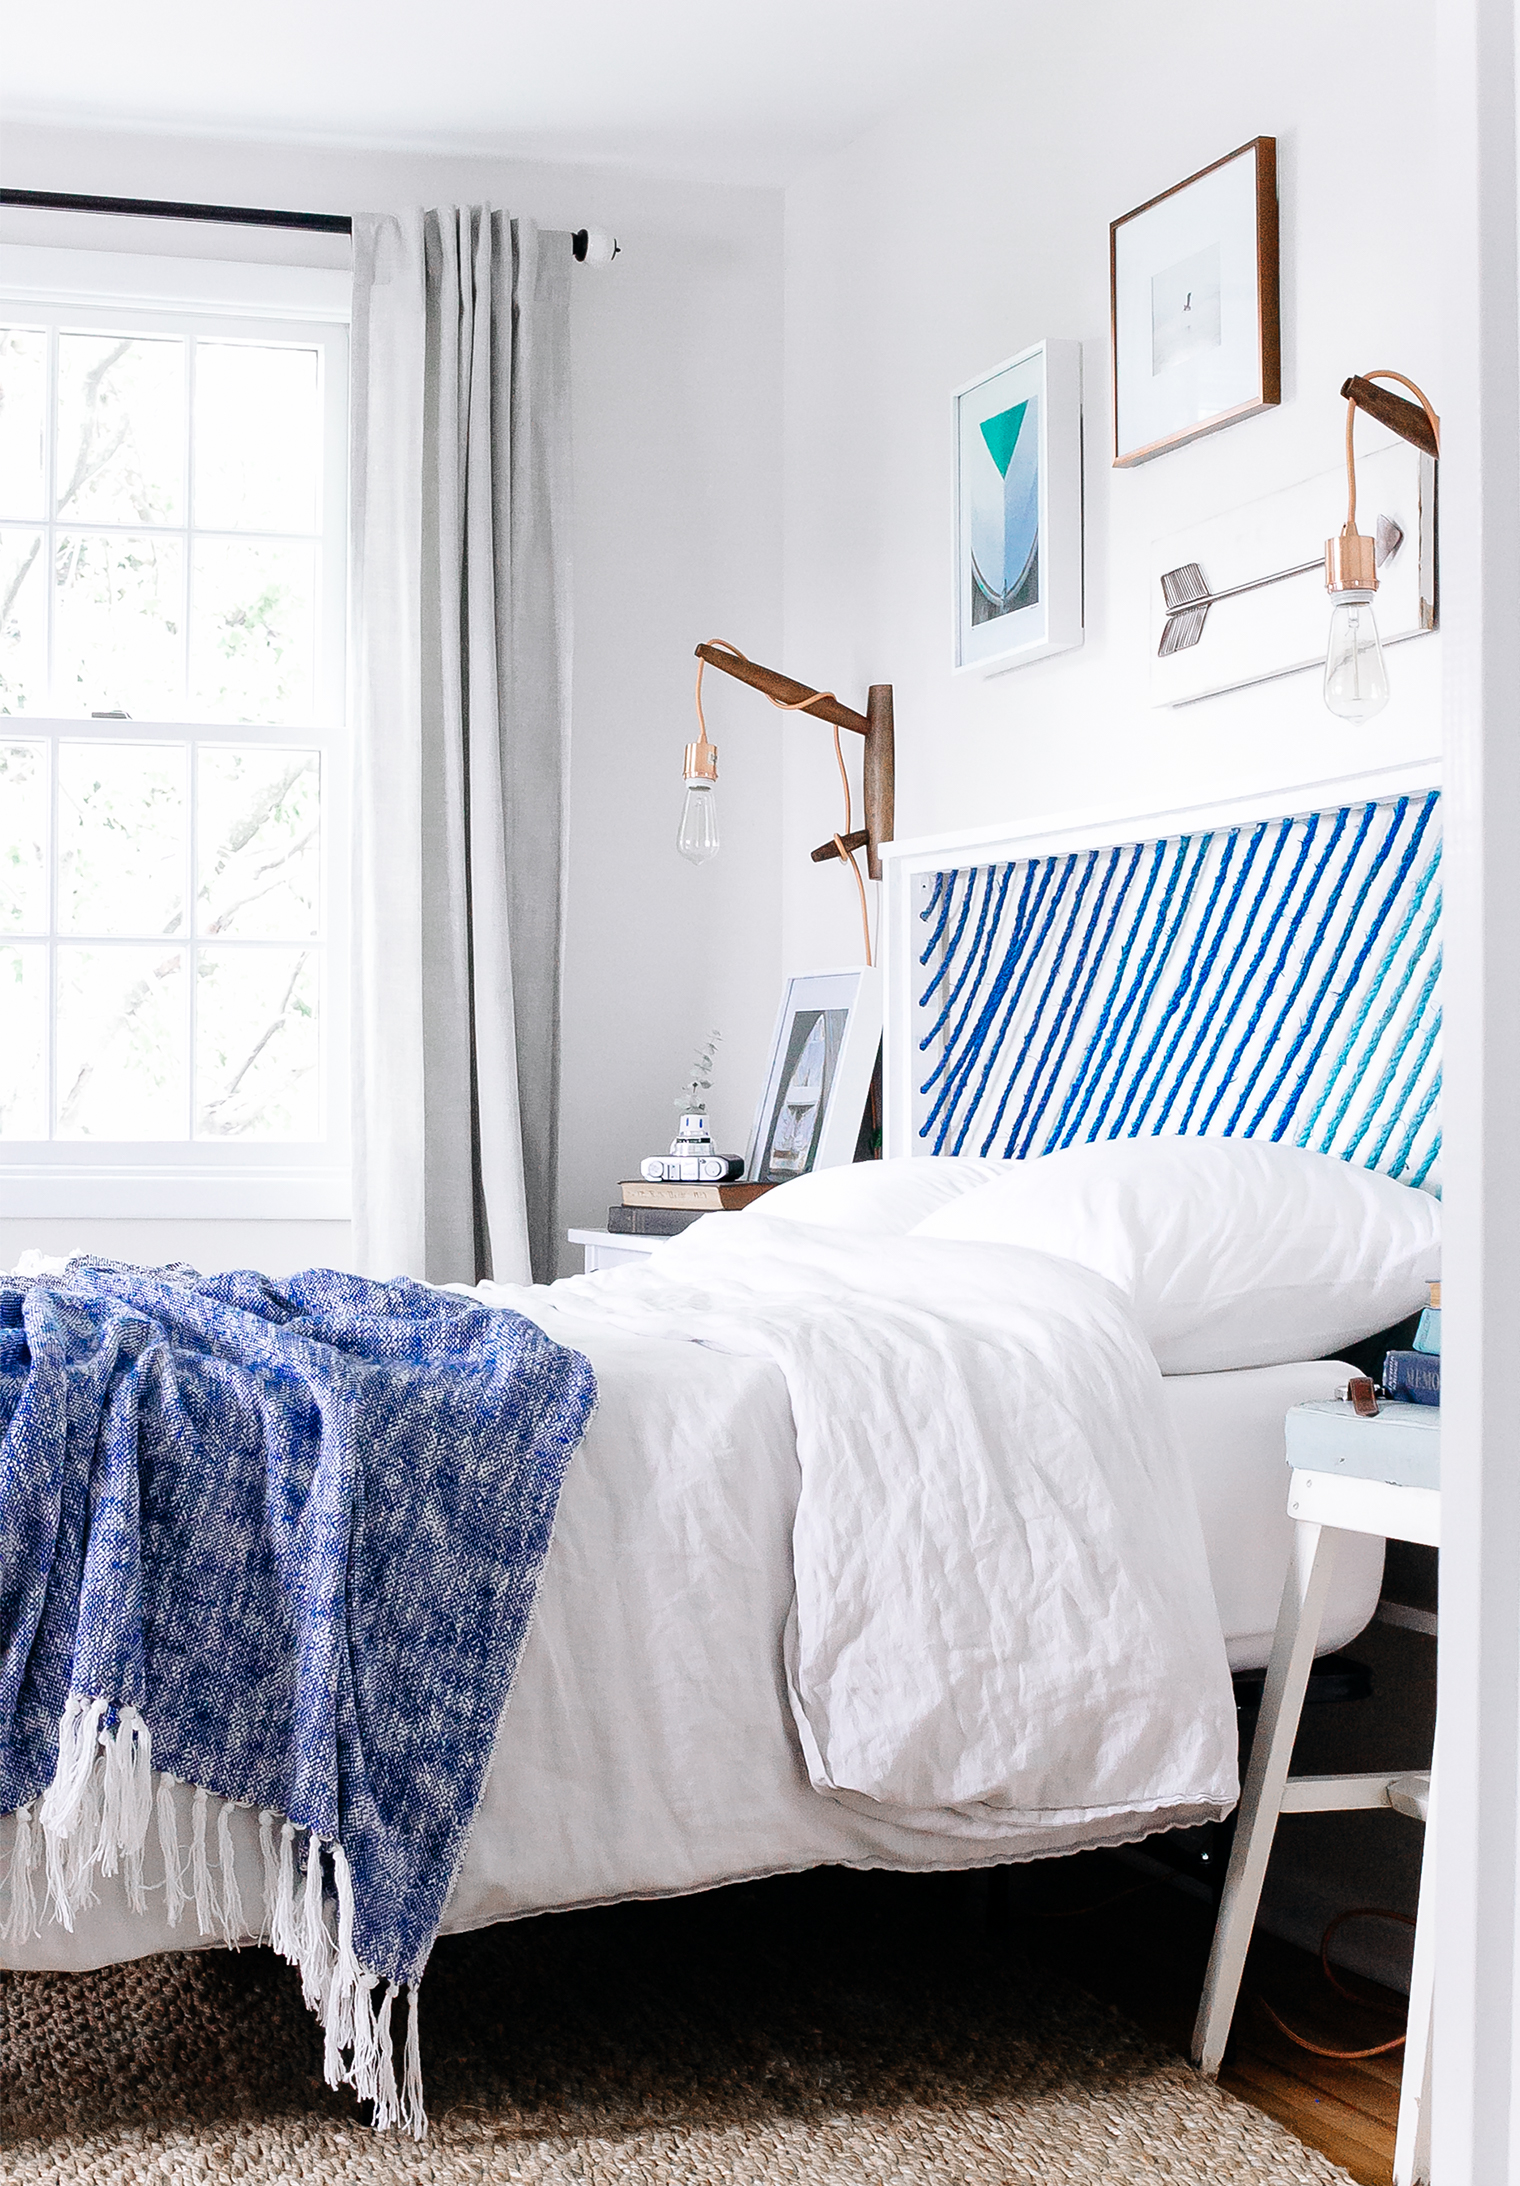 With your headboard made and in place you get to kickstart the really fun part: styling the bed to match your new look bed! I really wanted to keep the ombre rope headboard as the centerpiece and statement feature of the space, so I dressed the bed in washed white stone linens and accented the rope color with a soft throw.
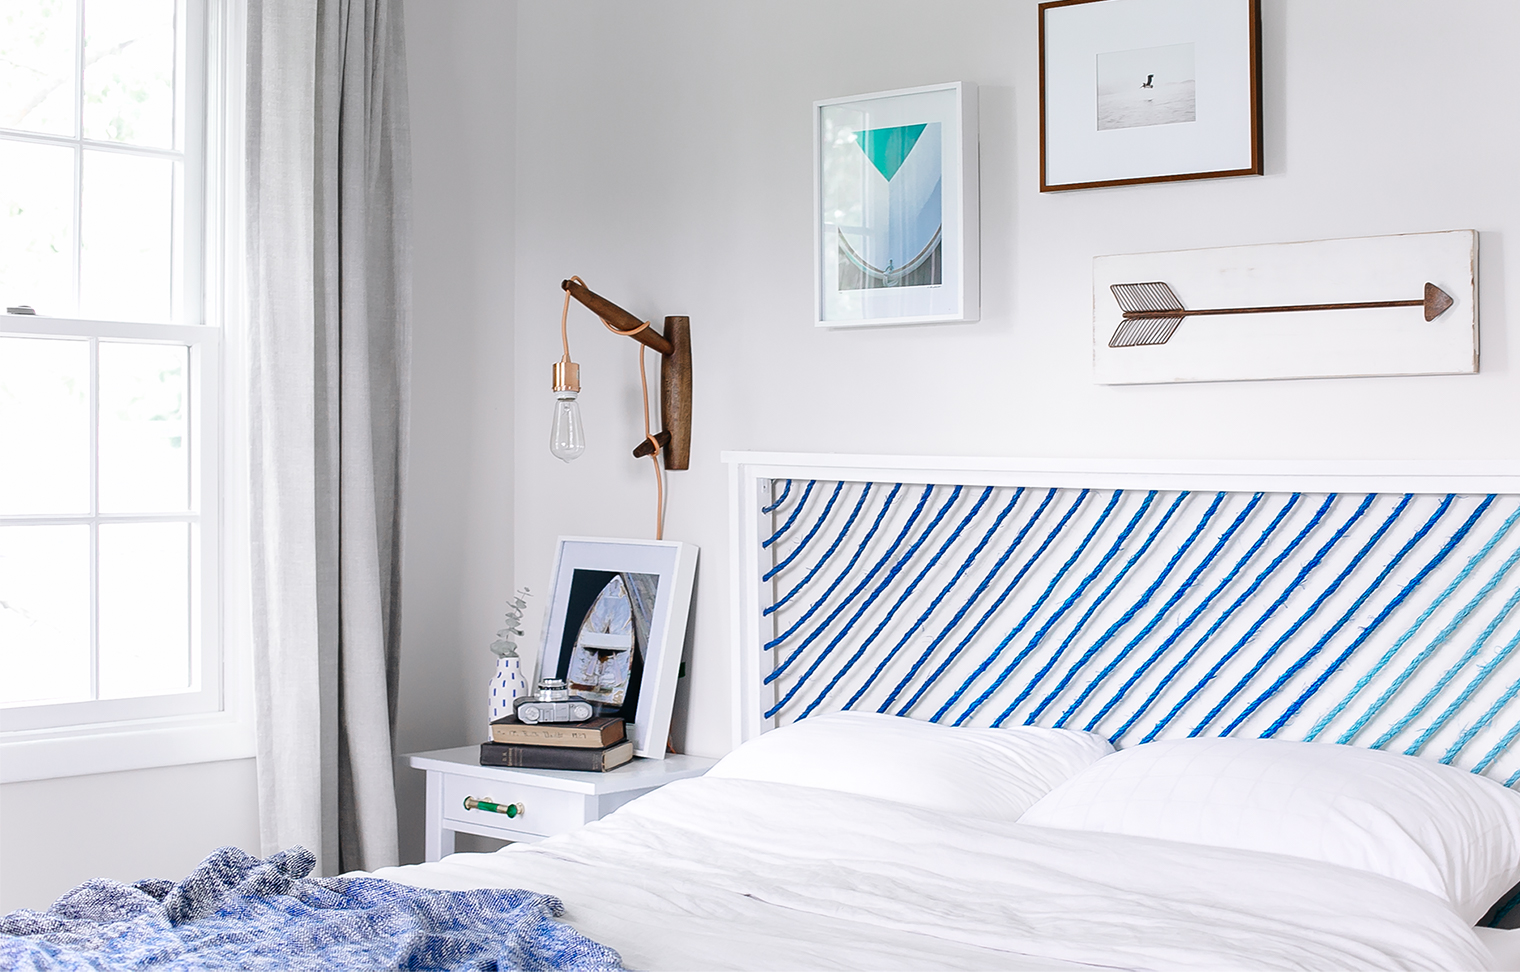 Next, think about adding decorative pieces that will help add to the wow factor of the headboard. For example, try hanging a trio of artworks that help continue telling the story of the space. This space was designed to be a colorful yet restful coastal bedroom scheme, so I used nautical prints and natural elements such as weathered wooden textures to help tell that design story.
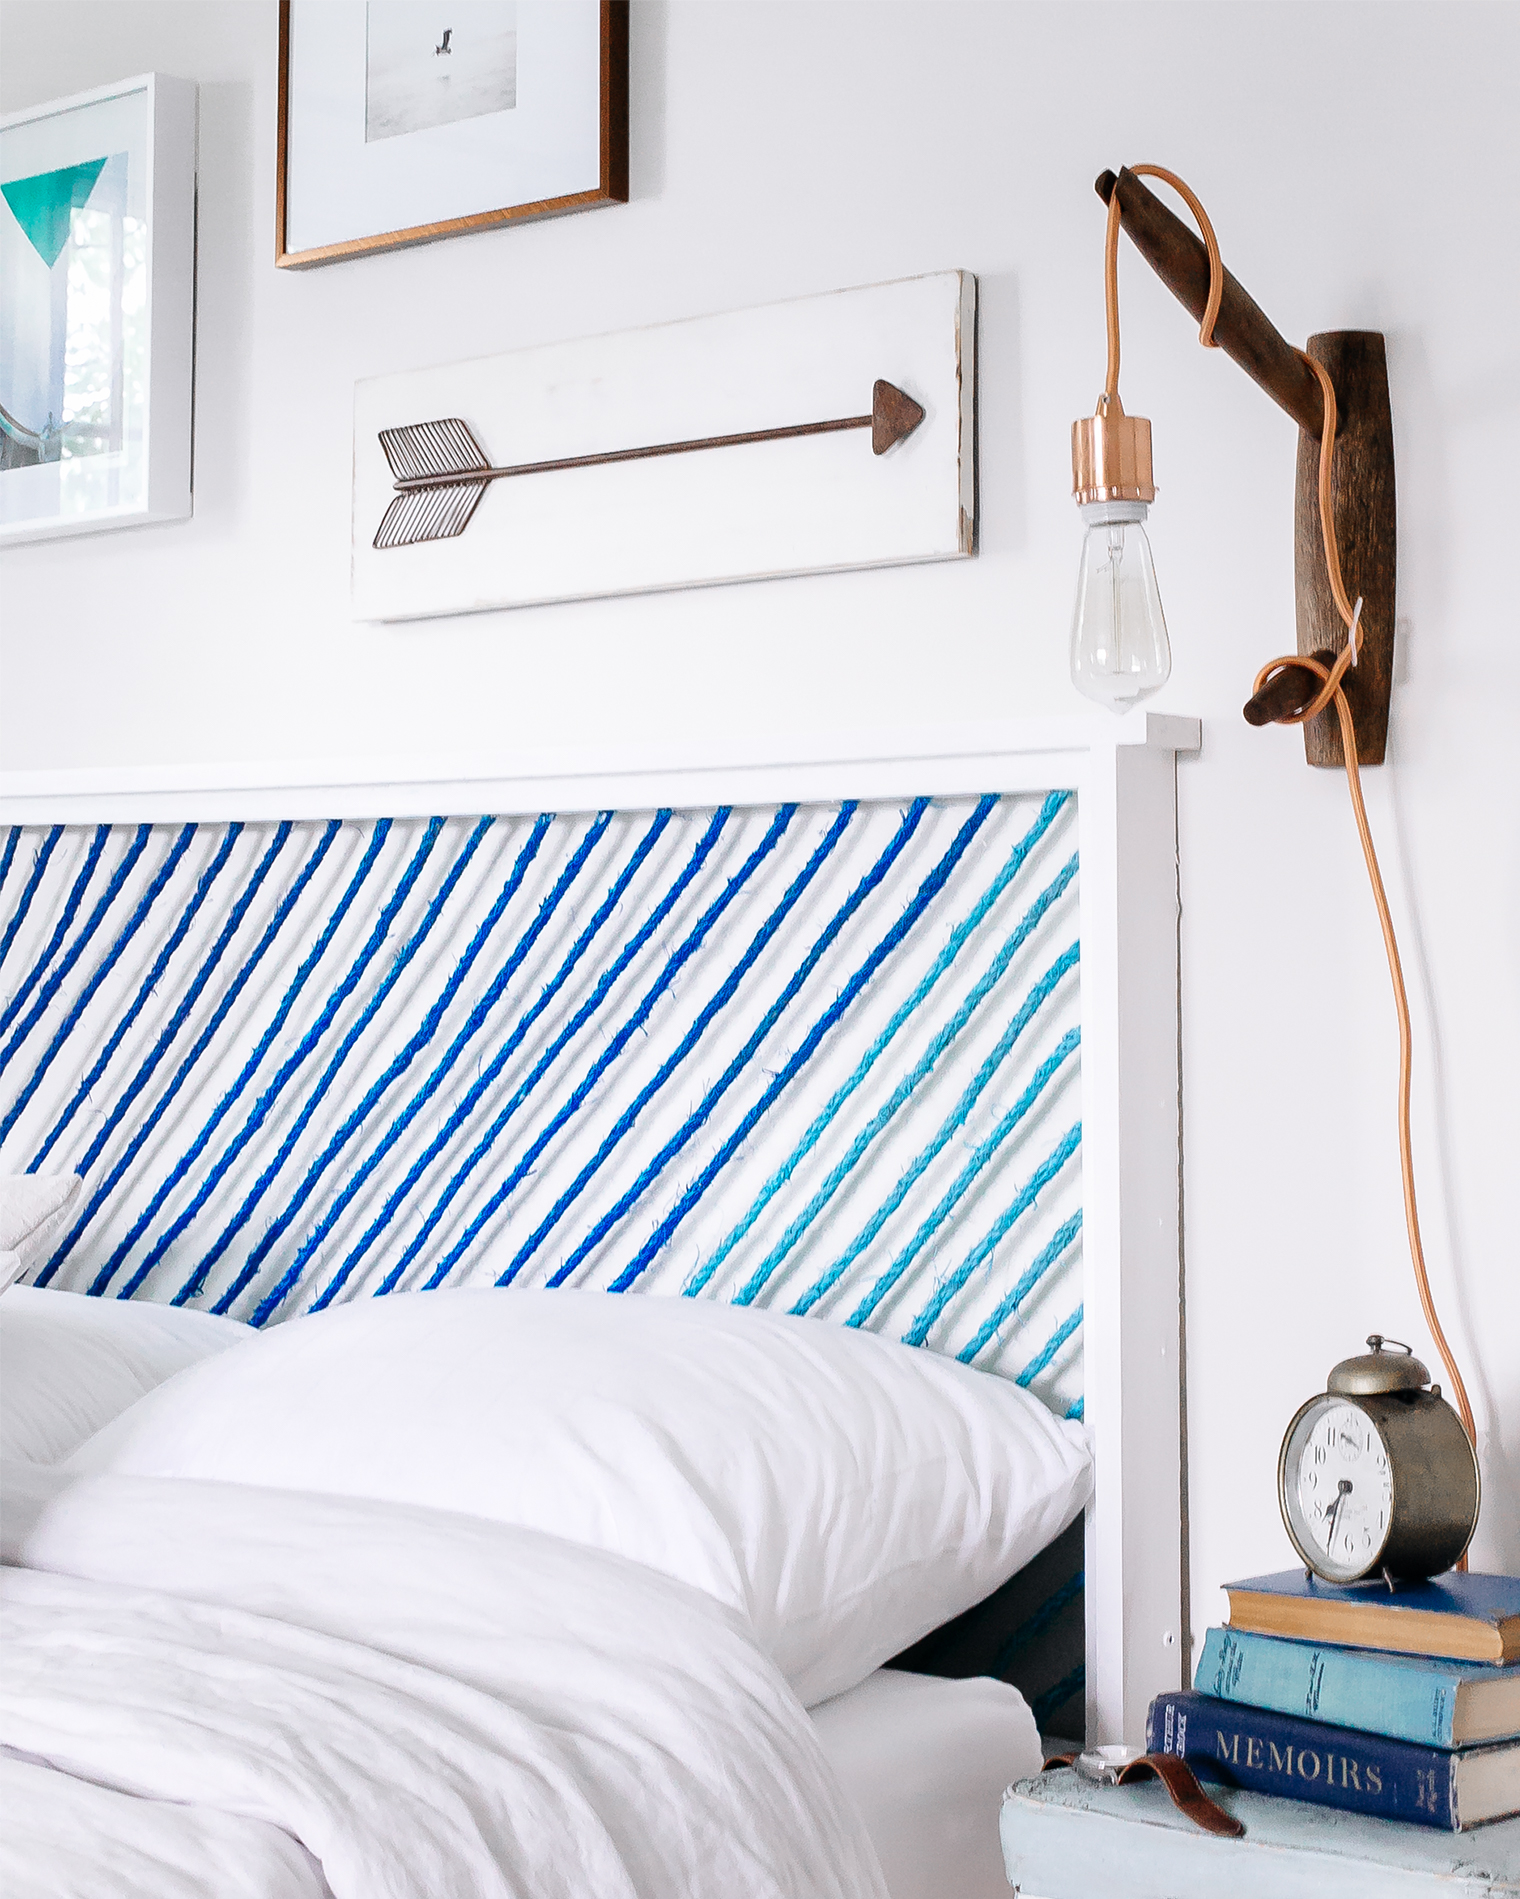 Add emphasis to the rough texture of the rope by contrasting it with opposites – a metallic wall scone and linen bedding work really well at achieving this stylish look.
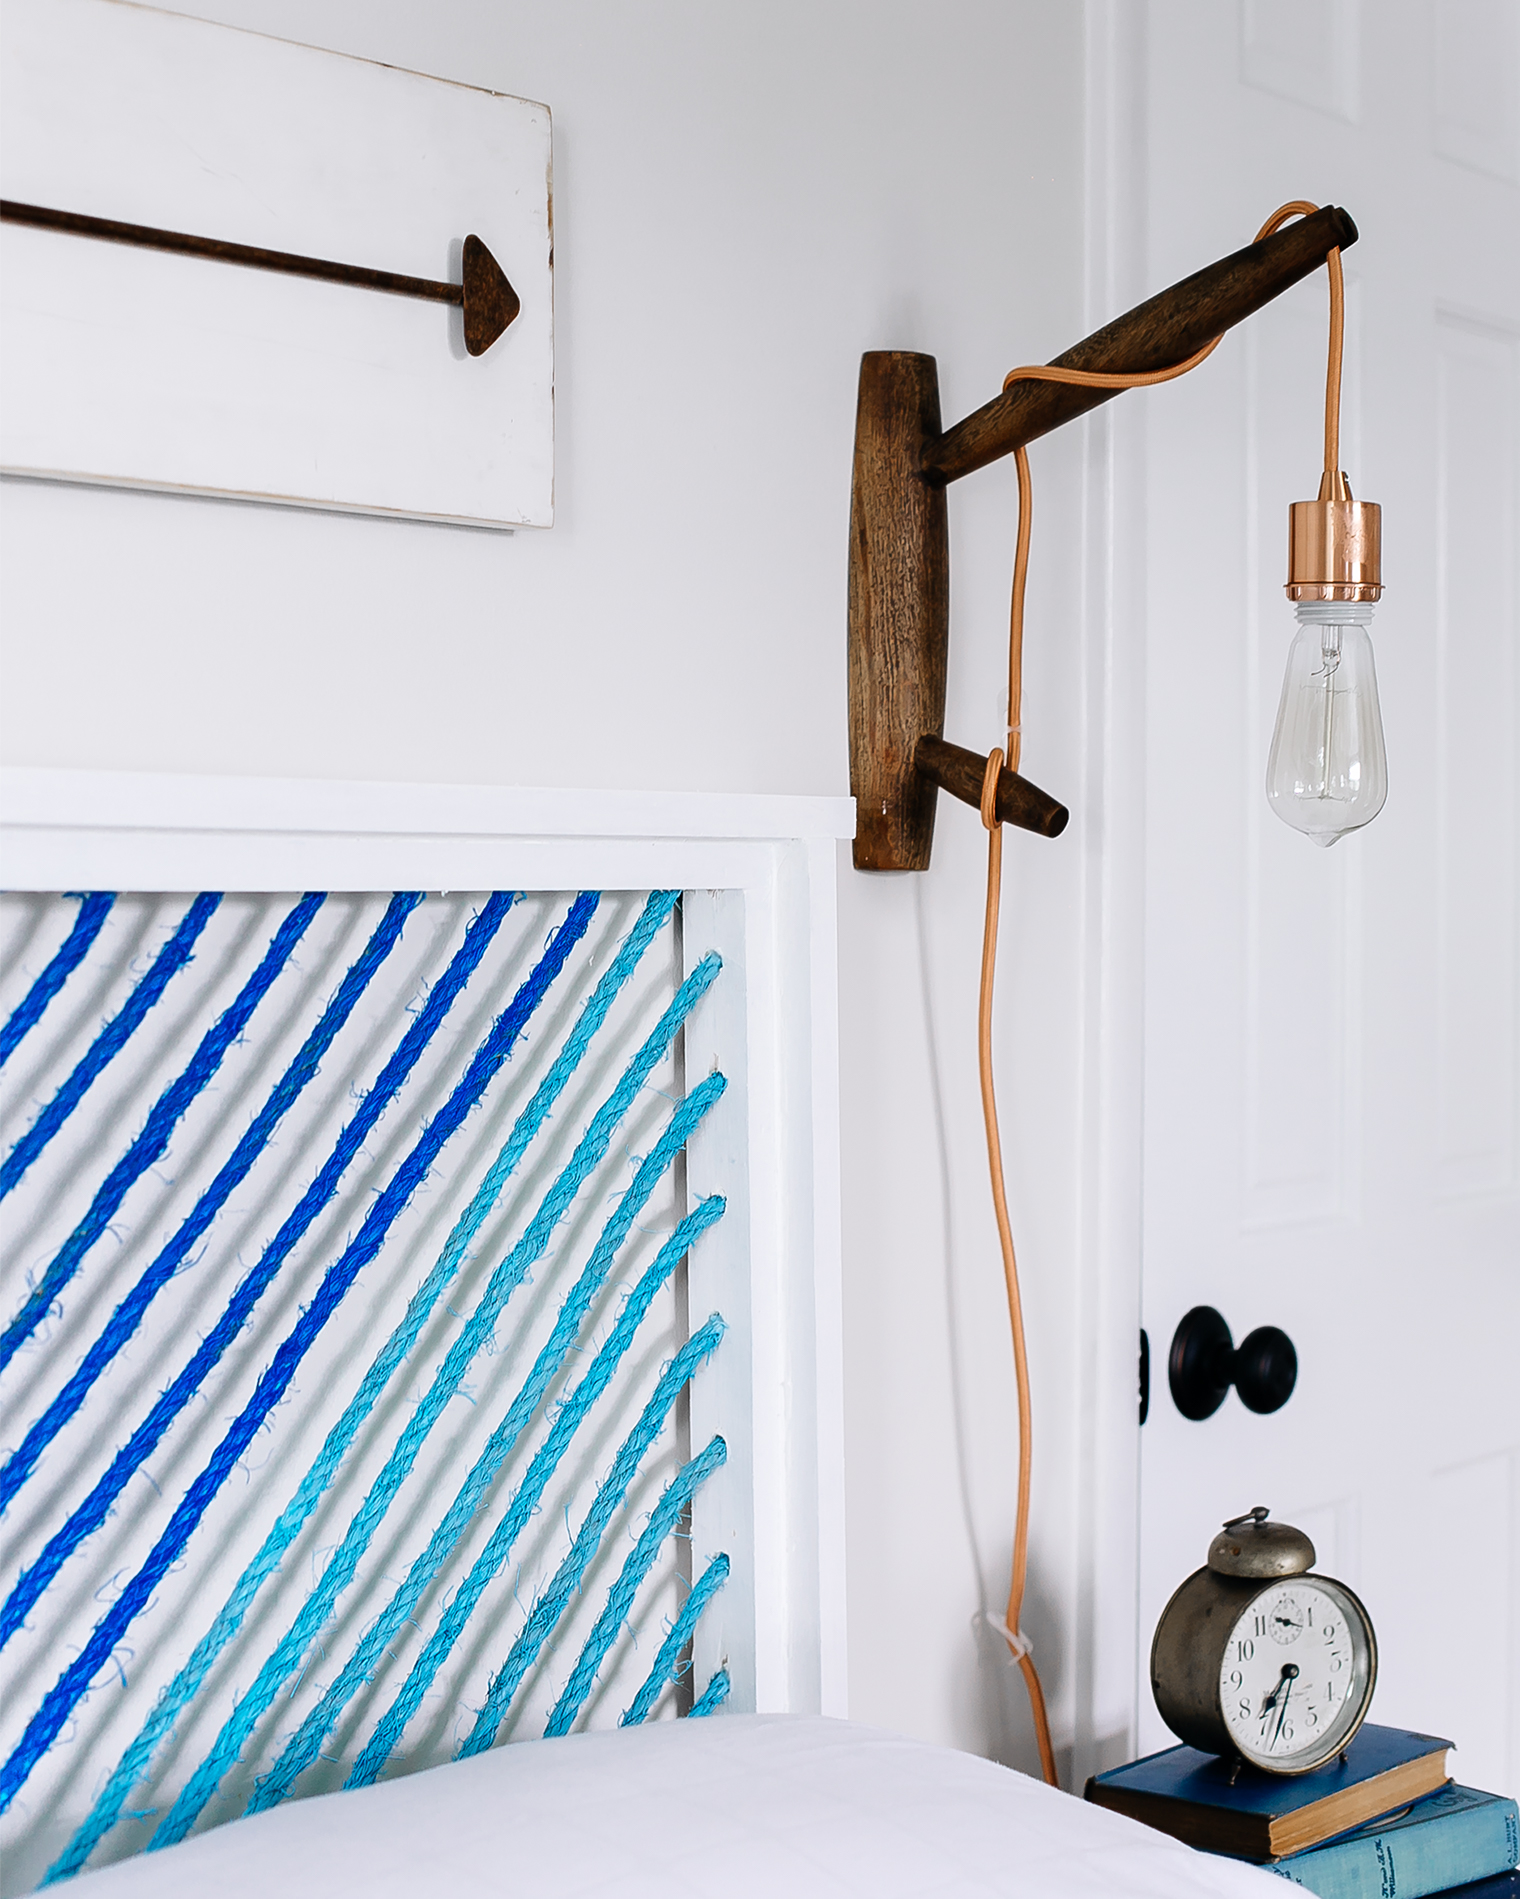 The best part about this project is that you can customize it to match your personal taste and existing decor. So, if blue isn’t for you, why not try this project by using another color instead? I think green or pink would work just as well as blue did!
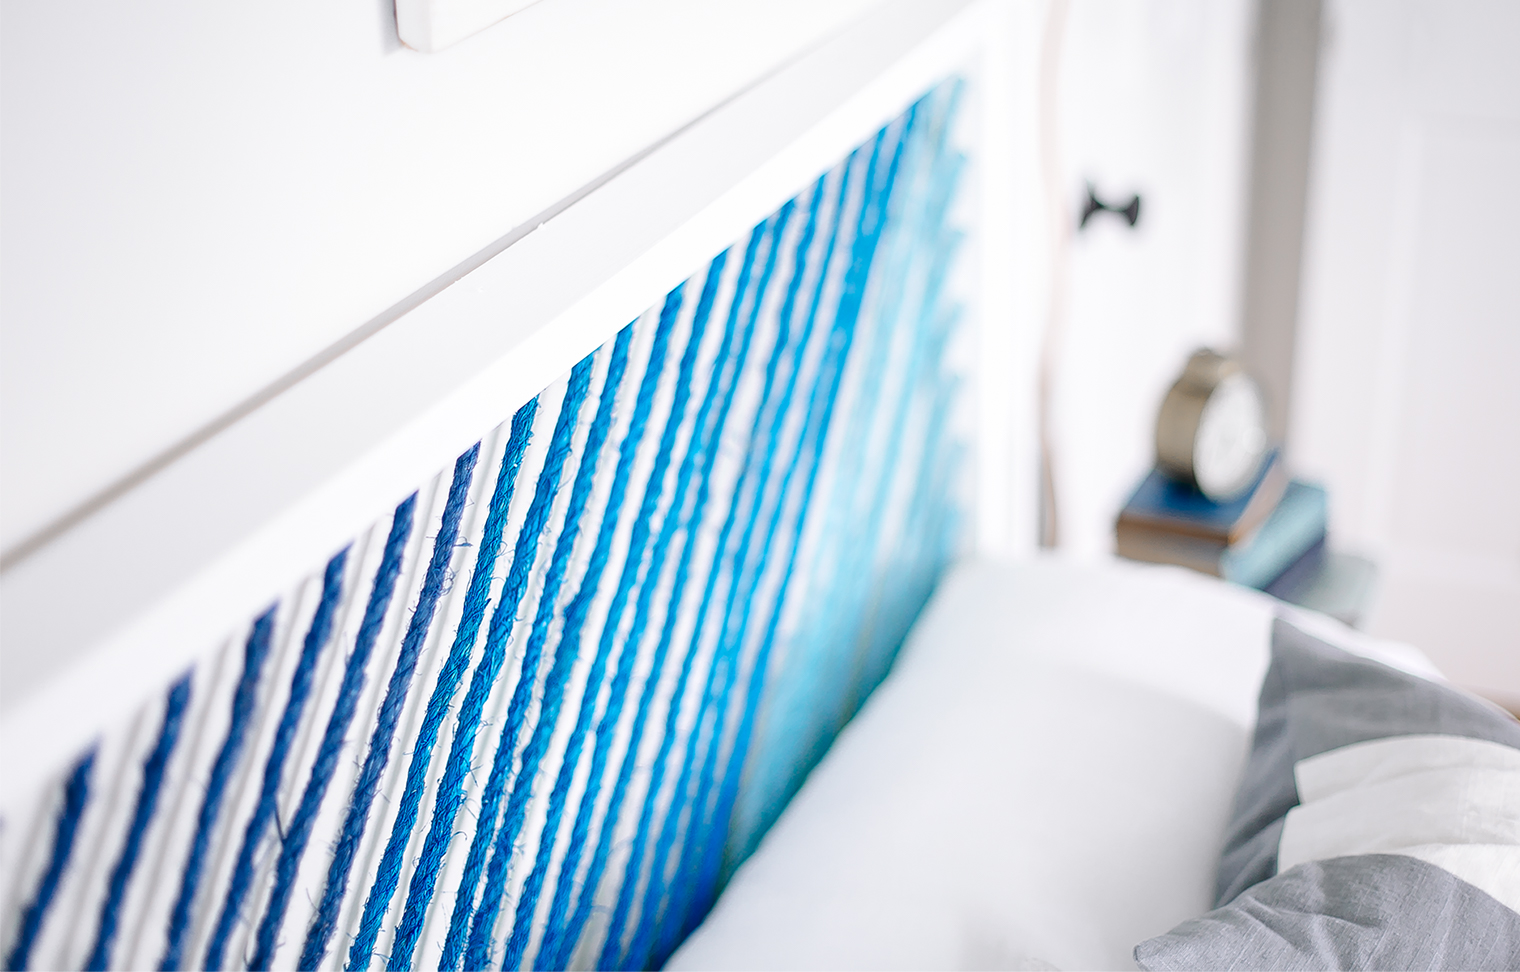 I hope you enjoyed this DIY painted rope headboard project as much as I did putting it all together! Have you ever made anything with painted rope? If you were to do this project, what color would you paint the rope? Don’t forget to check out True Value on Facebook, Twitter, Pinterest and Instagram, or visit TrueValueProjects.com for more DIY ideas and projects!
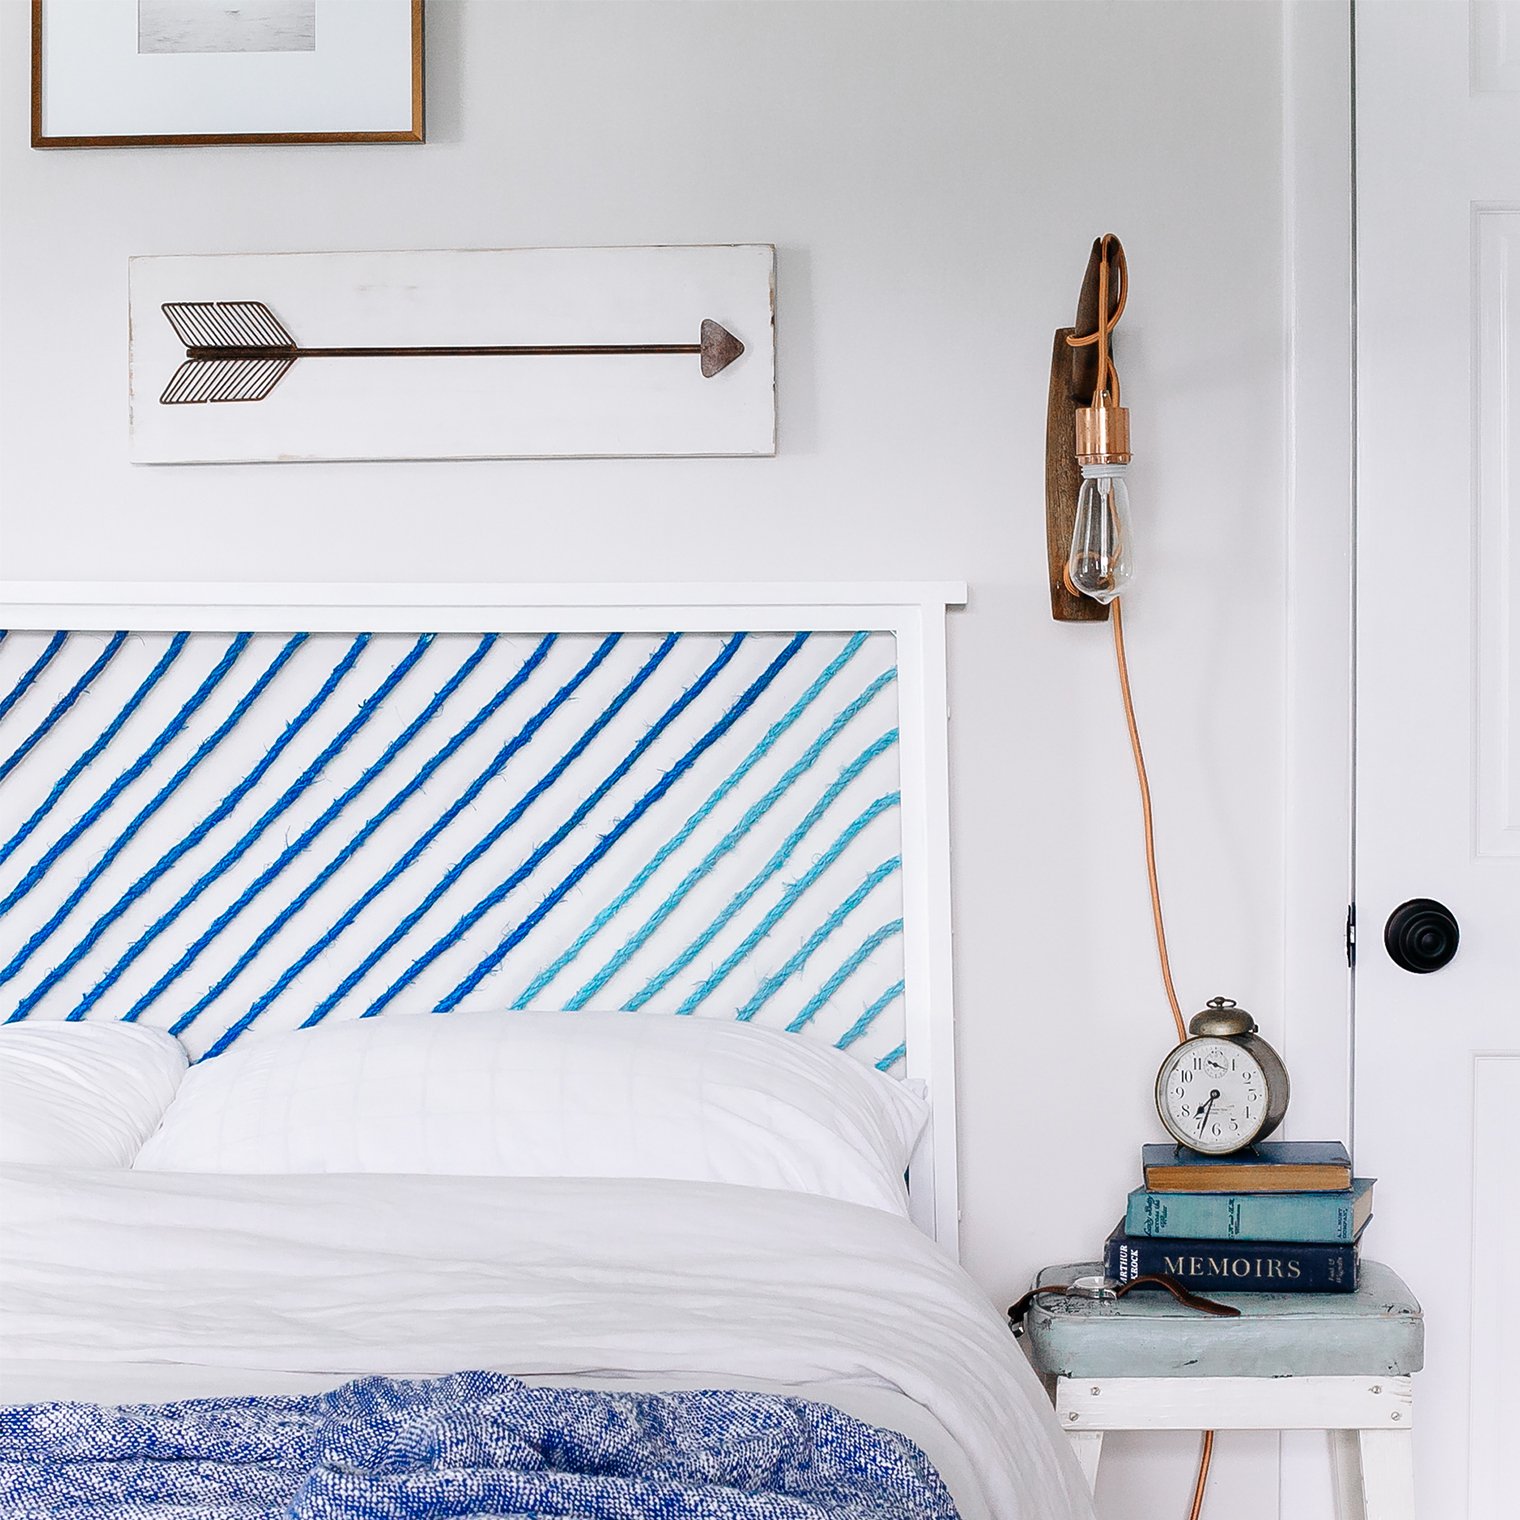 // Creative direction, styling and photography by Will Taylor | This is a sponsored conversation written by me on behalf of True Value. The opinions and text are all mine.


17 Comments
Never would I ever have thought to do this!! You are a smart cookie!!!
@Jenna – Thank you! It was such a fun project to work on and I love how the headboard looked in the space. So relaxing, isn’t it! 🙂
Awesome job bro.
@Nick – Cheers!
Hi Will, I always enjoy your DIY posts but this has to be my favorite! The rope is so unexpected but works beautifully in the room especially with the ombré color choice. Well done! Thank you for sharing it with us. Take care, Barbara. xoxo
@Barbara – Oh, thank you so much! Such a lovely comment! 🙂
Love love love this
@Jo – YAY! Thanks!
That’s an interesting idea, very nautical!
@Krafty Fix – Thank you!
I also really like the light bulbs on either side. What is the piece of wood the chords are wrapped around?
@KSutt – Walnut wall scones!
Looks great and a different way to create a nautical look in a more contemporary way, Great Wall lights too!
@Glyn – That’s just the look I was hoping to achieve so that made me smile. Thank you!
Pingback: Weekend Reading. - The Stripe
This is ingenious! Can’t wait to give this a try myself, though I think I might try to make the ropes look a bit more like jungle vines to match the dark green tones of my room. Thanks for the guide!
Pingback: 20 Awesome DIY Headboards For A Cozier Bedroom - The Mommy Mess