

Step One: Planning and Costs
Finance
Here is my public service announcement: pools cost quite a lot money to start with and then to run, so think really carefully about adding one. Our house is located in a beach town where many of the buyers are weekenders who are almost always are looking for a pool, so it adds significant value to your home. That said, often pools don’t add any value to your house (as people see them as a burden) – so think carefully if you aren’t located in a weekend/vacation town. In terms of ongoing costs our weekly pool maintenance, all in including chemicals and labor, is around $70 USD a week when it’s open. The pool is open from Mid May to Mid September. While the pool is open you also have to run the pool filter for 10-12 hours a day, which obviously increases your energy bill. Lastly, your tax bill may increase as your house is considered to be more valuable.
In terms of one-off costs, the main ones are the pool installation, the pool equipment (filter, pump, heater, chlorine generator, remote controls), building permit costs and the electricity upgrades. I will talk about pool installation costs later. Pool equipment is quite standard and you can find prices online. We have Hayward equipment, which is one of the leaders and have been very happy with it. You will likely go with the brand that your contractor likes the best; I would be wary of contractors who select brands which have no name to them. Building permit costs you can find from your local building department; our village charges a percentage of the overall job cost. The final cost is electricity upgrades – I will be honest our cost was quite high because we needed a whole new sub panel and also need a lot of new wiring to the location of the pool equipment. In total it cost over $10,000 for the electricity work – for us we needed to do this whether we put a pool in or not, as we needed it to be able to run central air and multiple appliances inside the house, so the cost was kind of unavoidable for us but thankfully was part of the requirements for the main house renovation two years ago. However, if you are just putting in a new pool and don’t have any space on your electricity panel then be prepared to factor in this cost.
Position
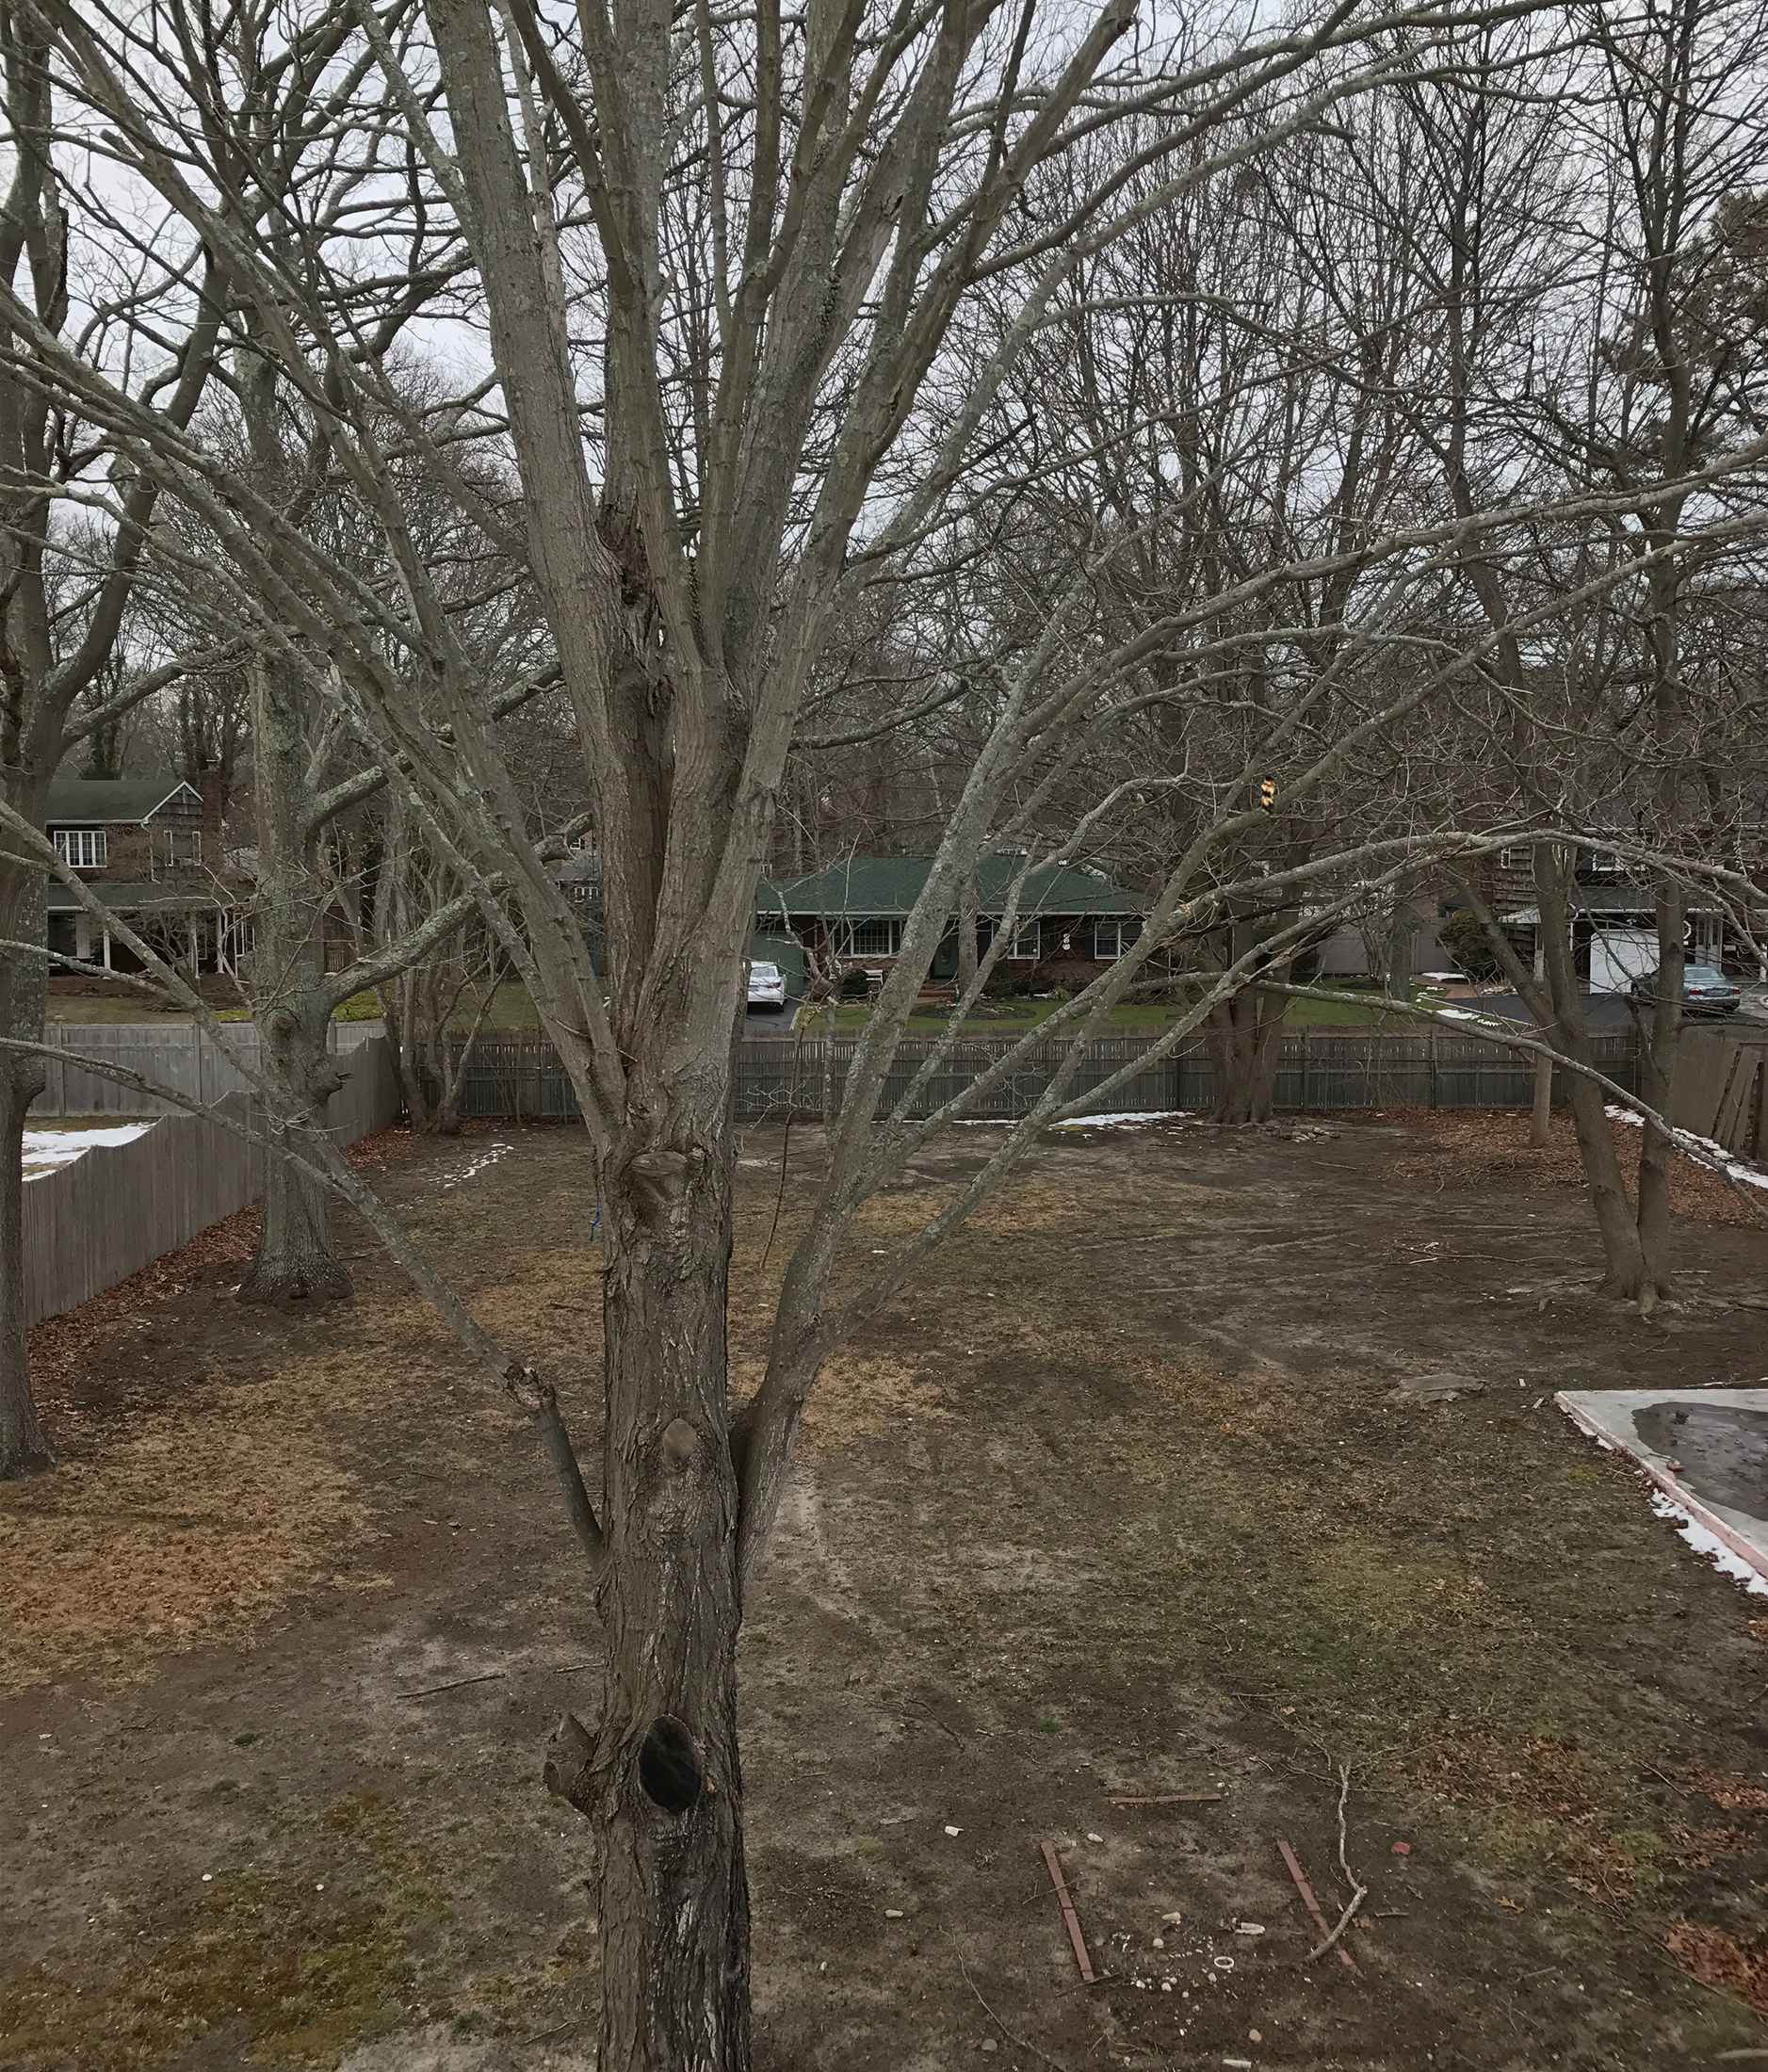
The next thing is to think very carefully about where to put your pool in your yard. We wanted a pool that was mainly in the sun. If we couldn’t get that, then we weren’t that interested as we didn’t want to be in a shady pool. This is just a personal preference so think carefully about what’s important to you as once it is in there is no going back! What we found really useful was using our Nest Cam to track the shadows across the yard throughout the day. With Nest Cam you can create a time-lapse so you can see quickly where the shadows land throughout the day to help you position the pool per your preference. Don’t forget that shadows change through the year, too. For us, we choose a spot that stayed in the sun all day by moving the pool further away from the house.
There will be municipal regulations as to where you can put the pool so be sure to check those out. You will also need to locate the pool equipment, the filter and heater – they do create some noise and look ugly, so think about where you want them. We put ours at the end of the garden which was a little more expensive for the electricity connection but we thought it was worth it so as not to ruin the relaxing experience by the pool, or the overall aesthetics of the garden. We have since hidden them further with hedging and now its virtually unnoticeable.
Step Two: Type of Pool
There are three types of in-ground pools. I’ll start with the most affordable and work up from there:
1. Vinyl pools
These pools are made from digging a hole and then lining it with cement (you can do steel but I was advised to never do that) then add a vinyl liner, which come in many colors and styles, With a vinyl pool you can create any shape you want and vinyl are typically the most affordable option. The biggest downside to vinyl is that they need replacing every 5-7 years and this costs thousands of dollars. Therefore, you need to factor this in going forward and it can affect resale. People like the soft feeling of vinyl as other types of pool can feel rough and hard to the touch.
2. Fiberglass pools
These pools are made in a factory to order and then shipped in one piece where a crane or truck unloads it into a pre dug hole. Fibreglass tend to be more expensive than vinyl because they have to be made and shipped. A big negative of these pools is that you can’t have any shape you want – they are made in a factory to certain sizes and shapes so you have to like one of the shapes on offer. However, the plus points are they are quick to get up and running. As it is made in factory to exact standards, the surface isn’t porous so you generally use a lot less chemicals than other types of pools. The surface should also last a lifetime: no changing liners or re-plastering the walls. Finally, people often like the softer feeling of fiberglass pools because you are a lot less likely to graze your skin on a step as it feels smooth rather than a rough stone or tile.
3. Gunite Pools
This is the most expensive and involves a hole being dug and then lined with cement and plaster lining. This process is very labor intensive and as a result is much more expensive. It also takes a long time to do. However, gunite pools are often seen as the most luxury type of pool. It’s important to know that the plaster lining doesn’t last forever and will have to repaired and restored periodically, which again is costly. As plaster isn’t completely impermeable gunite pools tend to require more chemicals than fiberglass pools. However, gunite pools are completely customizable and so can be any shape, which is great if you have a special shape in mind, want intricate features or a one-off design. Talking to contractors and people about pools, gunite is definitely seen as the gold standard in pools and super luxury homes that sell a million and up would definitely benefit from this type of pool.
Step Three: Process
I am going to share the process of putting in a fiberglass pool. We decided on fiberglass pool because we weren’t concerned with the shape. We have an oblong yard and so a small, simple and timeless rectangle pool was perfect for us. Cost was also a big factor for us: a gunite pool was going to be significantly more expensive than a fiberglass pool. As the fiberglass pool was only a few thousand dollars more than a vinyl pool and knowing we could use less chemicals, not need to replaced lining and that it would feel softer underfoot, we decided to go for the fiberglass option.
The process started with selecting our contractor. We sought a bunch of quotes from four different contractors for different pool types. We reviewed their quotes and read reviews of their work from many different websites (yelp, Angie’s List, Facebook and Google) and then selected the one we wanted to work with.
Then, we worked with our contractor to get our building permit which took about three weeks. Every town is different so have a look at their website and speak to your contractor about what they need. I would recommend buying stakes and staking out the pool location before you meet with your contractor. I think whenever someone is there, it’s hard to make decisions, so before they come grab some stakes and string and mark the space out so you can see it and have time to think everything through without feeling pressured.
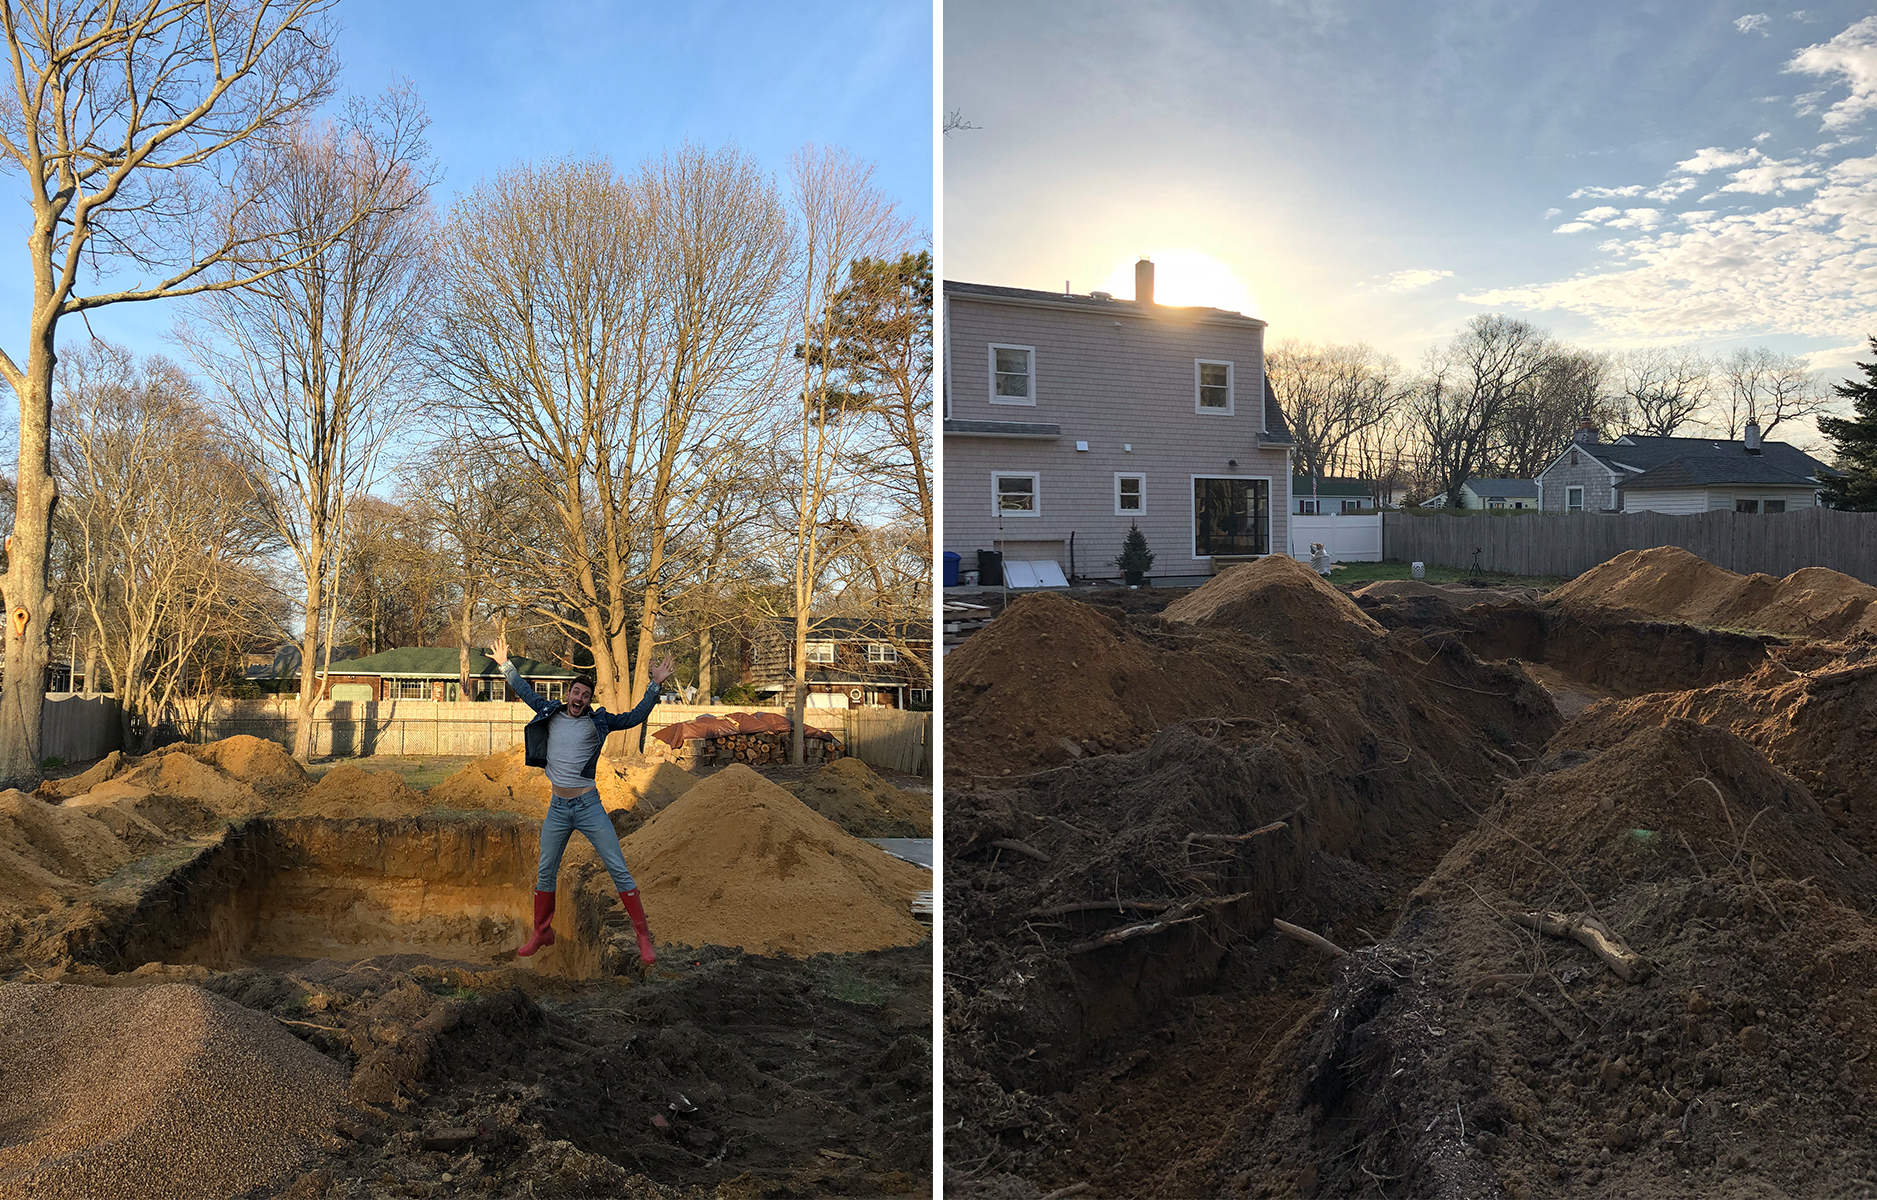
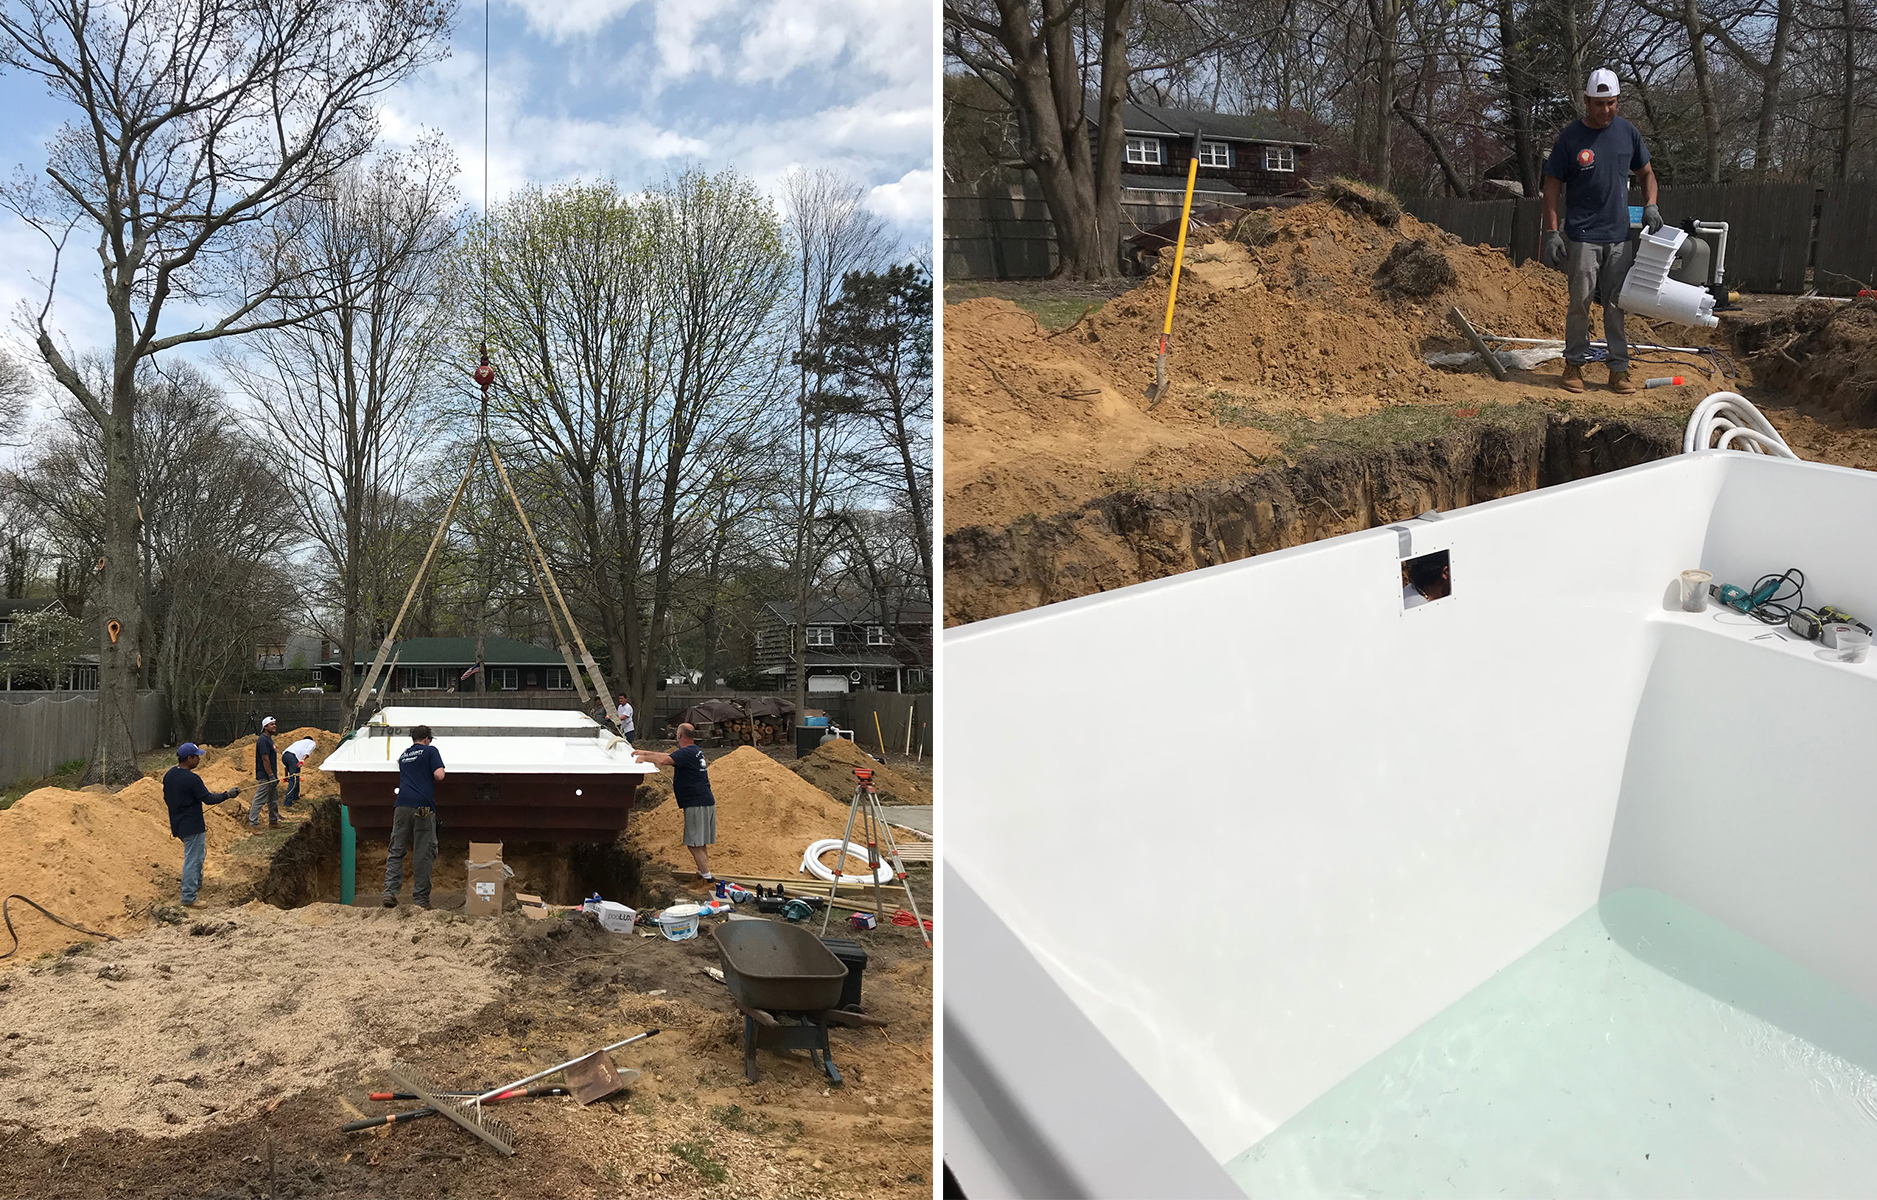
Next a huge whole is dug. When I mean big, I mean much bigger than you would imagine! The next step is they put gravel in the bottom of the hole as this helps the fiberglass pool settle and stay flat, whilst also allowing the water to drain from underneath the pool easily. We also got a large access pipe added next to the deep end. This is so that a pump could be lowered underneath the pool just in case water ever got beneath the pool – many people recommend this for fiberglass pools.
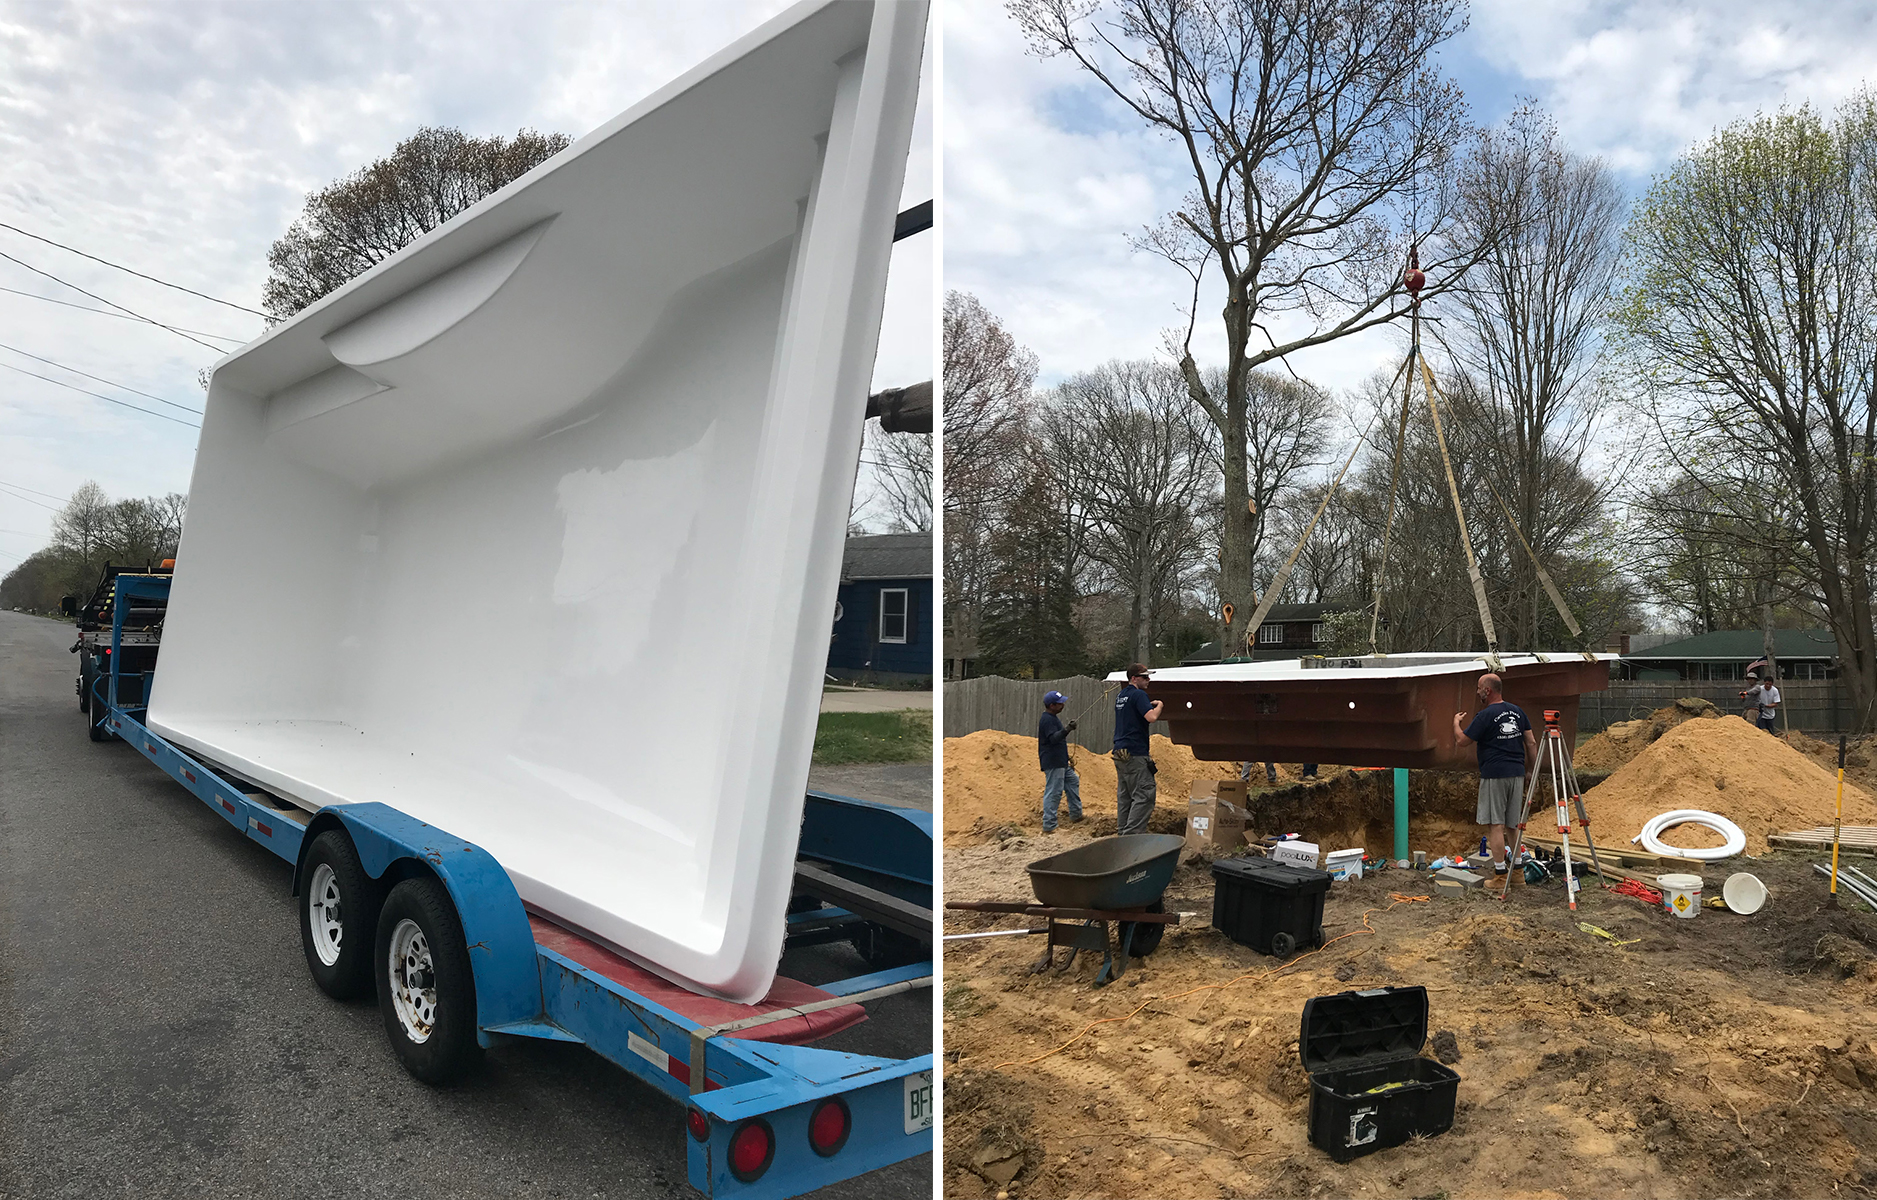
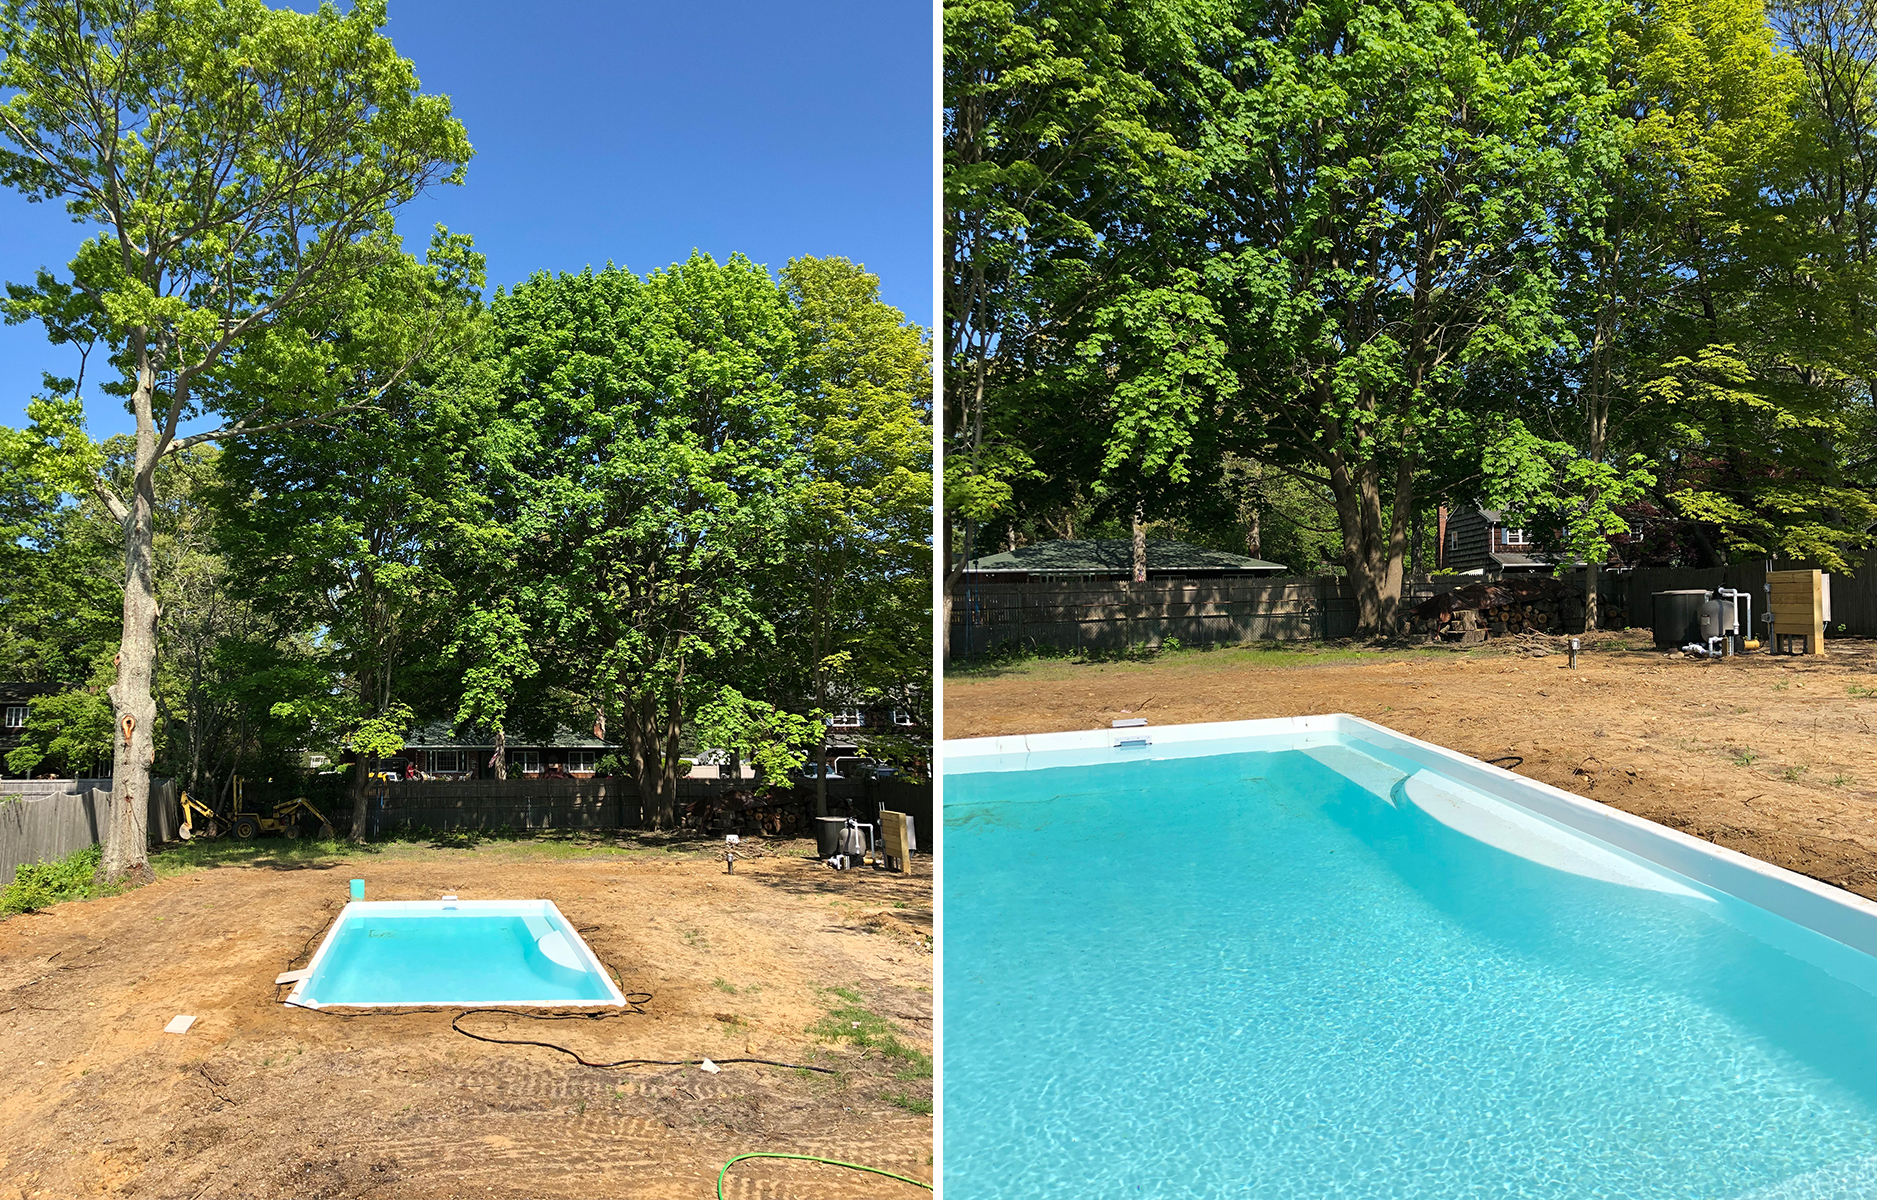
After this, you are ready for the pool to be lowered into the hole. The pool is brought in on a truck and then lowered into place via a crane. The process takes a while as to get the pool level they have to keep raising it, adding more gravel underneath and then lowering it in again. Once the pool is lowered in, the pipes and equipment are added, they drill holes for the lights, return jets and these are all installed. Then, they begin to backfill by hand all the dirt against the pool and you can begin filling the pool with water.
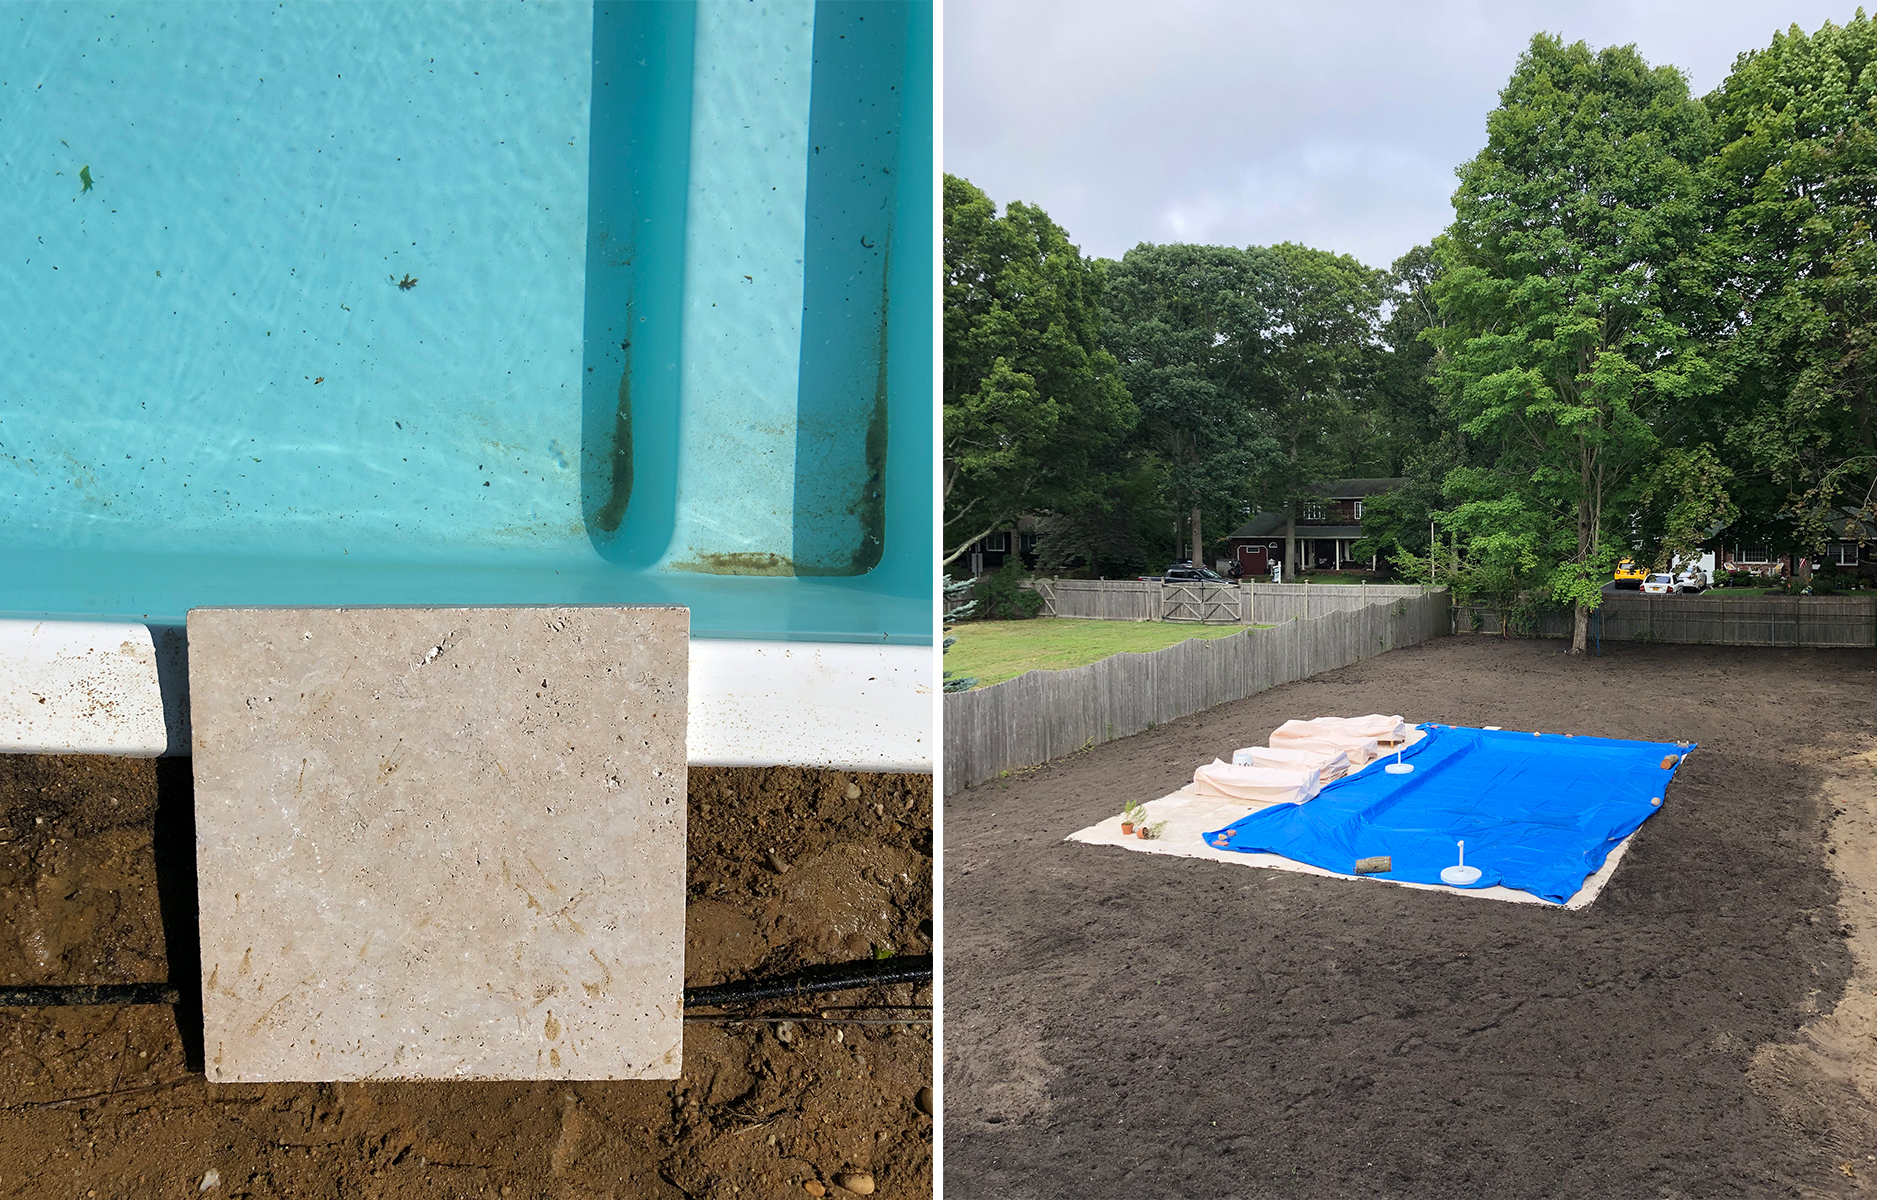
Our pool is quite small but it still took a series of days to fill up. Before you can put a stone surround the ground has to settle and this takes at least a month to six weeks. We setup soakers around the pool to help the soil settle and sink. It’s incredible how much the soil settles in so this is a really important step otherwise all your new stonework would just crack and fall away. During this time you can choose your stone. We found it useful to get real samples and place them up against the pool and see how it changes during the day and how hot the stone gets in the sun and how it feels under foot. For us we had two main optionsL a light travertine or a darker bluestone. In the end we choose the travertine as we liked how it looked against our pool and that it didn’t get hot to walk on. One thing I learnt was to do lots of research on patterns of stone before meeting with your contractor. Then have a talk to your contractor to understand what stone is available and the sizes it can come in before making your stone decision.
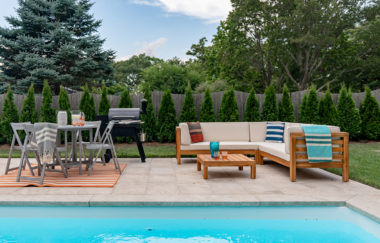
After about 6 weeks all the soil was settled and we were ready to install our stone surround which you can see below. The stone installation took around two days and once that was done we were all set to have our irrigation system and sod installed for our new lawn.
Step Four: Maintenance
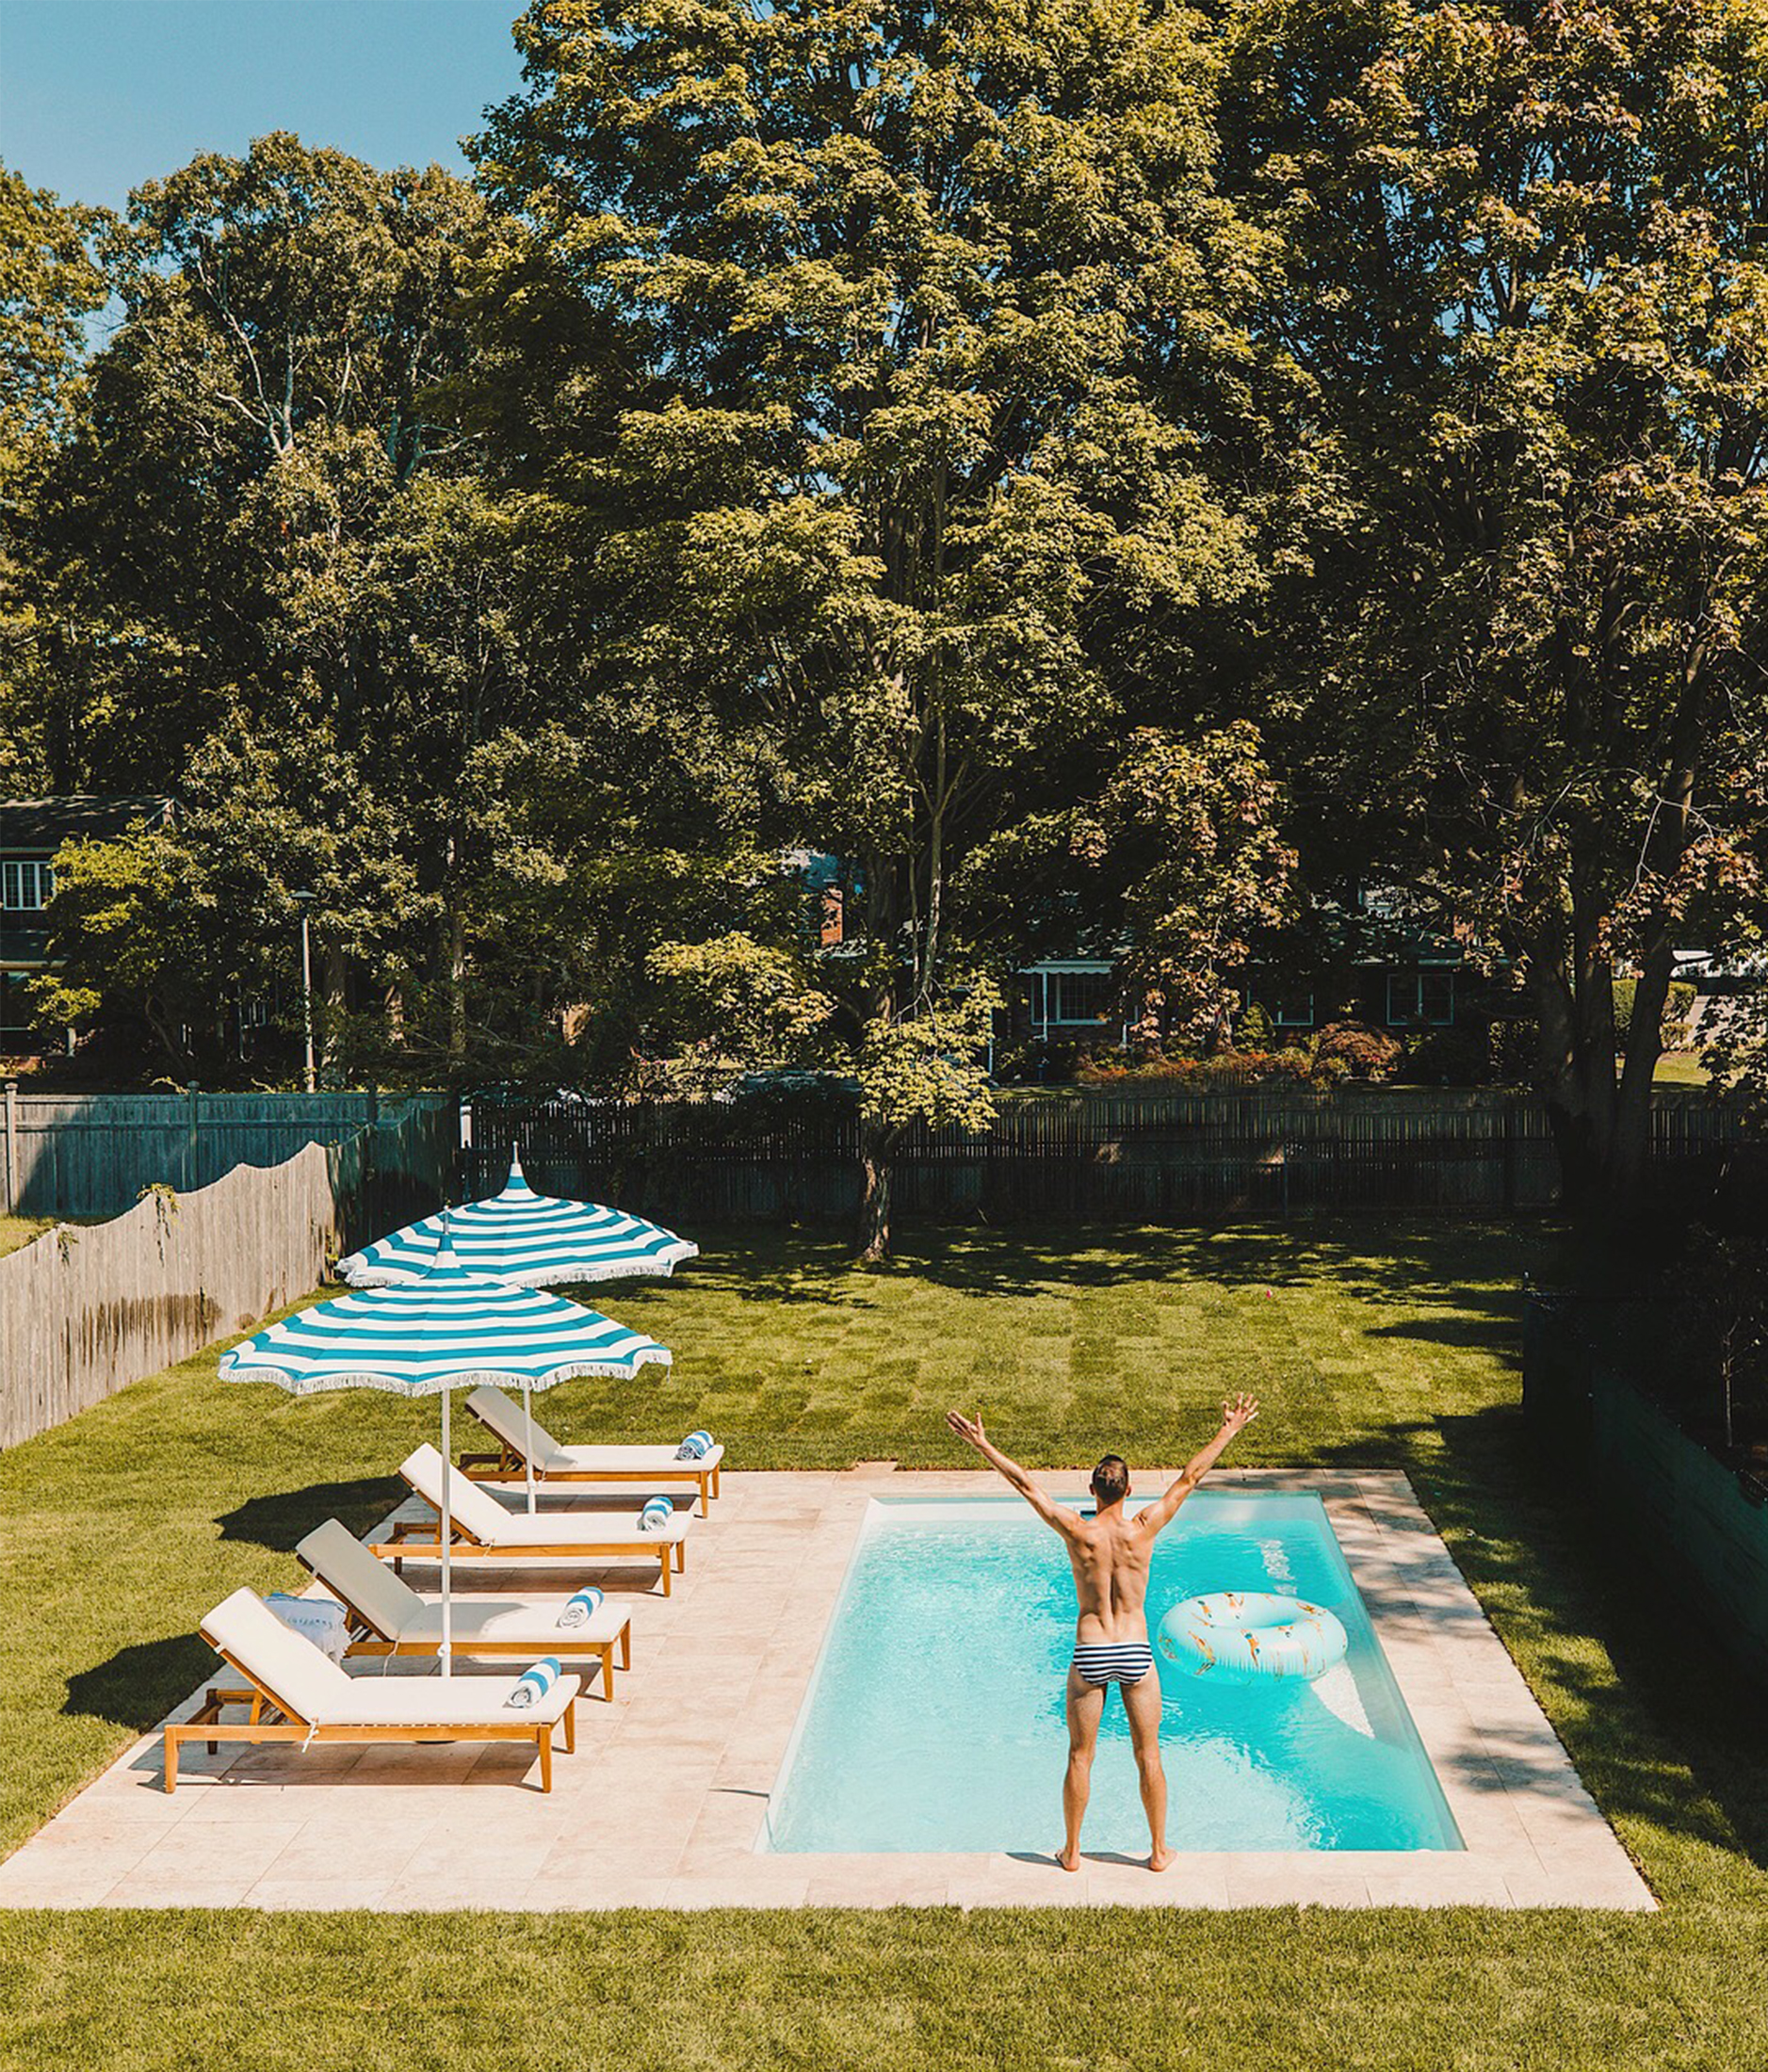
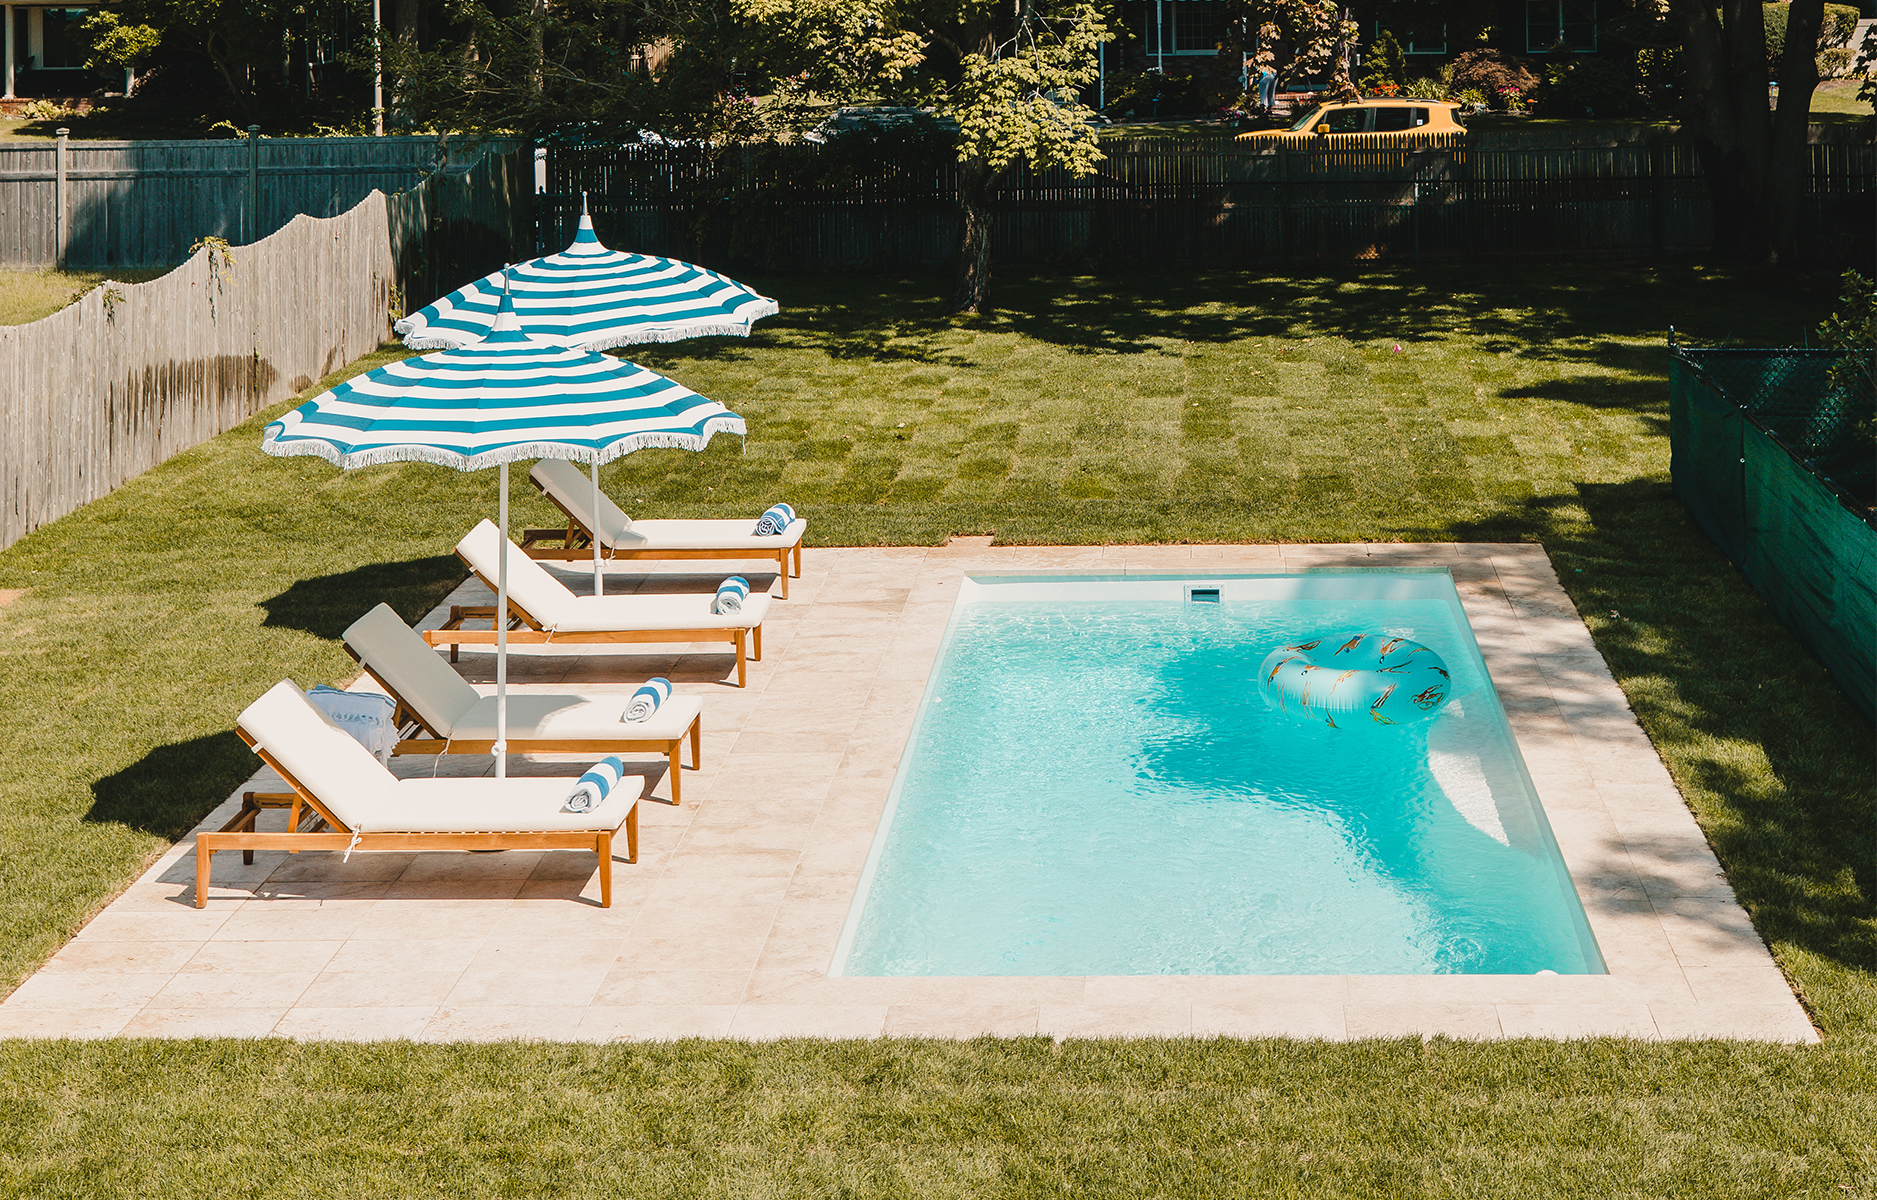
Beginning to end the whole process of putting in our fiberglass pool took about four and half months. The pool and installation all in was c.$30K which we felt was a wise use of our savings because it’s added value to the property and it’s become a catalyst for relaxation at the house. The pool looks great as it’s in perfect proportion to the backyard and the house, plus it’s in the sun all day. The pool water reaches 84F in the Summer without any artificial heating. We love this as everyone likes to just hang out in the pool so it’s a comfortable temperature to relax in.
You can do maintenance yourself and there are lots of blogs that can help with that here are some of my favorites are Swim University and Leslie’s Pool.
We aren’t always at the house so we asked friends for recommendations to find a local company to service our pool. We also have the Hayward OmniLogic pool control which lets us control the pool features from our phone. We also purchased the Cfloat pool alarm, which floats in your pool and connects to your WIFI and sets off an alarm if someone falls in your pool. The app on your phone also monitors the pool water from temperature, pH, oxidation levels and even the Sun’s UV strength.
In the North East we have to close and open our pool for the season. This means clearing all the pipes and equipment of water so that it doesn’t freeze, taking the pump inside and covering the pool. I’m a pool novice so we have someone help us with this, but it is something you can do yourself with research and practice.
That’s it! As you can see it is a lot of work, plus a lot of money. Would I do it again? Yes, I would. Not only has it added value to our property but we really love the pool and use it daily in the summer to relax. It encourages quality time where you can relax, put all your devices down and simply float, read, chat and cool off.

42 Comments
Will, this was so informative and useful. Thank you for sharing your knowledge with us. I never knew how much work pool construction was, incredible undertaking. Bravo!
@Justin – Awww thank you. It was certainly a journey but worth it.
I’m coming over!!! 💦👌👌👌
@Paul – Ha! I’ll save you a lounger!
Can’t stop pulling the slider back and forth… too good!
@Sarah – Love it!
Hi Will
You did the right thing avoiding bluestone. We used that and although we love how it looks we have regretted it ever since because it gets too hot to walk on. The travertine looks gorgeous. Well done.
Stephen
@Stephen – Oh no! I’m sorry you are finding that. Hopefully some umbrellas can make it more manageable.
Wow! What a transformation! Unrecognisable!!
@Kim – Thanks!
You guys killed it. Inspo. for when my fiancé and I do our pool next year. Thanks for sharing!
@Ryan – Good luck with your pool!
Oh my godddddddd Will this is stunning! I could never have envisioned this from the yard as it was in that before pic. You must be so proud! Congratulations!
@Julie – Thanks, we love it!
I remember you did the slider for your kitchen reno and this is just as satisfying 😂👏
@Leah – Yes! Good memory!
I hadn’t even heard of fibreglass pools until I read this….my husband and I want to put a pool in our yard….it’s overwhelming and we can’t work out what’s best for us…but this has been helpful to read….thanks will
@Paula – Welcome. Can’t recommend fibreglass enough!
Beautiful job.
@JL – Thanks so much!
No way!! I’ve been waiting to see your pool and it looks so good 👌
@Samuel – Cheers!
How do you do it?! Always turning dead spaces into wow spaces. I guess now I want to steal your kitchen and your pool. Lol 😉 xoxo
@Mags – Awwww so kind! Thanks
Will! Just like Oprah, everything you touch turns to gold! Congrats on this beautiful project.
@Yyvone – Oh my gosh! So kind. Thank you.
Looks like so much work but a nice outcome.
@Mason – Yes, quite the journey but totally worth it!
This must have taken you ages to write. Thank you for sharing such a comprehensive breakdown of the process with us all. You clearly did a great job.
@Eric – Of course! That’s very kind and I’m glad you enjoyed it.
Where are those beautiful parasols from?
@Harry – One Kings Lane!
Is the beach house available to rent?
The pool and decking are both gorgeous. Can you advise on the depth of your lounge area? We’re trying to ensure we’re planning enough decking to allow chaise lounge chairs without squeezing the walkway. Also, did you do any cost and heat-under-feet comparisons (initial investment vs. longer-term maintenance) of different decking options including concrete? I would treasure your guidance if you did. Thank you, in advance!
@Jonell – Thank you! Our stone for the lounge area by the pool has a depth of 13ft and that gives plenty of space to walk around the loungers. We never looked into concrete because we always knew we wanted to go with a stone look.
What a transformation. Great post.
Will, this was so enlightening and helpful. Much obliged to you for offering your insight to us. I never realized how a lot of work pool development was, fantastic endeavor. Bravo!
Very Informative post. Every one who can should try it.
Amazing transformation of Landscape. Beautiful pool.
The fiberglass pool looks cleaner and nicer to swim. I’ve tried swimming in a fiberglass pool and it was an amazing experience. Thanks for sharing this.
How big is your pool and how deep is it?
Hi Carlee, the pool is 12 ft wide by 25 long and 6ft deep