

 I’m so excited to share this DIY project today because I’ve wanted to try my hand at making my own scented candles for years. So, when my friends over at IZZE invited me to make something special out of their glass bottles I knew that the time was right to finally blog a DIY glass bottle scented candle project! There are so many things to love about this project: 1) It’s great to recycle IZZE bottles and reuse them in a completely different way in your own home; 2) You can co-ordinate the candles to your decor and personal scent preference by choosing dye and scents to match both! Feeling stumped? You can always look to IZZE’s bright colors and flavors for guidance. Click through after the jump to read the full how-to and see the finished glass bottle candles!
 WHAT YOU NEED
– IZZE glass bottle
– Nail varnish removed (Acetone)
– String
– Scissors
– Metal jug
– Candle wicks (available from craft stores)
– Thermometer
– Sand paper
– Small wooden sticks / dowel
– Candle dye
– Candle fragrance
– Heat proof gloves
– Candle wick centre tool
– Lighter
– Candle wax
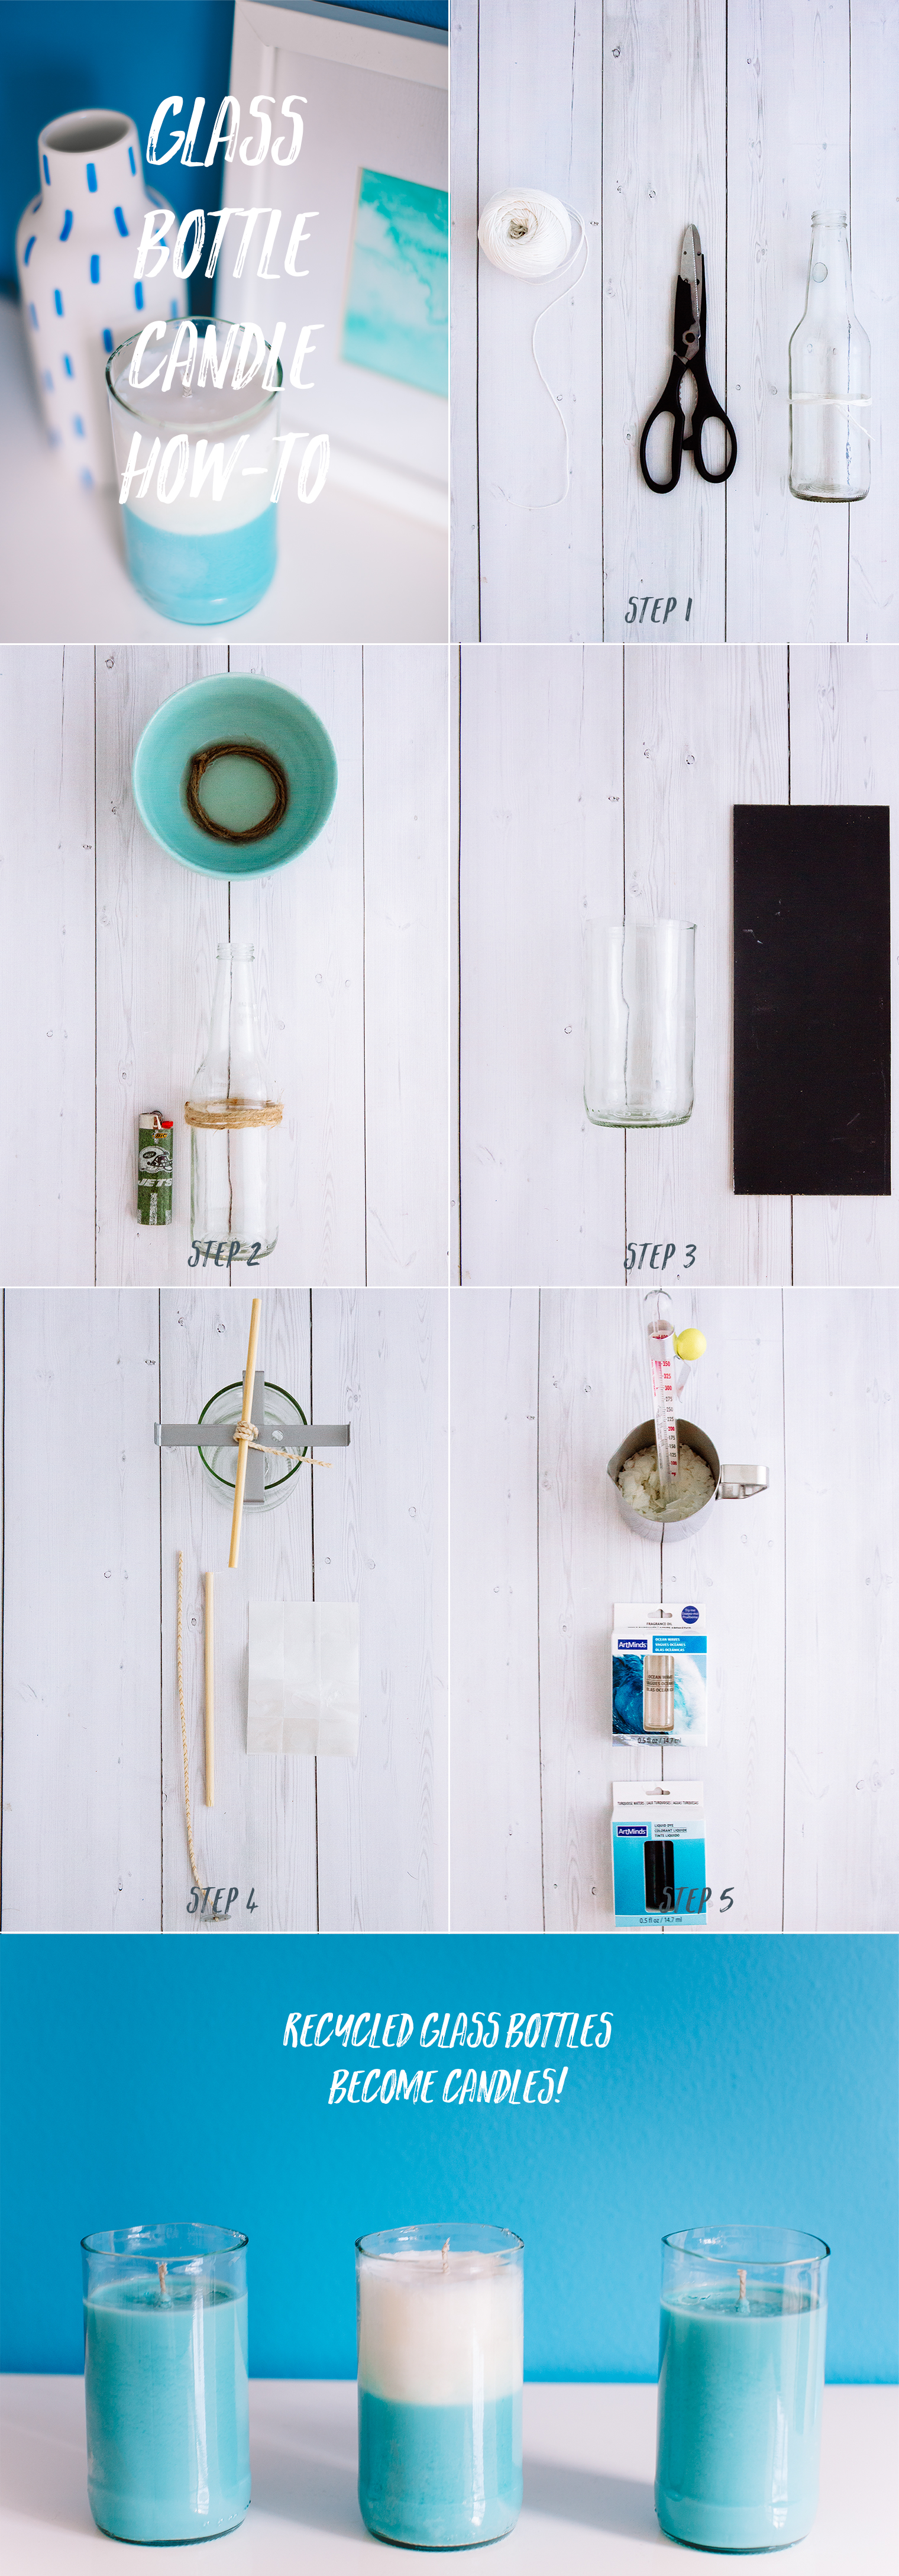 STEP-BY-STEP
*Please note: you need to wear eye protection and heat protecting gloves while completing this project. This is an adult DIY and requires great care.*
Step one: After you have enjoyed your IZZE Sparkling Juice or Sparkling Water, remove the label and clean the bottle. Pro tip! Use sticky stuff remover from a hardware store to help remove the glue residue from the label. Then, tie string around the bottle three times near to the join between the body and neck of the bottle.
Step two: Remove the string and soak it in nail varnish remover (acetone) for one minute, then place it back around the bottle in the same place as before. Then, moving outside, fill a large bucket with cold water and wearing thick oven gloves hold the bottle by the neck and carefully light the string. Turn the bottle slowly to ensure all the string is lit. After about 45 seconds, lower the bottle into the cold water and it should break off just above where you tied the sting.
Step three: While still wearing gloves, carefully remove the bottom part of the glass bottle from the bucket, dry it and then gently sand the ‘cut’ edge to make it smooth. The rim is likely to be a little wonky but that adds to the homemade charm and individuality of each candle! Once you have sanded the rim, rinse and dry.
Step four: Place a sticky glue patch onto the base of a wick stick, and press it into the centre of the glass bottle’s base. Tie the top of the wick around a wooden dowel and through a metal cross to help keep the wick straight and centered.
Step five: Measure out your wax per package instructions and place it into your a metal jug. Then, heat a saucepan of water and place the metal jug into it. Heat the wax to 140F, take it off the heat and then add your desired dye and scent (per package instructions) and stir thoroughly. Then, pour the wax from the metal jug into the glass bottle being careful not to let the wax touch the sides of the glass bottle. Pour the wax up to about half an inch from the top of the glass bottle. Alternatively, you can create a striped or color blocked candle by pouring layers of different colored wax. Measure out the thickness of your layers and mark with painters’ tape before pouring. Pour your first layer of wax, then allow the top to go solid before pouring your next layer. For this sized bottle, this process took around 45 minutes. Leave the candles for 48-hours to dry before trimming the wicks and then, of course, burning them!
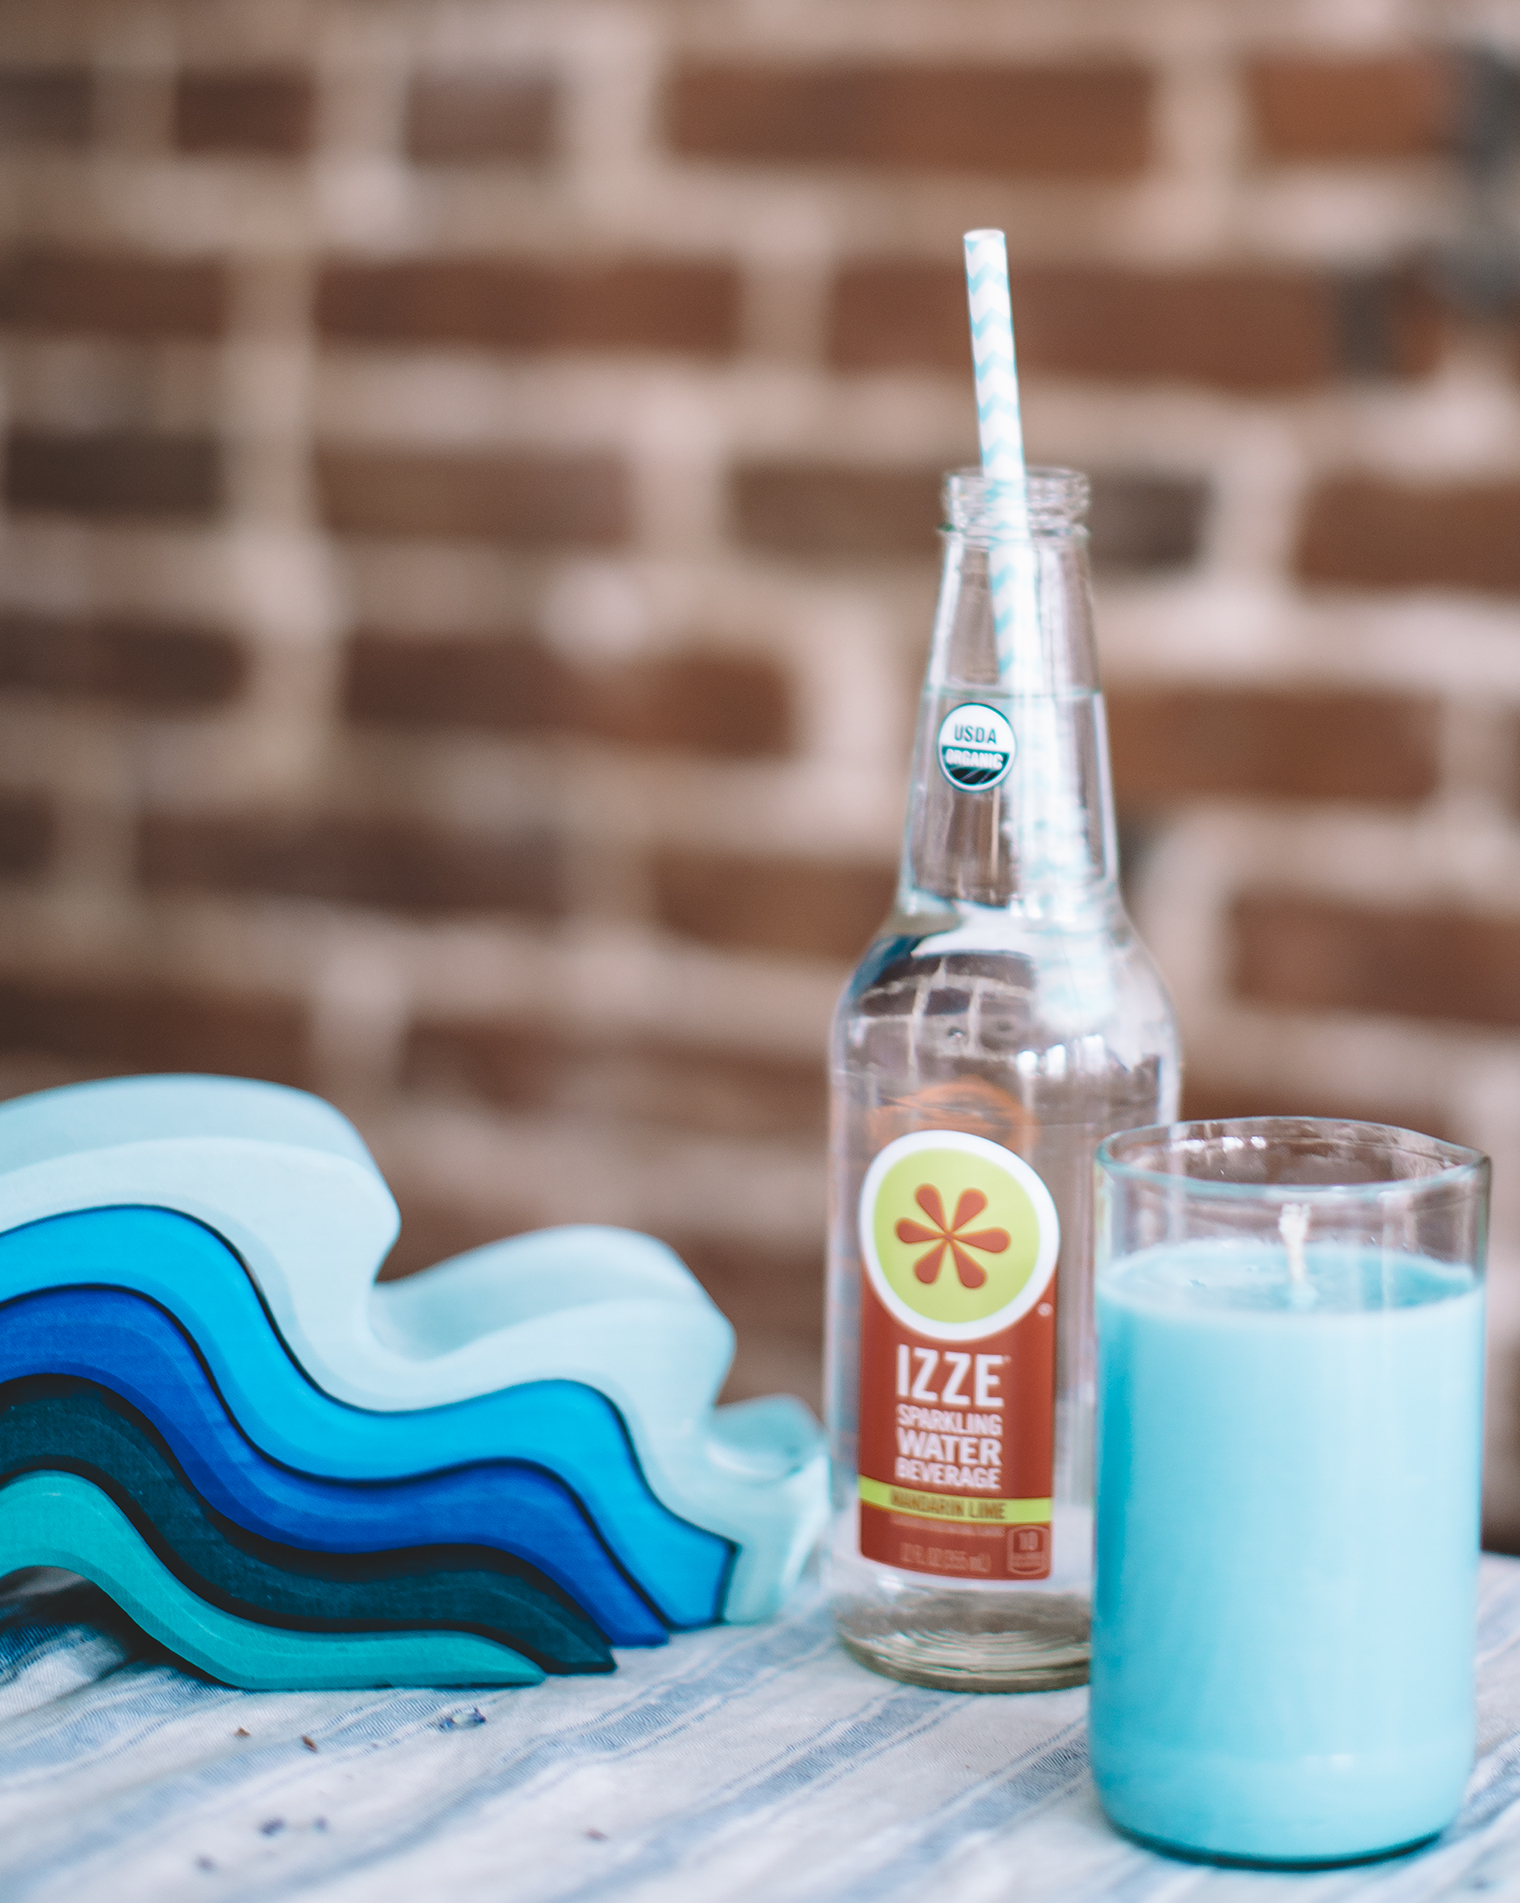 Didn’t they come out so great?! This is my first time trying my hand at both glass bottle cutting and candle making, so I’m thrilled with the result. Of course, I went for my favorite shade of blue to match my existing decor. I love the freshness of the aqua color with the ‘ocean waves’ scent – they are the perfect pairing!
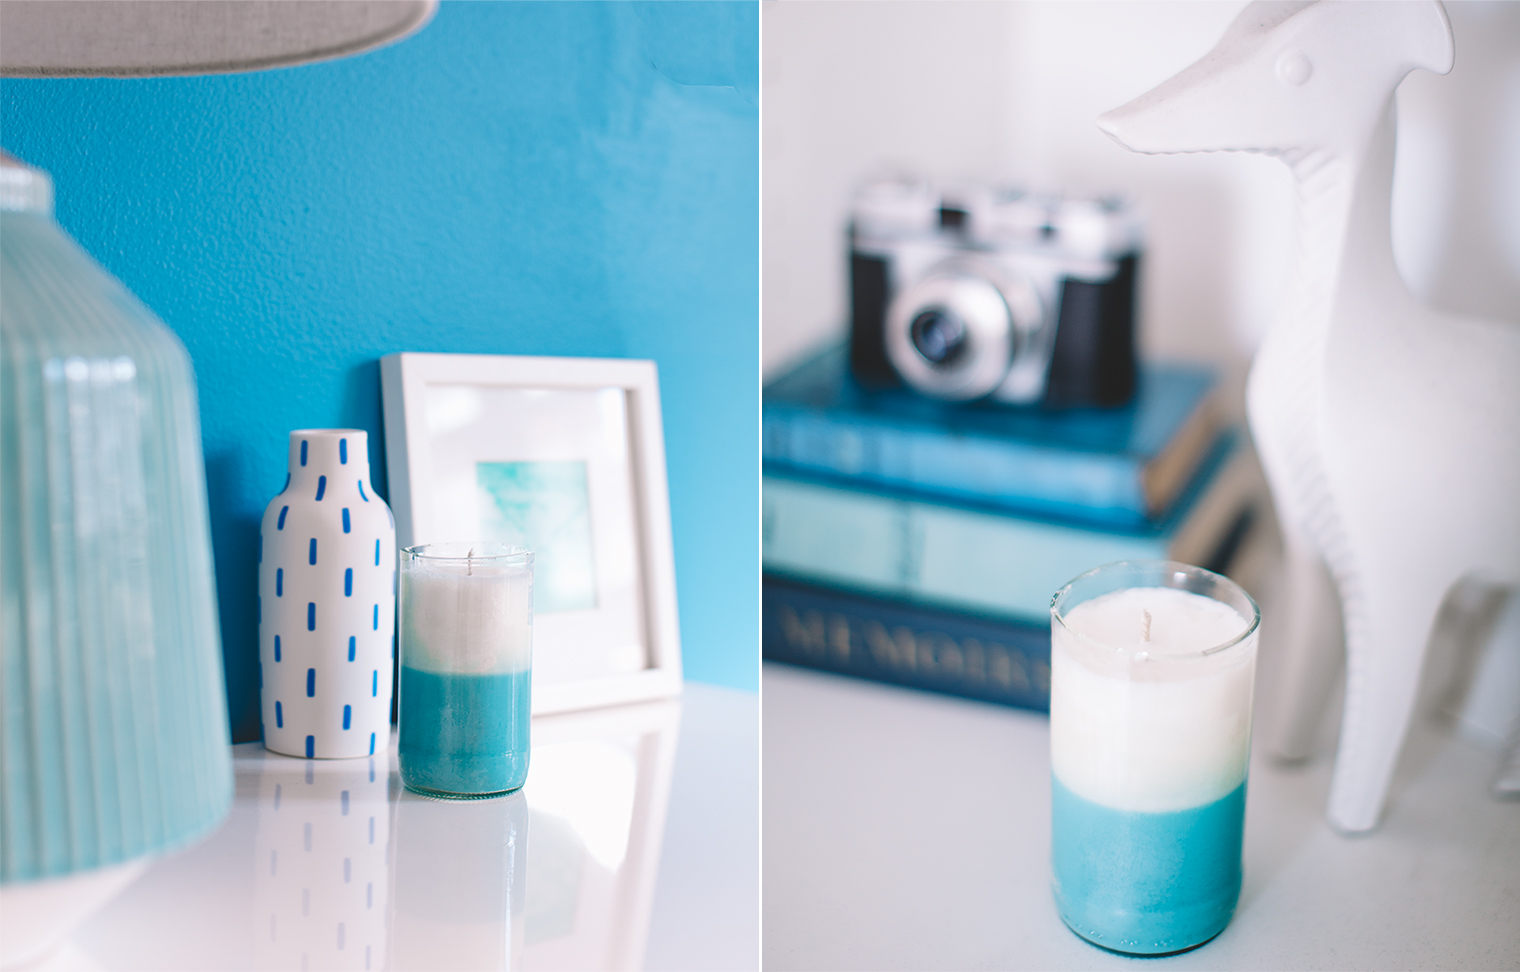 As it turns out these homemade glass bottle candles are ideal for peppering around my apartment; they make great finishing touches to collections of vases and small vignettes of books etc. It’s fun to have one on the dining table, too!
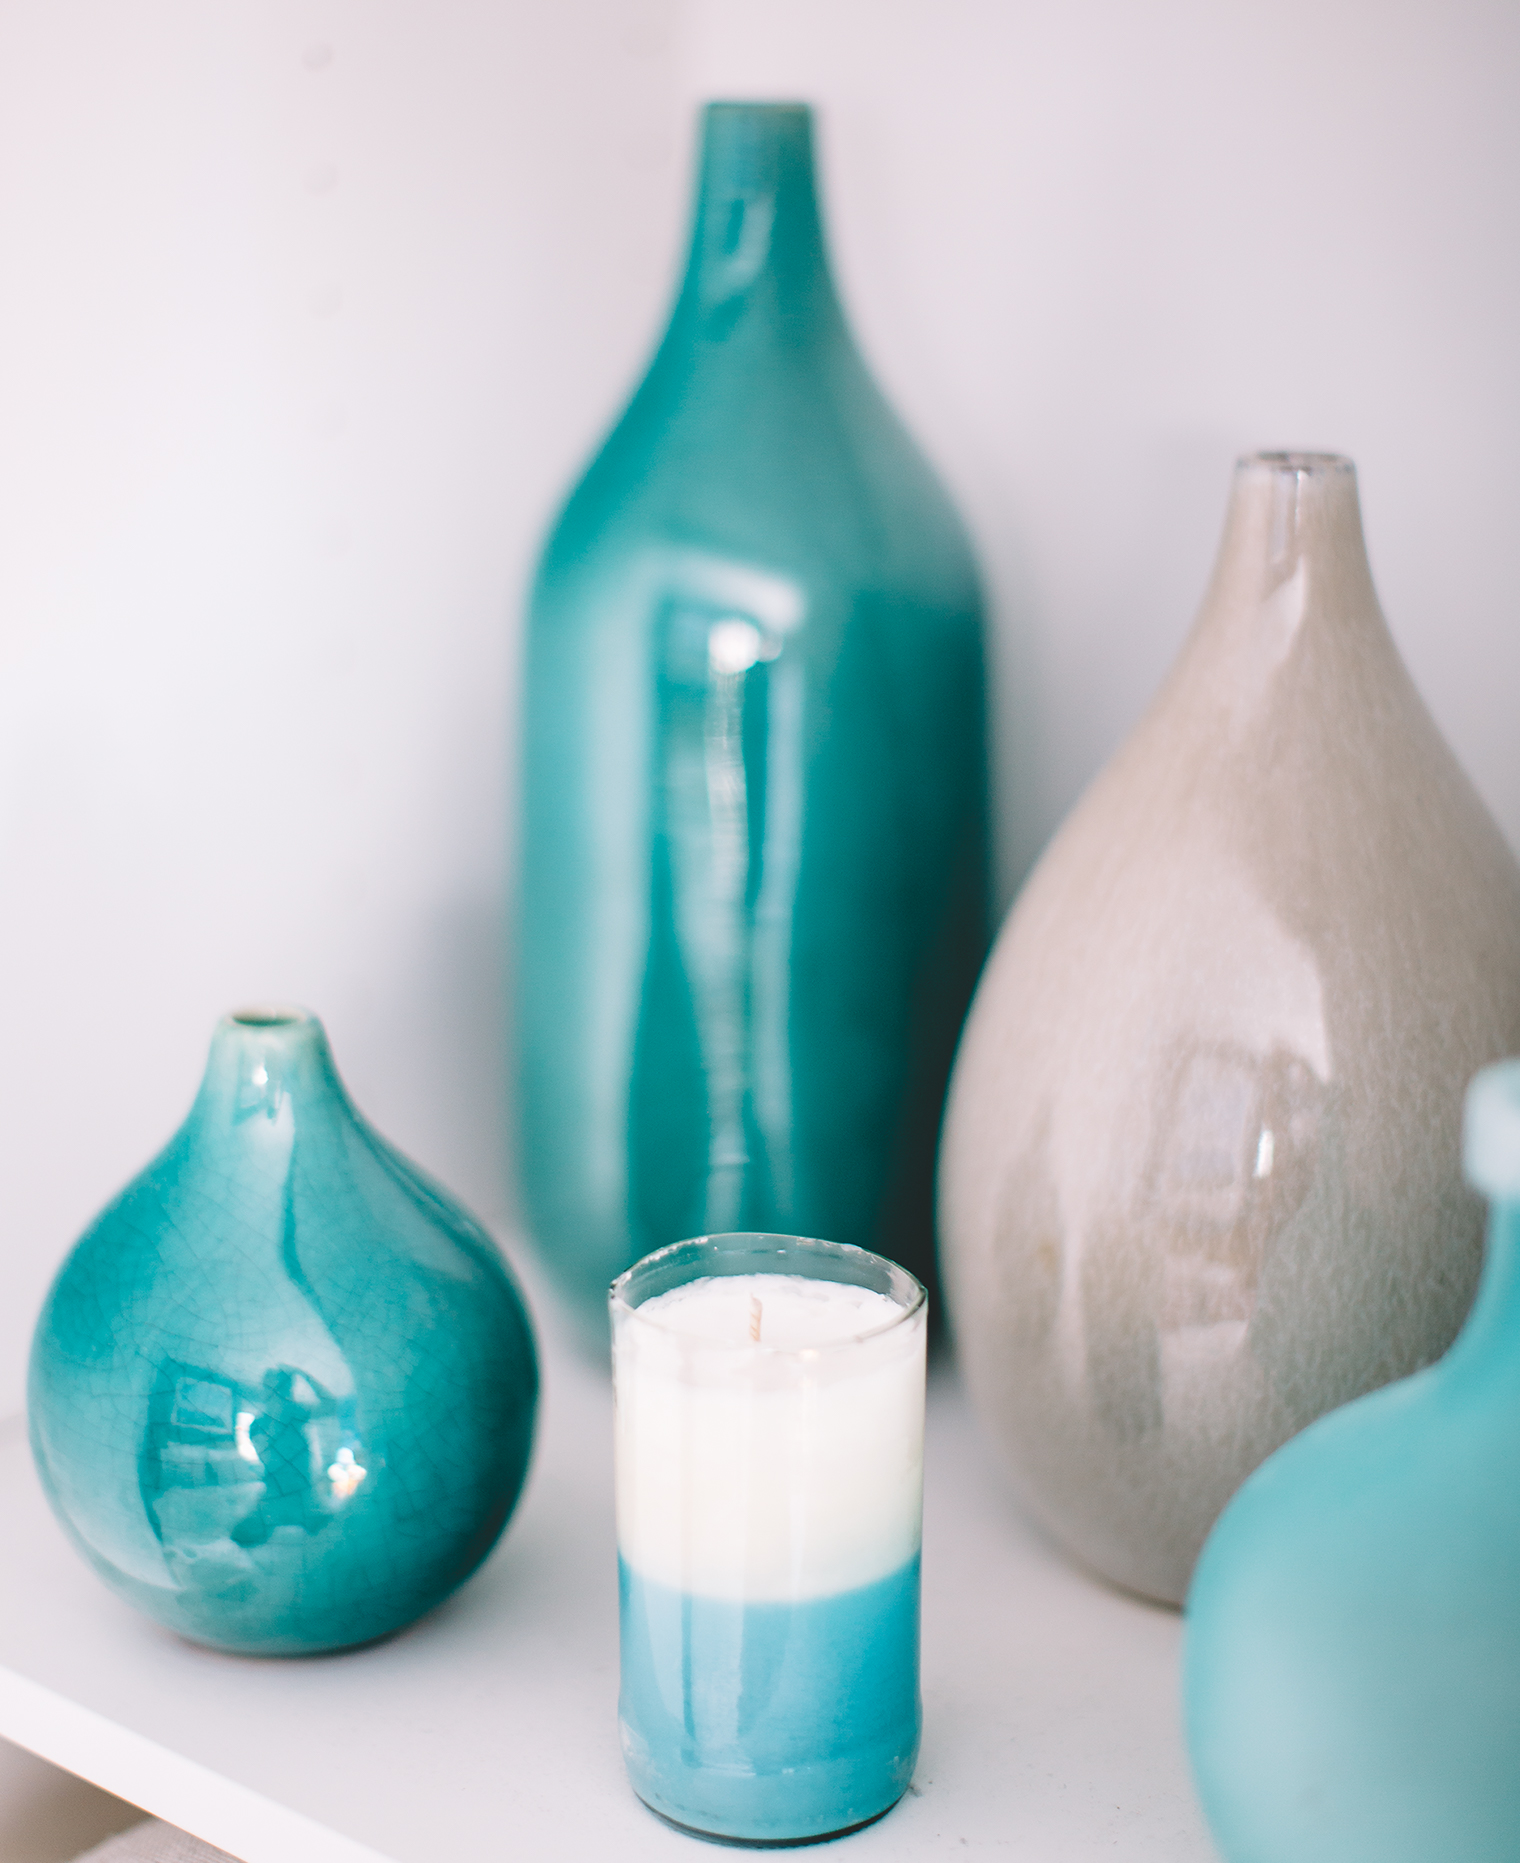 I love how well the blue and white layered candle pairs with my existing collection of vases. Have you ever made your own candles? What color and scent would you choose if you tried this project? If you enjoyed this, you can see my previous DIY projects with IZZE here and here.
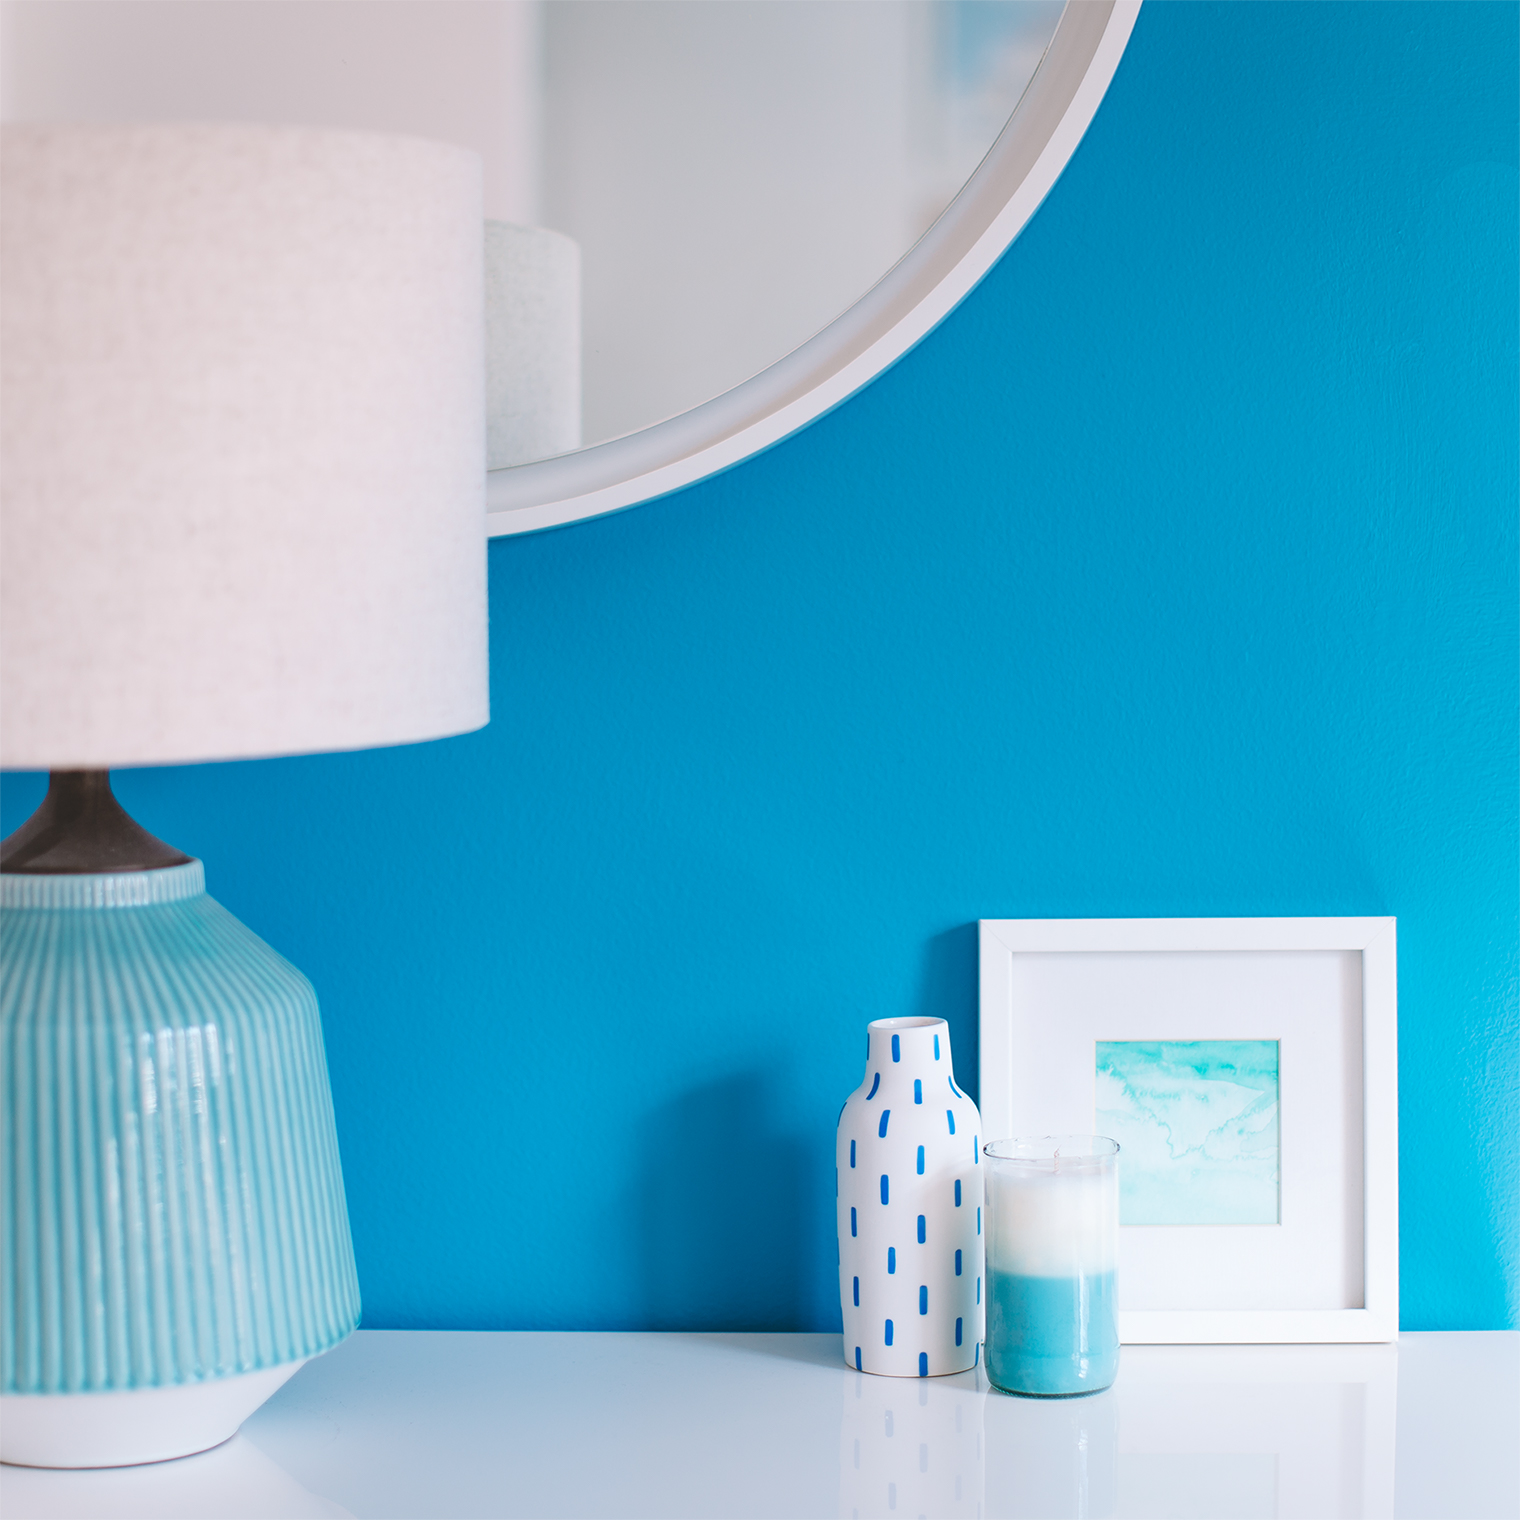 // Photography by Will Taylor | Posted in partnership with IZZE; all views my own.
12 Comments
So cool! Love this!
@Jenn – Thank you! I had such a blast making them! 🙂
So happy you posted a DIY! I tried my hand at candle making once and it wasn’t easy so I’m impressed you managed to make a layered version. You’ve inspired me to try again! xo
@Katrina – You should totally try again. The glass cutting is the bit that takes a few tries but once you get the rythmn and technique down, they flow quite easily. The key with the layered version is to make sure the top layer is solid but the wax still warm underneath before you pour the next layer on top. Hope that helps and good luck!
Where do your talents end will?! This is gorgeous!
@Sara – Kind of you to say, thanks. 🙂
We had IZZE at my sister’s BBQ this summer and I’ve been hooked ever since. Now I can tell my boyfriend there’s even more reason to keep buying them as I can try making candles! 😉 tee ghee hhheee
@Marie – Hahaha, I love that!
Good job I like the blue !
@Yusef – Thank you, me too! 🙂
Oh I love making my own candles, do it all the time (plus the kitchen smells insanely good for the rest of the day)! I’ve never tried my hand at a layered effect though – I really like that! I might have to try that for next time 😉 xx
@Kimberly – Yay, isn’t it the best. I found it to be very therapeutic and can’t wait to try my hand at it again! 🙂 x